JVC RX-F31S User Manual
Page 121
17
When your clapping sound is detected successfully
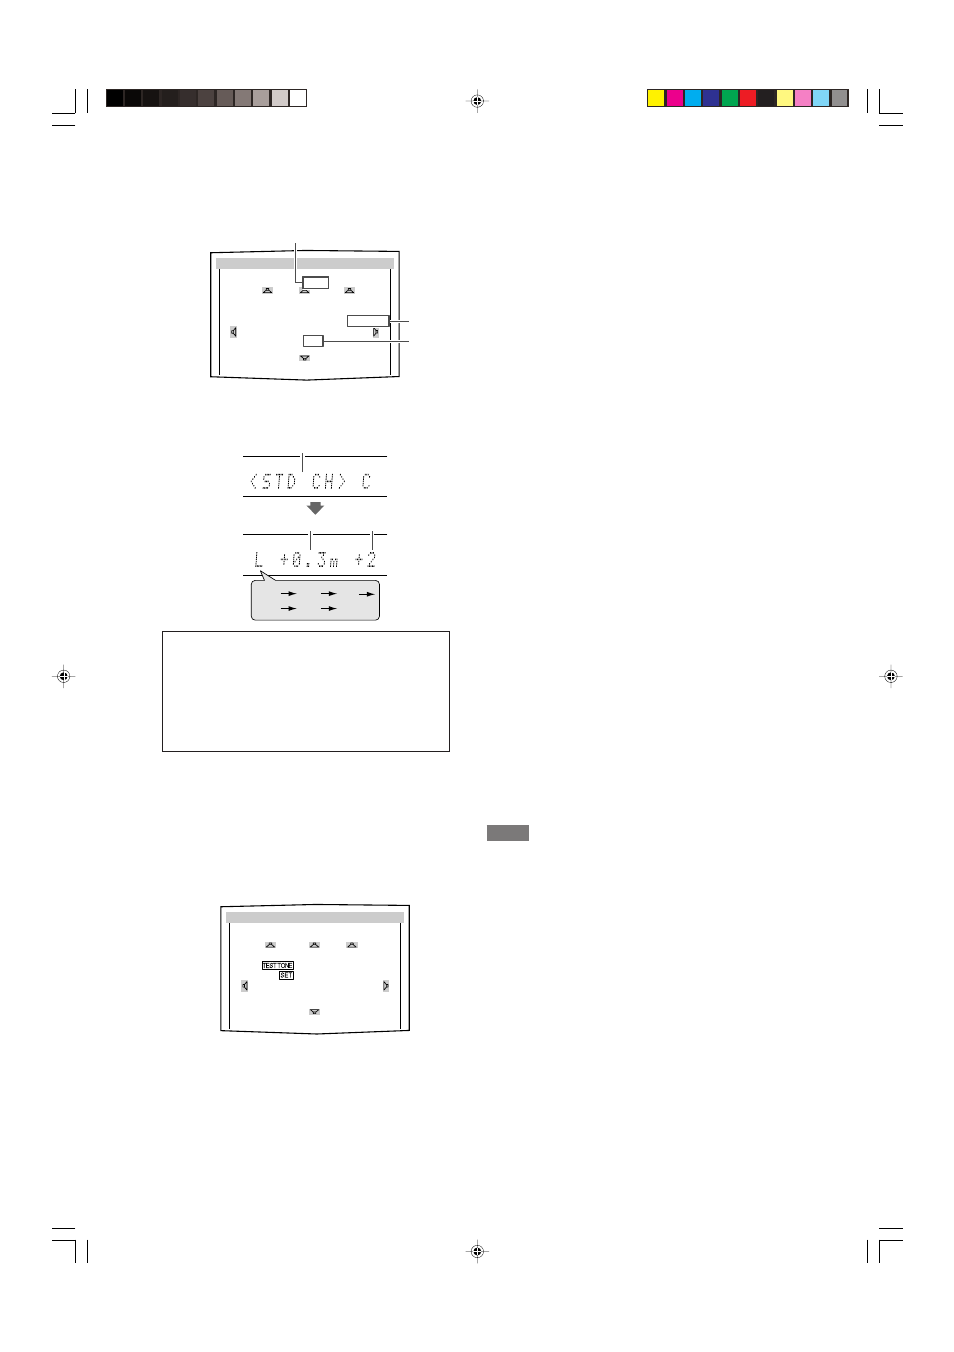
• On the TV screen, “SUCCESSFUL,” “RESULT,” and the setting
values appear. The setting values are shown for about 12
seconds.
Ex.:
• On the display, “SUCCESSFUL” appears, then the setting
values are shown as follows for about 12 seconds:
Ex.:
*7
Standard channel (the closest speaker).
This speaker position now works as the reference
position (“0m/ft”) and other speakers’ distance is
shown by the difference with this reference speaker
position.
*8
Difference of each speaker position in distance (in
meters or feet).
*9
Each speaker’s output level (–6 to +6).
When finishing displaying the setting values
On the TV screen, “COMPLETED” appears, then “TEST TONE”
and “END” appear. On the display, “TEST? END?” appears.
• To adjust the speakers’ output levels manually, press TEST
TONE (see page 29).
• To erase the on-screen display, press SET or any button except
TEST TONE.
• The receiver returns to normal operation mode automatically if
no operations are done for about 10 seconds.
Ex.:
When your clapping sound is not detected correctly
“SETTING UP” appears again after one of the following
messages. In this case, repeat step
3.
SILENT:
• The receiver detects sound from only the left
and right front speakers.
• The receiver detects no sound from the front
speakers and detects sound from at least one of
the other speakers.
SILENT-ALL: The receiver cannot detect any sound from any
speaker for about 10 seconds.
AGAIN:
• The receiver cannot detect sound from the left
or right front speaker.
• The receiver fails to calculate the speakers'
output level and difference of each speaker's
position in distance.
In the following cases, set the speakers manually.
• When “SILENT” appears twice in succession
The setting is partially made. (The distance of the speakers
from which sound has not been detected is set to “+9.0m
(+30ft).”)
The receiver exits from Smart Surround Setup.
• When “MANUAL” appears
The receiver fails to detect the sound three times. The receiver
exits from Smart Surround Setup.
To cancel Smart Surround Setup, press SMART SURROUND
SETUP while “SETTING UP” flashes.
• No other operations can be accepted after “SETTING UP” stops
flashing. Complete the Smart Surround Setup.
To check the current setting made by Smart Surround Setup,
press SMART SURROUND SETUP while the receiver is in
normal operation mode.
The setting values appear. On the display, the setting values are
shown one after another.
• The current setting is not indicated but “MANUAL” appears if you
change the following settings after using Smart Surround Setup:
– If you change speaker distance manually.
– If you change one of the speaker sizes either from “NO” to
“SMALL” or “LARGE,” or from “SMALL” or “LARGE” to “NO.”
To check the current setting, see each setting item of the
speaker distance (see page 22) and the speaker output level
(see page 29).
• If you have not used Smart Surround Setup, “NO S.S.S.”
appears.
NOTES
• The speaker distance and output level manually set will be
applied instead of those set by using Smart Surround Setup in
the following cases:
– When you change one of the speaker distance (see page 22).
– When you change one of the speaker size either from “NO” to
“SMALL” or “LARGE,” or from “SMALL” or “LARGE” to “NO”
(see page 21).
• When you want to adjust the speaker distance and output level
manually, see pages 22 and 29.
• When the headphone is in use or “DVD MULTI” is selected as
the source, the receiver returns to normal operation mode
without showing “TEST TONE.”
• Do not clap your hands so hard that it may hurt your hands.
SMART SURROUND SETUP
L+2 C 0 R+2
+0.3m STD+0.3m
LS+6 SUCCESSFUL RS+6
+1.2m RESULT +1.2m
SB+4
+0.6m
*7
*9
*8
*7
*8
*9
L
R
RS
LS
C
SB
SMART SURROUND SETUP
L+2 C 0 R+2
+0.3m STD+0.3m
LS+6 TEST TONE RS+6
+1.2m END +1.2m
SB+4
+0.9m
EN16-25RXF31S[A]1.p65
05.6.13, 10:36
17