How to use main menu, Functions, contents, and adjustment range of items, Cont.) – JVC DT-V100CG User Manual
Page 12
12
How to Use MAIN MENU
(cont.)
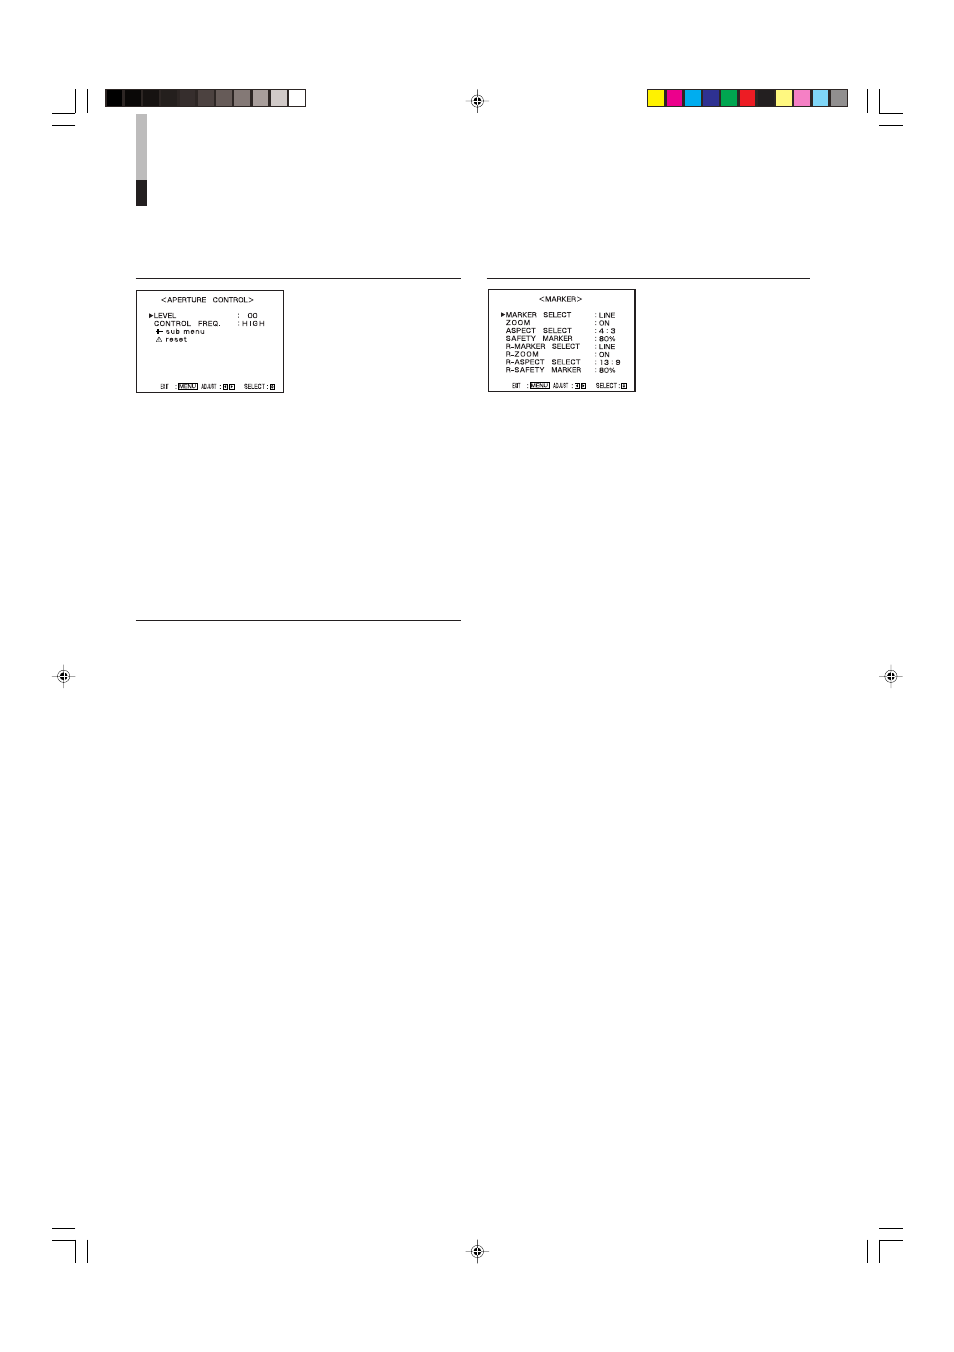
MARKER
Controls ON/OFF and other
settings of the MARKER
SELECT, ZOOM, ASPECT
SELECT, and SAFETY
MARKER functions
included in the MARKER
function.
NOTES:
• For the 4:3 screen ratio, only SAFETY MARKER and R-SAFETY
MARKER are displayed.
• To set up non-“R-” items, press the MARKER button on the front
panel. An external control system should not be operated at this
time.
• Using the external control, you can select either “R-” items or
non-“R-” items to activate.
☞ “How to Use the External Control” on pages 19 and 20
Ⅵ MARKER SELECT/R-MARKER SELECT
It displays the area of the aspect ratio that has been
set in the ASPECT SELECT/R-ASPECT SELECT,
superimposed on the current screen.
OFF:
MARKER SELECT does not function.
LINE:
Displays the area with an outline.
HALF:
The area outside the specified screen ratio is
displayed as a 50% transparency.
HALF+L: The area of the specified screen ratio is
indicated by an outline, and the area outside of
that is displayed as a 50% transparency.
BLK.:
The area outside the specified screen ratio is
black. Only the portion of the picture within the
designated area is displayed.
BLK. +L: The area of the specified screen ratio is
indicated by an outline, and the area outside of
that becomes black so that only the area inside
the line is displayed.
NOTE:
Does not function when the ZOOM function is operated.
Ⅵ ZOOM/R-ZOOM
Zooms the area of 4:3 aspect ratio to fill the whole
screen when the signal of 16:9 format is input.
This item appears on the menu only when using the
Multi-Format SDI Unit (option) or the Component
Unit (option).
OFF: Does not zoom.
ON: Zooms.
NOTES:
• Does not function when under-scan is operated.
• To adjust the zoomed picture size,
☞ “ZOOM H. SIZE” and
“ZOOM V. SIZE” on page 17.
• When zooming the picture for the component signal input, you can
adjust the horizontal position of the zooming area.
☞ “ZOOM WINDOW” on page 15
APERTURE CONTROL
Compensates the frequency
characteristics of the input
video signal.
Ⅵ LEVEL
Adjusts the compensate value. The higher the
number is, the larger the compensate value gets.
• 00
O 10
Ⅵ CONTROL FREQ.
Selects the frequency to compensate.
HIGH: Compensates the high frequencies.
LOW: Compensates the low frequencies.
OFF: Deactivates the aperture compensation.
sub menu SELECT
Selects the positions and the contents of the sub-
menu display.
☞ “To change the positions and the contents of the sub-menu
display” on page 10
Ⅵ Functions, Contents, and Adjustment Range of items
EN07-13_LCT1811-001A-H.p65
05.5.16, 8:53 PM
12