Insert editing, Make connections, Set input mode – JVC HR-E939EG User Manual
Page 34: Locate end point, Reset the counter, Locate start point, Editing (cont.)
34
EN
8
•
•
•
•
•
•
•
•
•
•
•
•
•
•
•
•
•
•
•
•
•
•
Insert editing replaces part of the recorded scene with new
material. Both the picture and Hi-Fi audio soundtrack are
replaced with new ones, while the normal audio soundtrack
remains unchanged. If you wish to change the normal audio
track as well, use the audio dubbing function simultaneously.
Use your video recorder as the recorder.
Insert Editing
EDITING (cont.)
1
2
4
5
3
6
8
0
7
9
2
1
3
NUMBER "0"
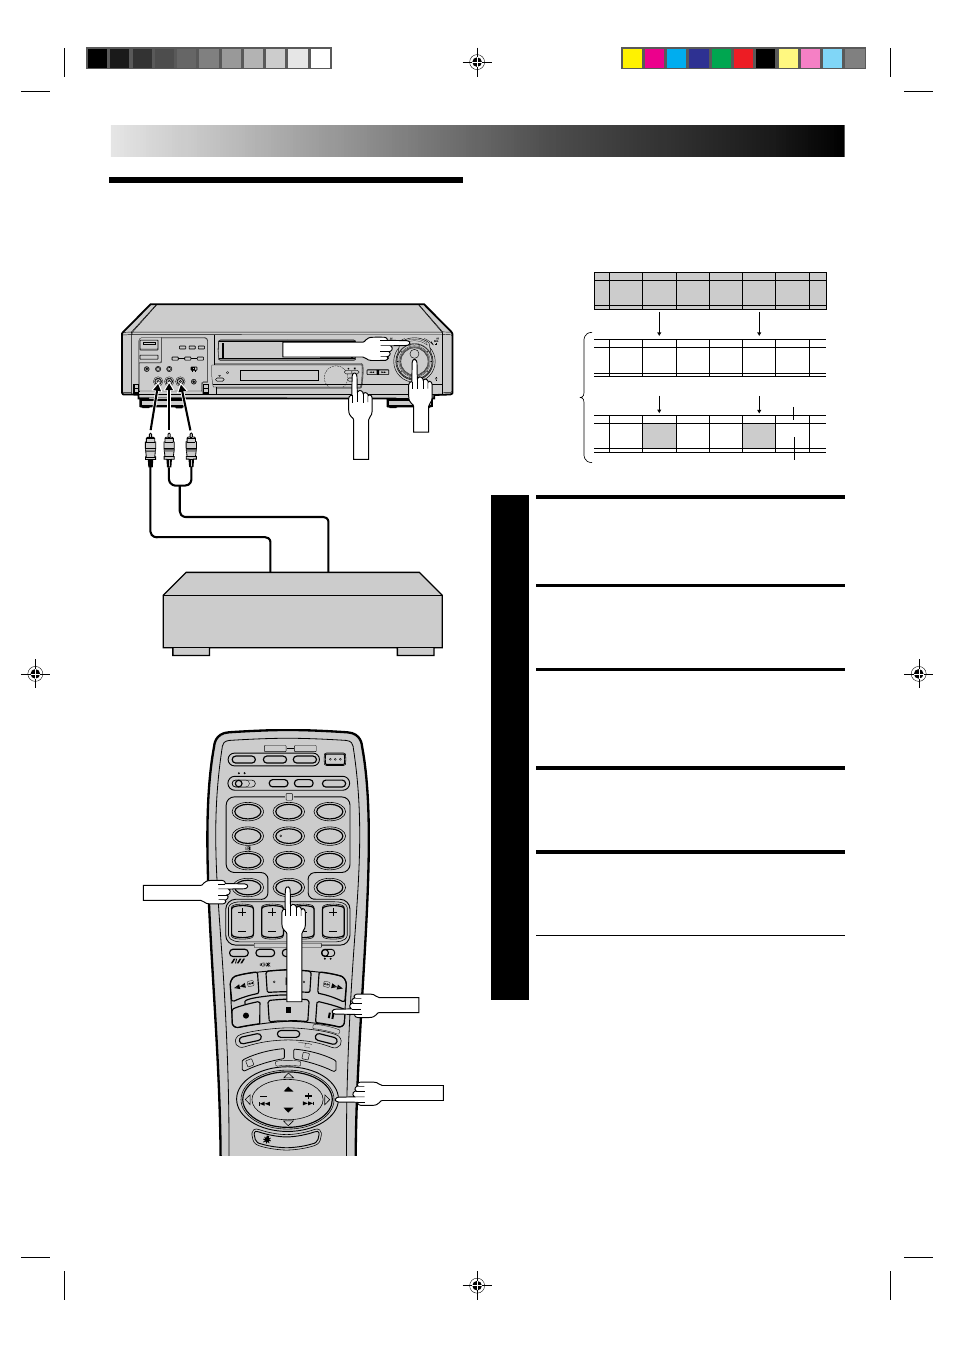
MAKE CONNECTIONS
1
Connect the player's VIDEO OUT and AUDIO OUT
connectors to your recorder's VIDEO IN and AUDIO IN
on the front panel.
SET INPUT MODE
2
Press NUMBER key "0". "F-AU" appears in place of a
channel number.
LOCATE END POINT
3
Load the recording cassette into your recorder, and play
it back to determine the edit-out point (the end of the
segment to be replaced) using the JOG/TIME SCAN
SHUTTLE controls or PUSH JOG and PAUSE.
RESET THE COUNTER
4
Press C.RESET to change the counter display to "0:00:00".
LOCATE START POINT
5
Determine the edit-in point (the beginning of the
segment to be replaced) using the JOG/TIME SCAN
SHUTTLE controls or PUSH JOG and PAUSE.
● Be sure to engage the Still mode at the edit-in point.
Before insert editing
After insert editing
Source tape
Recorded tape
Normal audio
track
Video/Hi-Fi
audio track
C.RESET
PAUSE
fi %
fi %
Recorder
Your recorder
JOG
TIME SCAN SHUTTLE
PAUSE
Video signal
Audio signal
Player
PUSH JOG
Another recorder