Select channel to watch, Start recording, Engage itr mode – JVC HR-E939EG User Manual
Page 21: Set recording duration, Set counter display, Reset counter, Adjust audio recording level, Record one programme while watching another, Instant timer recording (itr), Elapsed recording time indication
EN
21
1
2
4
5
3
6
8
0
7
9
2
1
3
8
•
•
•
•
•
•
•
•
•
•
•
•
•
•
•
•
•
•
•
•
•
•
DISPLAY
TV PROG.
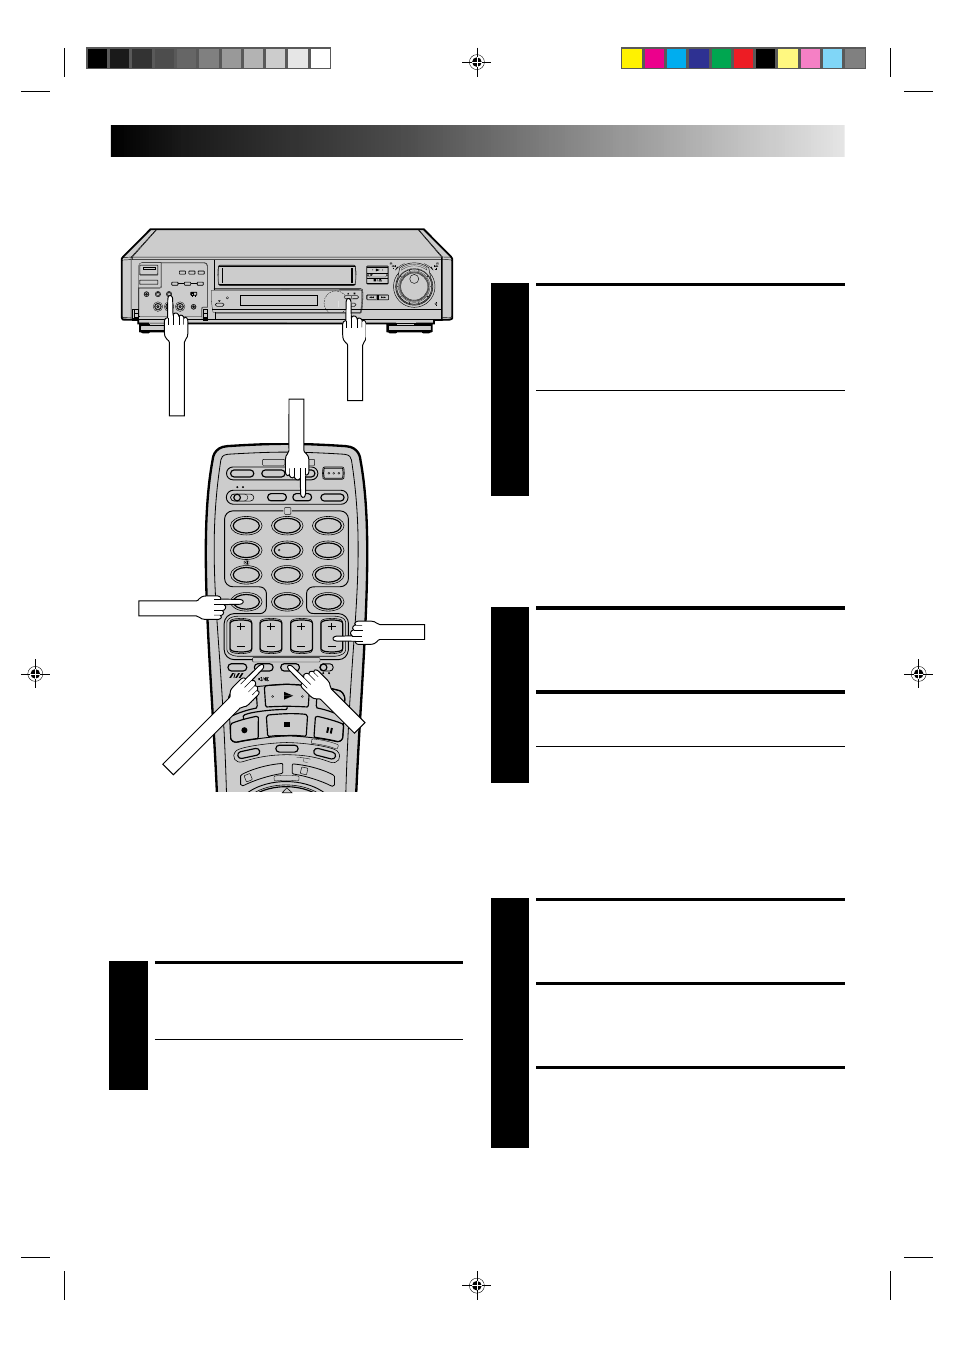
Record One Programme
While Watching Another
If your recorder is connected to the TV via AV connection, . . .
. . . press TV/VIDEO. The recorder's VIDEO indicator and the
TV broadcast being recorded disappear.
SELECT CHANNEL TO
WATCH
1
Once recording is in progress, all you need to do is to
set the channel controls on the TV for the station you
wish to view.
● The programme selected with the TV’s channel
controls appears on the TV screen while the one
selected with the TV PROG. button is recorded on
the tape.
● If a decoder is connected to the recorder (
੬
pg. 4),
you can select a scrambled channel as well with the
TV channel controls.
Instant Timer Recording (ITR)
This easy method lets you record for from 30 minutes to 6 hours
(selectable in 30-min. increments), and shuts the recorder off
after recording is finished.
START RECORDING
1
Press RECORD on the recorder.
ENGAGE ITR MODE
2
Press RECORD again. ITR blinks and 0:30 appears on
the front display panel.
SET RECORDING DURATION
3
If you want to record for more than 30 minutes, press
RECORD to extend the time. Each press extends
recording time by 30 minutes.
NOTE:
You can only perform ITR using the RECORD button on the
recorder's front panel.
Elapsed Recording Time
Indication
You can check the exact time of a recording.
SET COUNTER DISPLAY
1
Press DISPLAY until a counter reading appears on the
dispay panel.
RESET COUNTER
2
Press C. RESET before starting recording or playback.
● The counter is reset to “0:00:00” and shows the exact
elapsed time as the tape runs.
C.RESET
RECORD
TV/VIDEO
AUDIO MONITOR
Hi-Fi REC LEVEL
ADJUST AUDIO RECORDING
LEVEL
1
Turn Hi-Fi REC LEVEL in either direction.
● When the level indicator lights up to or near 0dB
with the loudest signal being applied, the recording
level is optimum.
NOTES:
●
Make sure that the "HI-FI L+R" position is selected with the
AUDIO MONITOR button.
੬
p. 13
●
Noise will increase if the recording level is too low, while
distortion will increase if the level is too high.
Hi-Fi Audio Recording LEVEL
Control
In most cases, setting the Hi-Fi audio recording level control to
the center position will provide satisfactory results. If necessary,
you can adjust the Hi-Fi audio recording level more precisely
by reffering to the audio level indicator on the front panel.