Playback picture adjustment, Override automatic tracking, Adjust tracking manually – JVC HR-DD855EK User Manual
Page 17: Return to automatic tracking, Activate 3r picture, Advanced operations, Manual tracking, 3r picture
17
– –:– –
1
2
3
4
5
6
7
8
9
0
2
4
1
3
TV PROG
ADVANCED OPERATIONS
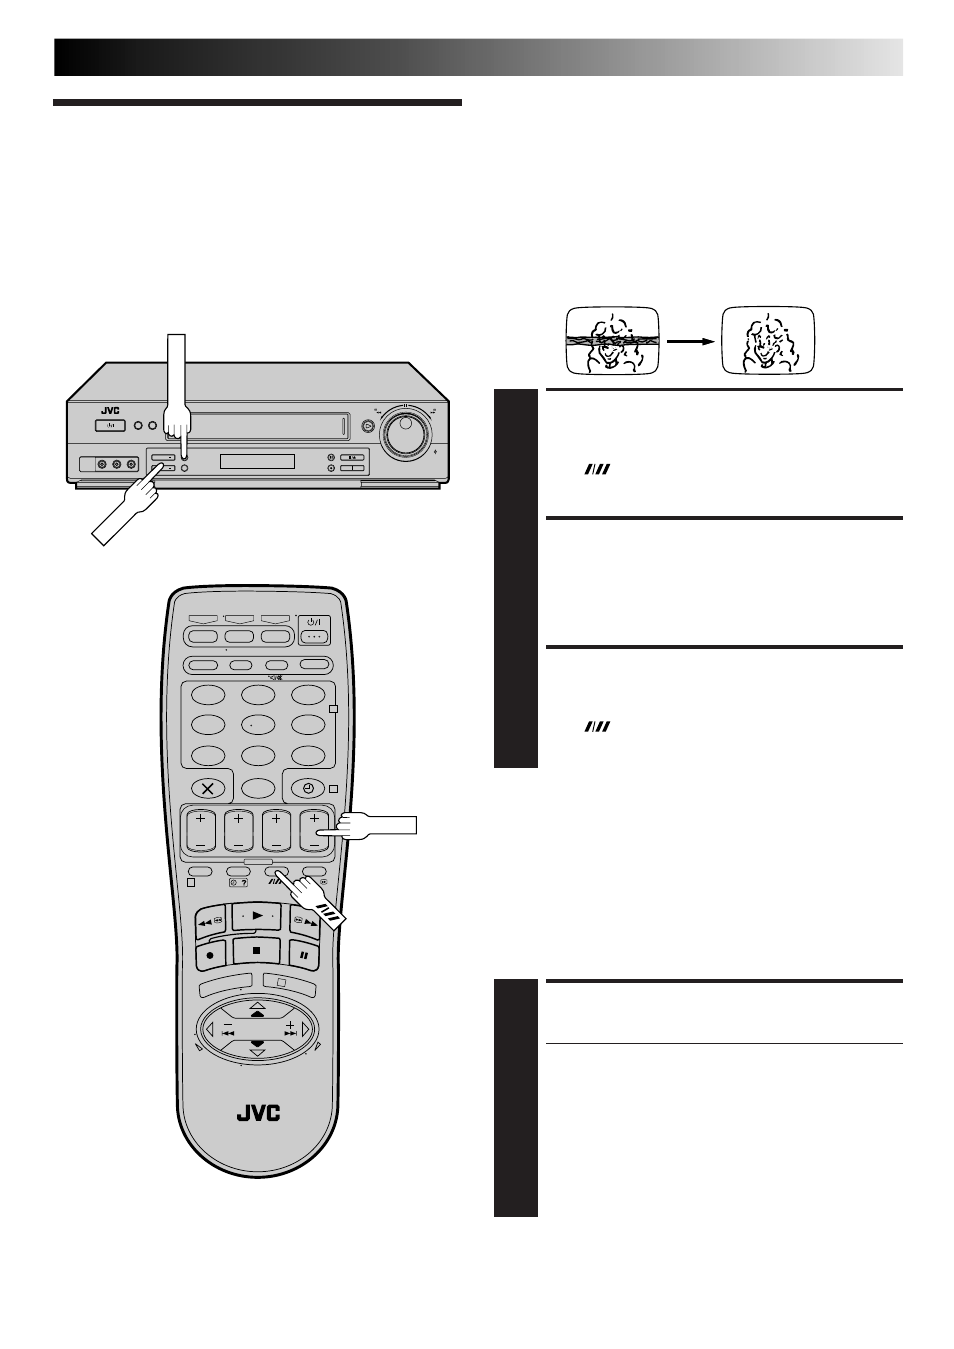
Manual Tracking
Your video recorder is equipped with automatic tracking
control. For most tapes this will automatically adjust the
tracking to suit the particular tape you are playing. In some
circumstances it may be necessary to make manual tracking
adjustments. This is usually only associated with old or worn
tapes or recordings made on old or worn recorders. If the
automatic tracking control fails to operate correctly you will see
noise bars across the picture as shown on the left below. To
correct this you can override the automatic control and adjust
the tracking manually by pressing the TV PROG buttons.
OVERRIDE AUTOMATIC
TRACKING
1
Press
on the remote to engage manual tracking.
ADJUST TRACKING
MANUALLY
2
Press TV PROG + or – to adjust tracking.
RETURN TO AUTOMATIC
TRACKING
3
Press
on the remote to re-engage automatic
tracking.
NOTE:
When a new tape is inserted, the recorder returns to the
automatic tracking mode automatically.
Playback
Picture
Adjustment
3R Picture
3R(= Resolution and Response Recovery technology) maximises
sense of resolution and sharpens image edges to make playback
picture look better focused.
ACTIVATE 3R PICTURE
1
Press 3R PICTURE. The button will light.
● To turn off 3R Picture, press 3R PICTURE again so
that the light goes off.
● Normally it is recommendable to keep 3R Picture ON
(with the button lit).
● Depending on the type of tape used, picture quality
may be better with 3R Picture set to off.
● If you use this recorder as the player for editing, be
sure to turn off 3R Picture before starting.
● The setting will remain effective even though you
turn on/off the recorder.
3R PICTURE
TV PROG