Jackson Conserver XL2-CMR User Manual
Page 5
www.jacksonmsc.com
Conserver XL/XL2 Drain Slolenoid Replacement Instructions
Revision A (07/02/2005)
5
3. Once the cover is removed, the drain solenoid and its wiring will
be exposed.
4. Using the wire cutters, remove the tie-wraps that are holding the
wires.
5. Note: It is very important that you do not cut or break the insu-
lation on the wires. These wires will carry line voltage and any sort
of breakage can cause dmagae to the unit or harm to personnel. If
you do cut or break the wire(s), the wiring must be repaired in
accordance with national, state and local electrical codes.
6. Using the needle nose pliers, take the bent parts of the cotter pin
and bend them back so that the pin is relatively straight. With the
pin straightened, pull it out from the opposite side. This will discon-
nect the drain link from the solenoid.
7. Gently separate the wires at the terminals. This will electrically
disconnect the drain solenoid from the dishmachine.
8. Now use the nut driver to remove the (4) locknuts used to mount
the solenoid to the dishmachine.
9. Remove the old drain solenoid.
10. You may dispose of the drain solenoid. Do not return it to
Jackson unless specifically requested to do so by the Technical
Service Department or a Technical Service Representative. You
should now retrieve your service kit.
11. Before installing your new solenoid, verify that the the voltage
ratings marked on the component correspond to the voltage of the
unit. You can verify the unit’s voltage by referring to the machine
data plate located on the right side of the tub.
12. Verify that the new solenoid’s slide does not bind and moves
freely before installing it. If it does not, contact Jackson Technical
Service.
13. Attach the new drain solenoid to the machine using the (4) lock-
nuts.
14. Reconect the wires to solenoid. Refer to the machine schemat-
ic if you have any questions regarding the wiring of the solenoid. It
can be found on the inside of the control box cover. If you machine
does not have a schematic, please contact Jackson Technical
Service.
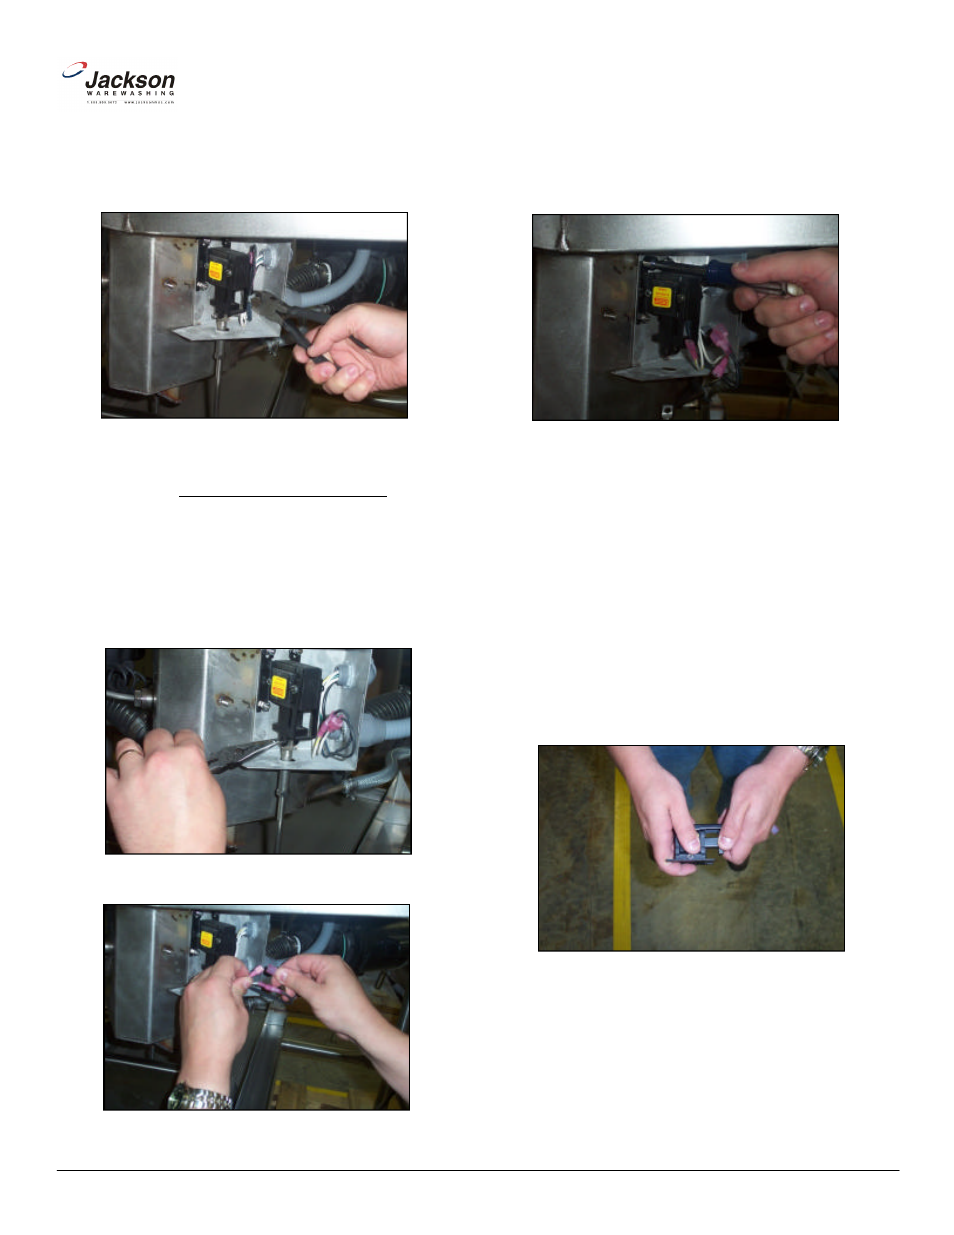
Cutting the tie-wraps (Conserver XL2)
Removing the locknuts (Conserver XL2)
Removing the cotter pin (Conserver XL2)
Separating the wires (Conserver XL2)
Verifying the free movement of the solenoid (Conserver XL)