Steps (conserver xl2 models) – Jackson Conserver XL2-CMR User Manual
Page 4
data plate located on the right side of the tub.
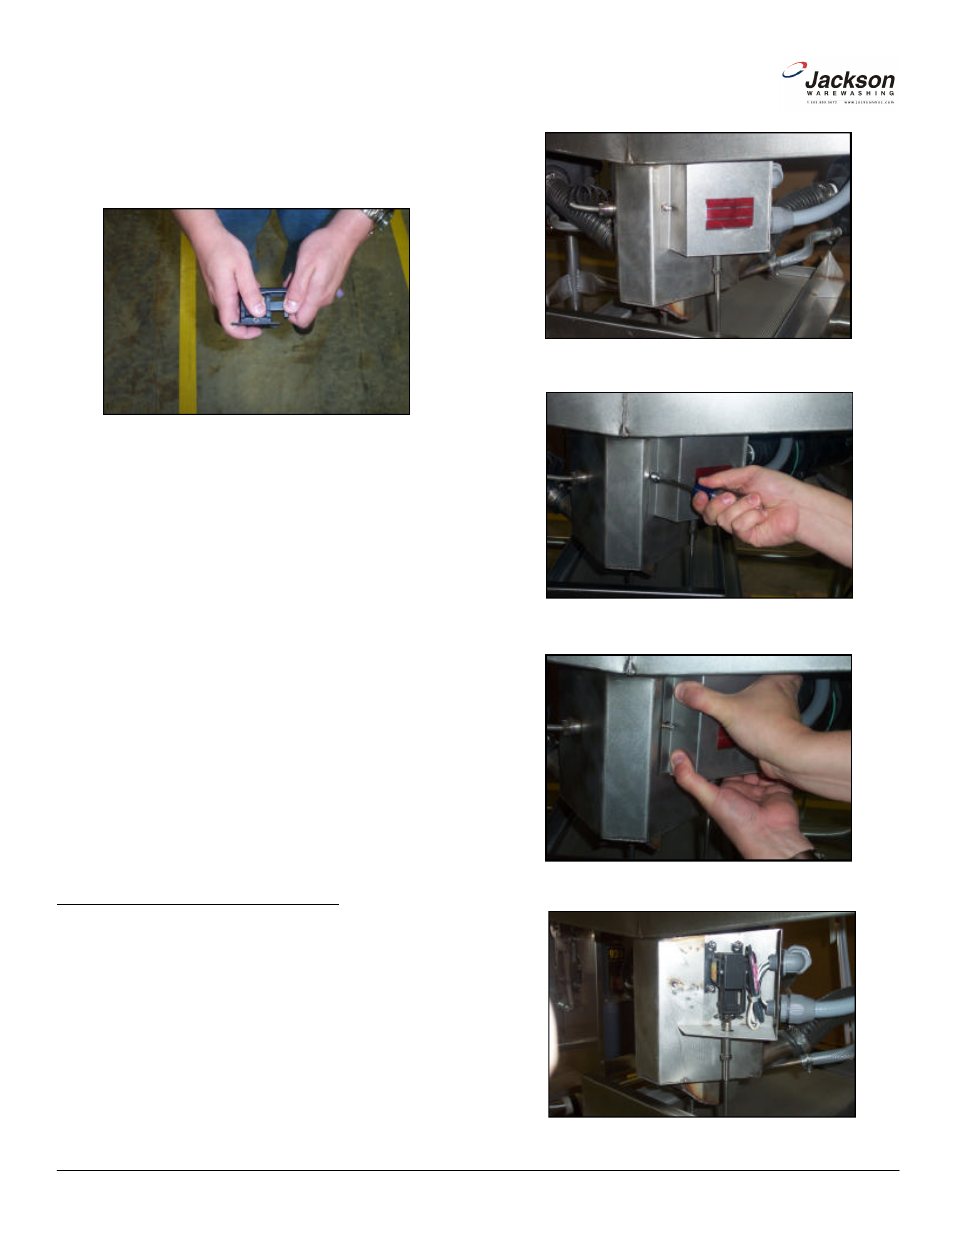
13. Verify that the new solenoid’s slide does not bind and moves
freely before installing it. If it does not, contact Jackson Technical
Service.
14. Attach the new drain solenoid to the machine using the (4) lock-
nuts.
15. Reconect the wires to solenoid. Refer to the machine schemat-
ic if you have any questions regarding the wiring of the solenoid. It
can be found on the inside of the control box cover. If you machine
does not have a schematic, please contact Jackson Technical
Service.
16. Tie-wrap the wires so that they will be out of the way when the
cover is placed back on.
17. Using the cotter pin, re-attach the drain link. Ensure that after
putting the pin through that you pull back the ends to secure it in
place.
18. Slide the cover back on taking care not to pinch or smash any
wires.
19. Secure the cover using the (4) screws.
20. Proceed to the section entitled “AFTER MAINTENANCE
ACTIONS”.
STEPS (Conserver XL2 Models)
1. Note: These instructions apply to all of the Conserver XL2 mod-
els, including the Conserver XL2-CML and Conserver XL2-CMR.
2. Locate the cover for the drain solenoid. It is located underneath
the tub on the sump. Using the nutdriver, remove the locknut hold-
ing the cover in place. With the locknut removed, push back on the
cover and it should come right off. Do not attempt to pry the cover
off as this could cause damage to the cover, the stud or the wiring
for the drain solenoid.
www.jacksonmsc.com
Conserver XL/XL2 Drain Slolenoid Replacement Instructions
Revision A (07/02/2005)
4
Verifying the free movement of the solenoid (Conserver XL)
Drain solenoid cover location (Conserver XL2)
Removing the locknut (Conserver XL2)
Removing the cover (Conserver XL2)
The drain solenoid exposed (Conserver XL2)