Invacare Excelerator XLT 2000 User Manual
Page 26
26
F
O
O
T
R
E
S
T
EXCELERATOR/LI'L EXCELERATOR
FOOTREST ADJUSTMENT/
REPLACEMENT (FIGURE 1)
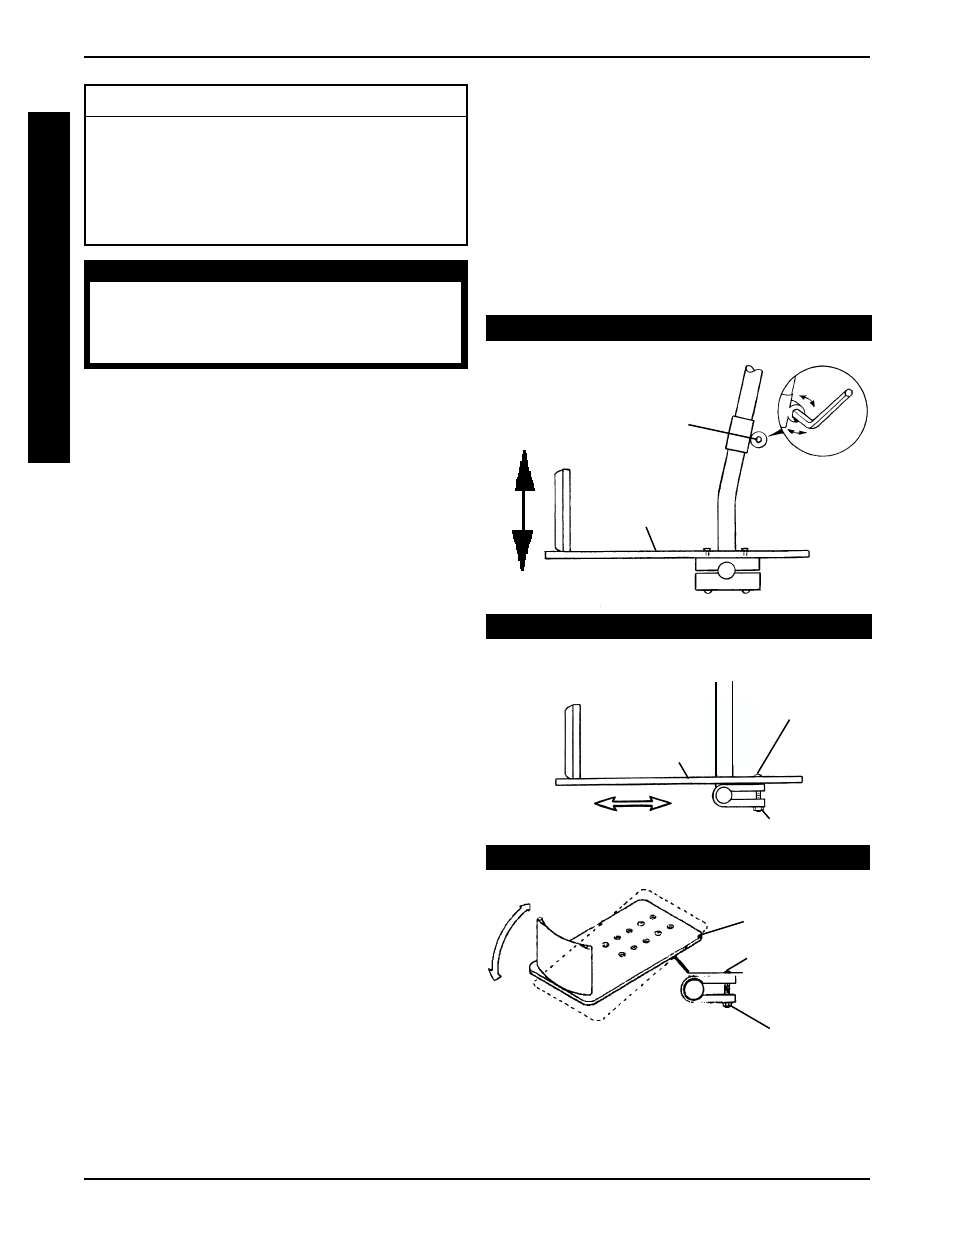
NOTE: Range of the Footrest is 0 to 4-1/2-inches.
Adjusting Footrest Height:
1. Loosen the socket screws on both footrests.
2. Slide the footplate up or down to desired height.
3. Retighten the socket screw that secures the footplate.
4. Secure straps over top of feet before using your
Excelerator.
Adjusting Footrest Angle
1. Loosen the button screws and locknuts that secure
the half clamps to the footrest weldment.
NOTE: The footplate clamps are located under the
footplates.
2. Position footplates to an appropriate angle for user.
3. Securely tighten the button screws and locknuts that
secure the half clamps to the footrest weldment.
Adjusting Footrest Depth
1. Remove the two (2) button screws and locknuts that
secure the footplates to the half clamps.
2. Adjust the footplates to one (1) of five (5) depths.
3. Line up the mounting holes in the footplates with the
mounting holes in the footplate clamps.
4. Install the button screws into the mounting holes and
tighten securely with the locknuts.
This Procedure includes the following:
EXCELERATOR LI'L EXCELERATOR:
Footrest Adjustment/Replacement
EXCELERATOR - XLT/XLT 2000: Footrest and Leg
Guard Replacement
Using/Replacing Footrest Strap
Height Adjustment
Angle Adjustment or Replacement
Depth Adjustment
FIGURE 1 - FOOTREST ADJUSTMENT/REPLACEMENT
FOOTREST
PROCEDURE 11
Button
Screws
Footplate
Footplate
Button Screws
Locknuts
Locknuts
WARNING
After ANY adjustments, repair or service and BE-
FORE use, make sure all attaching hardware is tight-
ened securely - otherwise injury or damage may
result.
Replacing Individual Footplates
1. Remove the two (2) button screws and locknuts that
secure the footrests to the footplate clamps.
2. Align new footplates on the footplate clamps at the de-
sired depth.
3. Line up the mounting holes in the footplates with the
mounting holes in the footplate clamps.
4. Install the button screws into the mounting holes and
tighten securely with the locknuts.
Socket
Screws
Footplate