Insignia NS-F20TR User Manual
Page 20
20
Insignia NS-F20TR 20" Flat Tube TV/DVD/VCR Combo
www.insignia-products.com
8 Press the
or
button one or more times
to select the tape speed, then press the
button. For more information, see “Selecting
a tape speed for recording” on page 18.
9 Press the ENTER button.
10 To schedule additional recordings, repeat
Step 3 through Step 9.
11 When you have finished scheduling
recordings, press the SETUP button to close
the menu.
12 Insert a videotape with the erase-prevention
tab in place. If the videotape does not have
an erase-prevention tab, your TV combo will
eject the tape when you turn off your
TV combo.
13 Press the POWER button to turn off your
TV combo. The recording indicator light turns
on. (You must turn off your TV combo to
activate the automatic timer recording.)
When the recording start time comes, your
TV combo starts recording without turning on
the TV screen.
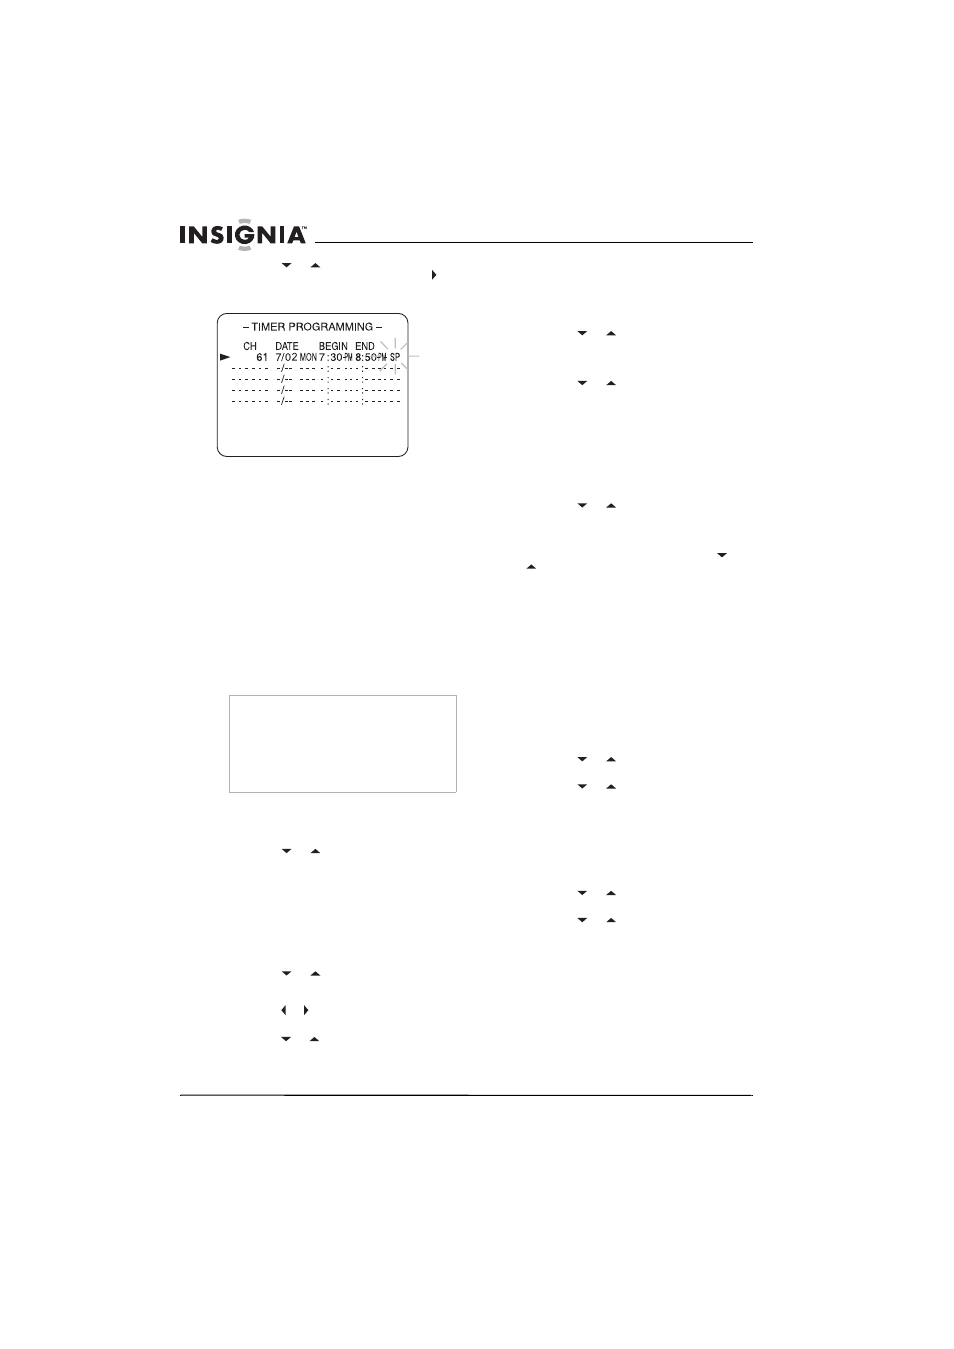
To check a scheduled recording:
1 Turn on your TV combo.
2 Press the SETUP button.
3 Press the
or
button to select TIMER
PROGRAMMING, then press the ENTER
button. The scheduled recordings appear on
the screen.
4 Press the SETUP button to close the menu.
Changing a scheduled recording
To change a scheduled recording:
1 Press the SETUP button.
2 Press the
or
button to select TIMER
PROGRAMMING, then press the ENTER
button.
3 Press the or button to select the field you
want to change (the field will flash).
4 Press the
or
button to change the field,
then press the ENTER button.
Cancelling a scheduled recording
To cancel a scheduled recording:
1 Turn on your TV combo.
2 Press the SETUP button.
3 Press the
or
button to select TIMER
PROGRAMMING, then press the ENTER
button. The scheduled recordings appear on
the screen.
4 Press the
or
button to select the
program you want to cancel, then press the
CLEAR button.
5 Press the SETUP button to close the menu.
Extending the time for a scheduled
recording
1 Turn on your TV combo.
2 Press the SETUP button.
3 Press the
or
button to select TIMER
PROGRAMMING, then press the ENTER
button. The scheduled recordings appear on
the screen.
4 Press the REC button, then press the
or
button to select the program you want.
5 Press the REC button one or more times to
select the beginning and ending time for the
recording. Each time you press the button,
the time shifts forward by 10 minutes.
6 Press the ENTER button.
7 Press the SETUP button to close the menu.
Using AUTO RETURN
After scheduled recordings are finished, you can
search through the beginnings of the recordings
on the videotape.
To use AUTO RETURN:
1 Press the SETUP button.
2 Press the
or
button to select USER’S
SET UP, then press the ENTER button.
3 Press the
or
button to select AUTO
REUTRN, then press the ENTER button to
select ON. When the scheduled recordings
are complete, the videotape rewinds to the
beginning of the recorded programs, then
your TV combo turns off.
To cancel AUTO RETURN:
1 Press the SETUP button.
2 Press the
or
button to select USER’S
SET UP, then press the ENTER button.
3 Press the
or
button to select AUTO
REUTRN, then press the ENTER button to
select OFF.
Note
•
If you do not turn off your TV combo, “TIMER
REC STANDBY” starts flashing on the screen
two minutes before recording start time.
•
During the recording you can only watch the
channel that is being recorded or a DVD.
•
If the videotape runs out before the recording is
complete, your TV combo stops recording,
ejects the tape, and turns off.