English – Intel XP-P5IM800GV User Manual
Page 11
English
11
2.2.
Installation of Memory
1.
Before installing or removing memory, please make sure that the computer power
is turned off to prevent hardware damage.
2.
Please make sure that the memory used is supported by the motherboard.
3.
Memory modules have a foolproof insertion design. The memory can be in
stalled only when facing the correct position. If you cannot insert the module,
please switch directions.
4.
It is recommended that memory of similar capacity, specifications and brand be
used.
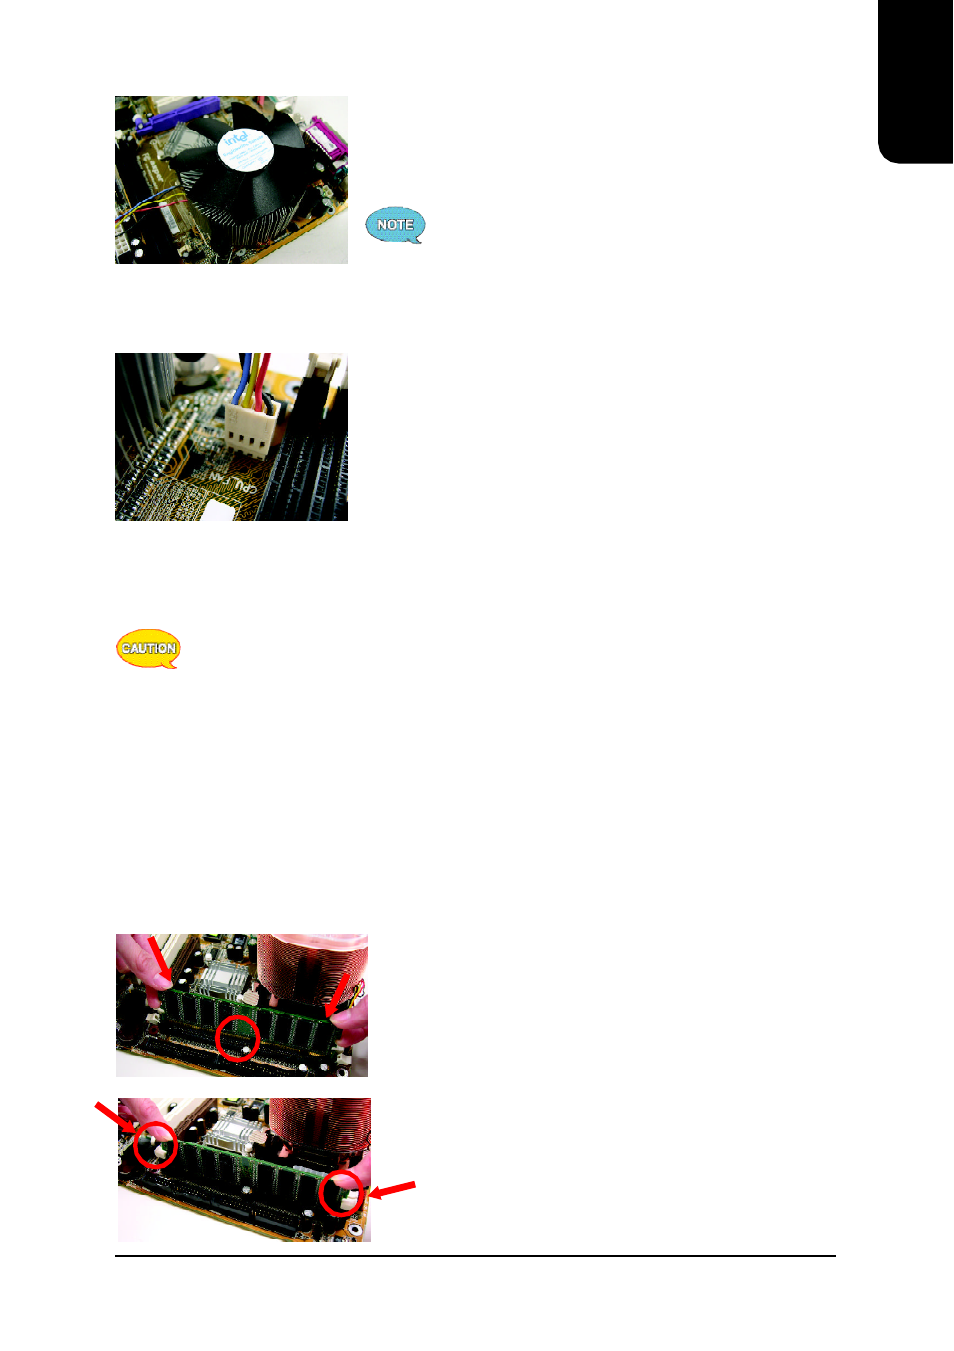
1.
Unfasten the clips on each end of the memory slots.
Correctly align the memory module in the slot and
push downwards..
2.
Once the memory module is correctly inserted, the
clips will automatically refasten. If the memory
module is positioned in the wrong direction, it will
not insert. If this occurs, please switch directions.
The motherboard supports DIMM memory modules, whereby BIOS will automatically detect
memory capacity and specifications. Memory modules are designed so that they can be
inserted only in one direction.
3.
Connect the 4-wire power cable of the fan sink to the
CPU_FAN header on the motherboard to complete the
installation.
2.
Align the four fasteners of the fan sink with the four holes
around the CPU socket. Push down each fastener and
you should hear a "click" when the fastener is attached.
Make sure the four fasteners are attached securely.
Prior to installation of the fan sink, check the direction of
each fastener by the arrow engraved on fastener top.
Before attaching the fasteners, turn each fastener
clockwise. To uninstall the fan sink, release each fastener
by rotating the fastener along the direction of the arrows
and pull them up.