Chiimney installation, Caution – Monessen Hearth BWBC500MHB User Manual
Page 19
61D0087
19
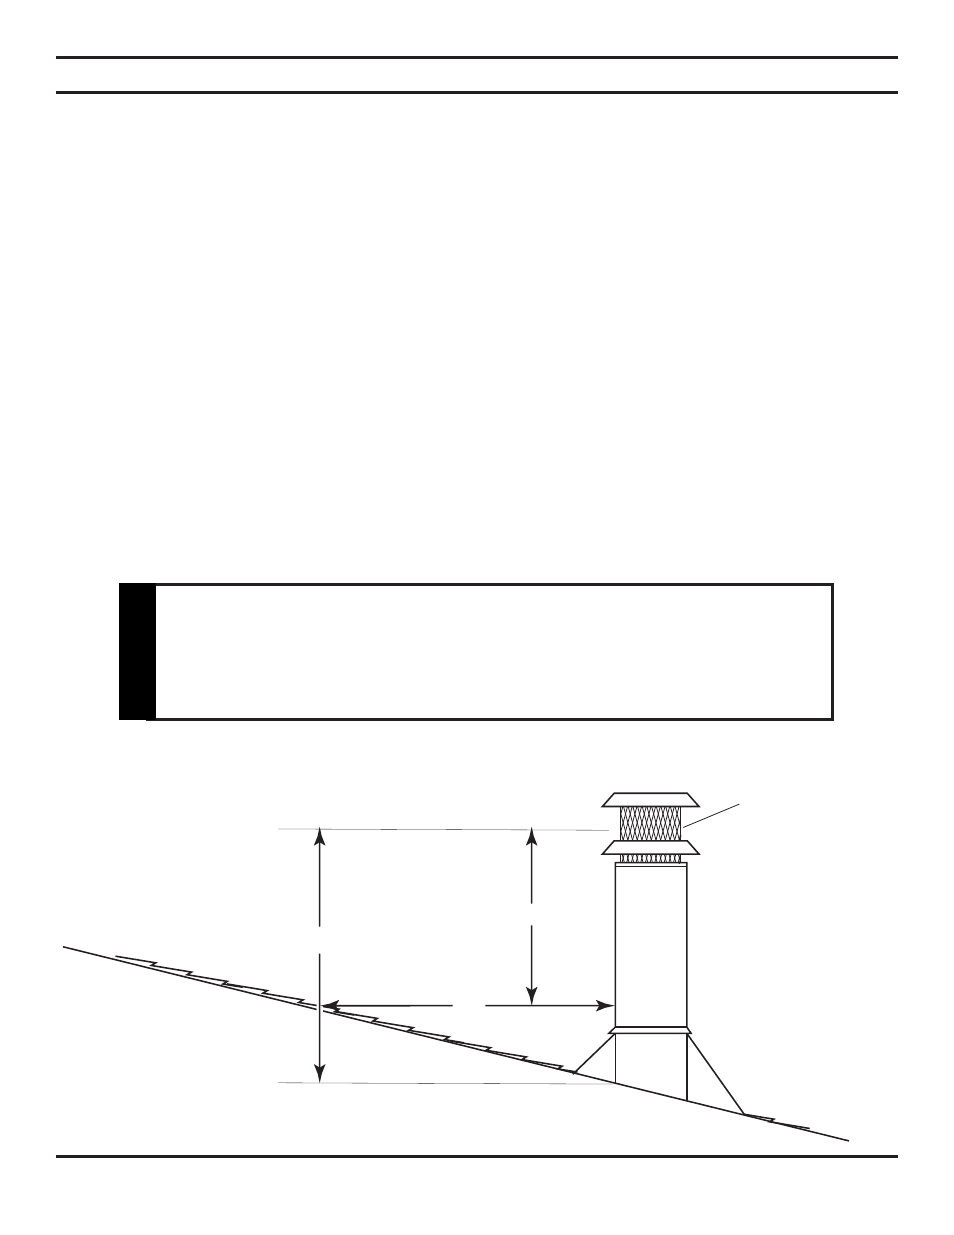
3' min.
2' min.
10'
CHIIMNEY INSTALLATION
OFFSET INSTALLATION SEQUENCE
(CONTINUED)
1. Install the first SE30 elbow by placing the male end of the 8" diameter flue elbow into the mating part of the fireplace
or chimney section. Press down until the snap locks engage.
2. Insert the female end of the 11" diameter outer elbow onto the mating part of the fireplace or chimney section . Press
down until the snap locks engage.
3. Nail the support straps to the framing member with a minimum of two (2) 8-penny nails per strap.
4. Install the sections of pipe between elbows until the proper number of chimney sections have been installed.
5. Install the second elbow to return the run of the chimney to vertical.
6. Nail the support straps of the second elbow to a building frame member.
7. Continue installing the vertical portion of the chimney.
CHIMNEY CAP INSTALLATION
MODEL SC CHIMNEY CAP
Note: The proper chimney height is important to assure proper draft and safety.The SCchimney cap
must extend the flue outlet 4" above the top of the last section of chimney. Keep this mind when
determining the proper height for the chimney. The chimney should not be extended more than
90" above the supporting roof structure without additional support.
Figure 18 - Proper Chimney Height
SC Chimney
Cap
For safety and proper draft, the chimney must be at least 3' higher than
the highest point where it passes through the roof. It also must be at least
2' higher than the highest part of the roof or structure that is within 10' of
the chimney. See Figure 18.
CAUTION