MRV Communications TERESCOPE TS800/155 User Manual
Page 46
M R V C o m m u n i c a t i o n s , I n c . – I n s t a l l a t i o n M a n u a l
36
THE JMP-L SHOULD BE ORIENTED IN SUCH A WAY THAT THE GROUNDING SCREW IS
LOCATED ON THE BACK (CLOSE TO THE INSTALLER) AND THE FRONT FACING THE
OPPOSITE SITE.
)
Vertical surfaces (wall, rectangular column, ...):
Note
For more convenience it is suggested to assemble the 3 parts of the
JMB before mounting it on the surface.
Special Mounting
1- Mounting on the floor
In some cases the only place where the installation is acceptable, possible, or
authorized is on the floor. Avoid installation on roofs with a metallic parapet or
without a parapet by drilling holes in the roof floor.
&&&&
*These bolts and nuts are
included in the kit
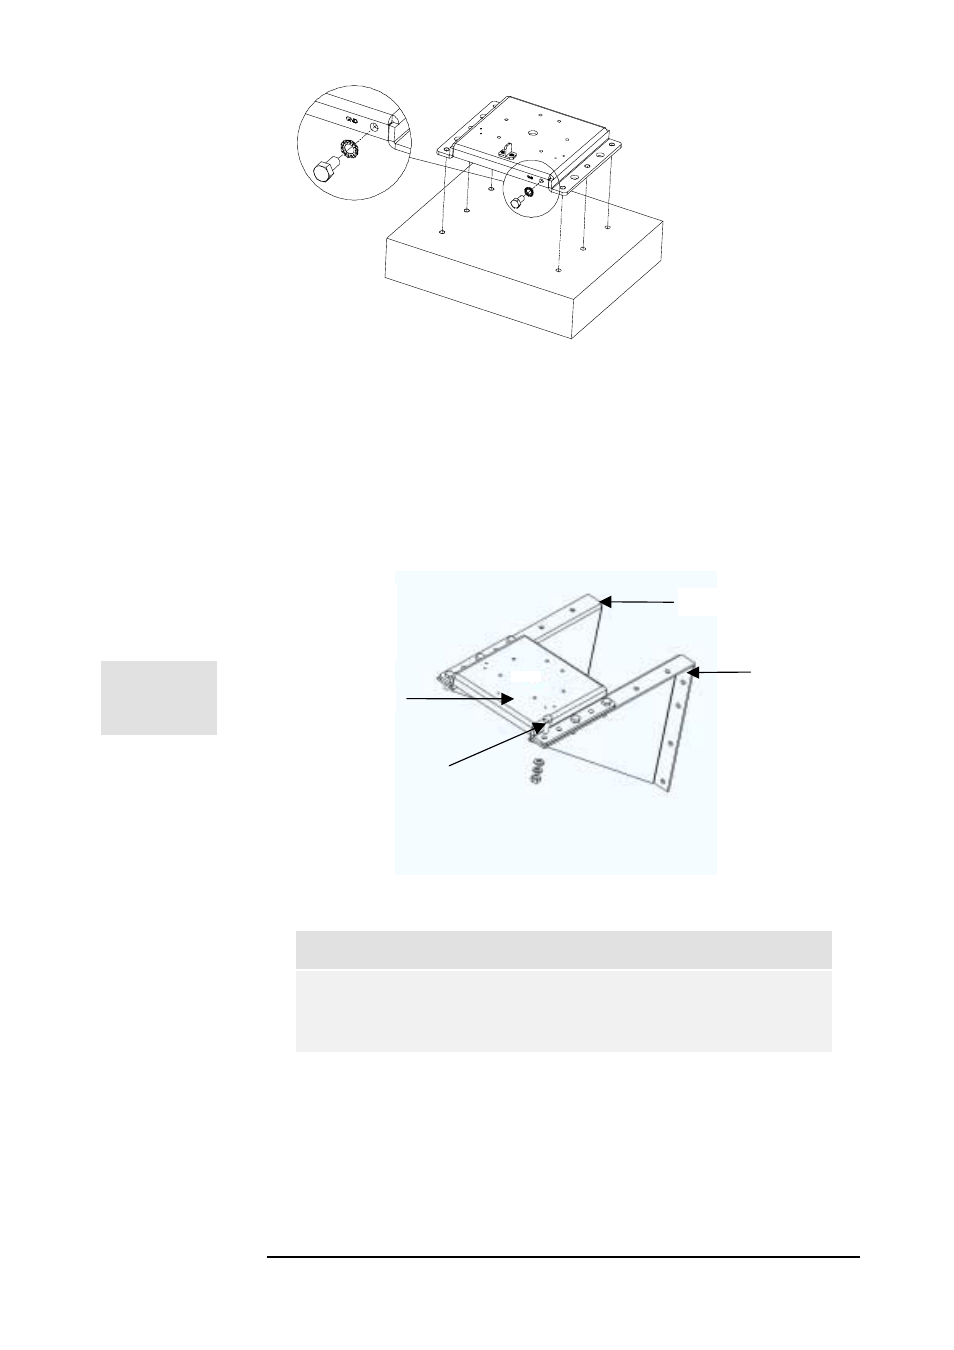
Figure 5.13b: JMP-L on the fixation surface
JMP-L
JMB Left
JMB Right
M8 (25mm)*
6places
Use a JMB (To be ordered separately,
not included in the standard kit)
Figure 5.14: JMP-L on JMB