Changing the setup menu, Audio setting display setting (cont’d), Instructions continue on the next page – Philips Magnavox MWR20V6 User Manual
Page 69: Press [stop c ] if you are playing a disc, Press [setup] to exit, Press [setup, Using [ k / l ], select “disc audio”. press [ok
69
Recording
Playing
discs
Editing
Getting
started
Changing
the
Setup
menu
VCR
functions
Others
Before
you
start
Connections
E
sp
añ
ol
EN
STANDBY-ON
OPEN/CLOSE
VIDEO/TV
VCR
.@/:
GHI
PQRS
TUV
WXYZ
JKL
MNO
ABC
DEF
DVD
DISPLAY
SETUP
OK
0
2
1
4
6
5
3
9
7
8
CHANNEL
TIMER
TIMER SET
SEARCH AUDIO DUBBING
SLOW CM SKIP RAPID PLAY
VCR REC DVD REC REC MODE
DISC MENU
RETURN
CLEAR/C-RESET
TITLE
SPACE
Changing the Setup menu
Display
Angle Icon
ON
Screen Saver
10 minutes
OSD Language
English
DVD
Screen Saver
5 minutes
10 minutes
OFF
15 minutes
30 minutes
DVD
• Using [K / L], select a
setting. Press [OK].
Your setting will be activated.
Screen Saver (Default : 10 minutes)
Set the time to work the screen saver function on the screen.
4
Press [SETUP] to exit.
1
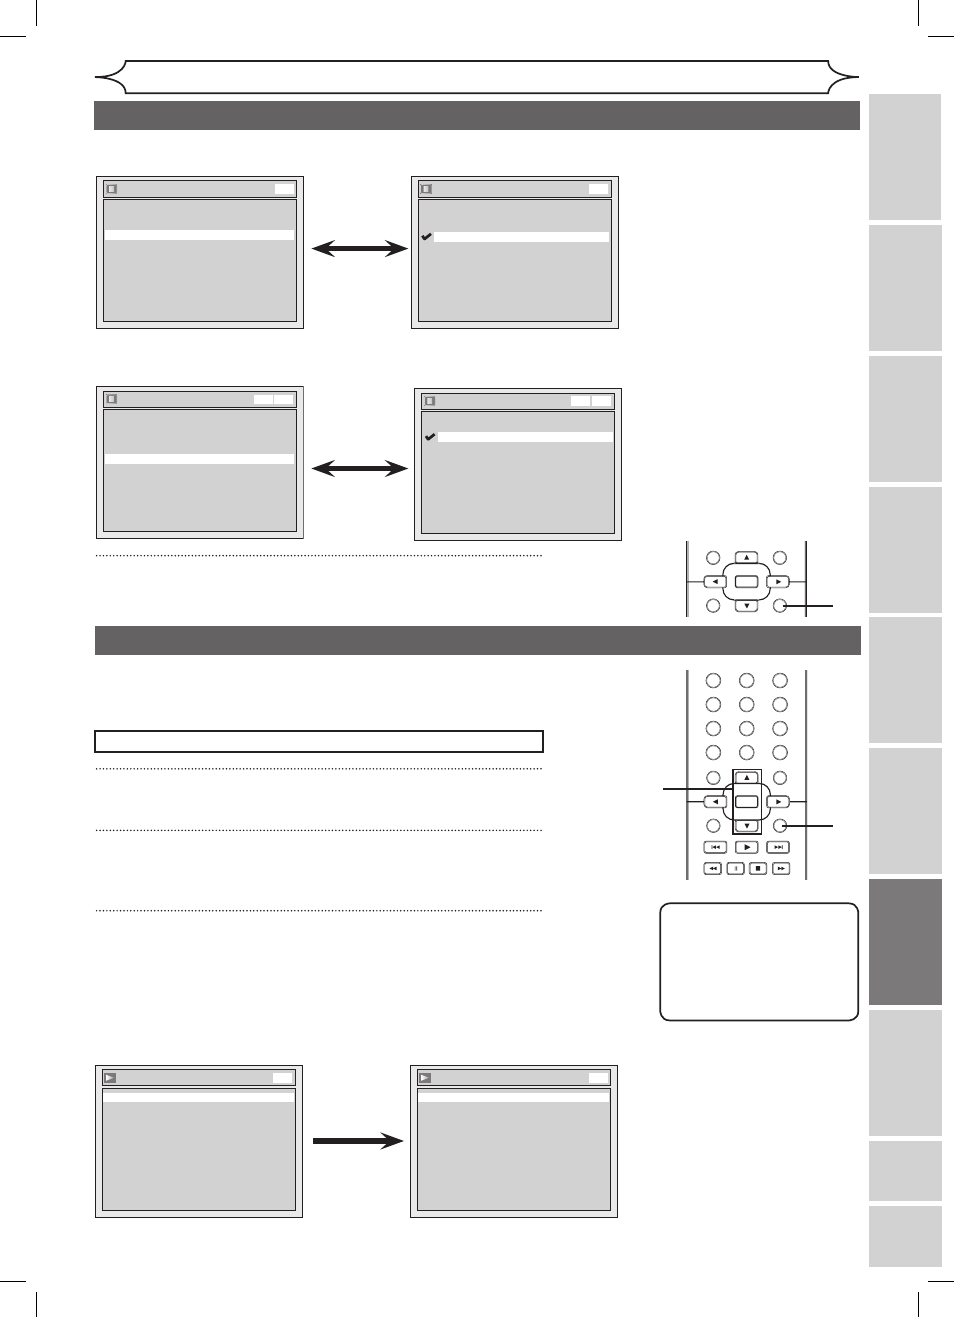
Press [SETUP].
2
Using [K / L], select “Playback”. Press [OK].
Playback menu will appear.
3
Using [K / L], select “Disc Audio”. Press [OK].
Press
[STOP C] if you are playing a disc.
Choose the appropriate Audio settings for your external
equipment.
It will only affect a disc playback.
Audio setting
Display setting (cont’d)
4
1
Instructions continue on the next page.
FL Dimmer
Bright
Dark
Auto
VCR DVD
Display
Angle Icon
ON
Screen Saver
FL Dimmer
10 minutes
Bright
OSD Language
English
VCR DVD
• Using [K / L], select a
setting. Press [OK].
Your setting will be activated.
• If “Auto” is selected, the
display is shown brighter when
the power is on, darker when
the power is off.
FL Dimmer (Default : Bright)
Set the brightness of front panel display.
You can choose one among “Auto”, “Bright” and “Dark”.
STANDBY-ON
OPEN/CLOSE
VIDEO/TV
VCR
.@/:
GHI
PQRS
TUV
WXYZ
JKL
MNO
ABC
DEF
DVD
DISPLAY
SETUP
OK
0
2
1
4
6
5
3
9
7
8
CHANNEL
TIMER
TIMER SET
SEARCH AUDIO DUBBING
SLOW CM SKIP RAPID PLAY
VCR REC DVD REC REC MODE
DISC MENU
RETURN
CLEAR/C-RESET
TITLE
SPACE
Note
• Dynamic Range Control
function is available only
on the discs which are
recorded in the Dolby
Digital format.
2
3
Digital Out
Set the digital audio output.
• Using [K / L], select a
setting. Press [OK].
Option window will appear.
Proceed to step A or B.
Disc Audio
Dynamic Range Control
ON
Digital Out
DVD
Digital Out
Dolby Digital
Stream
PCM
48kHz
DVD
E9A80UD_MWR20V6_02.indd 69
2006/01/17 17:58:32