Name and function, Front panel – Marantz SC-7S2 User Manual
Page 16
12
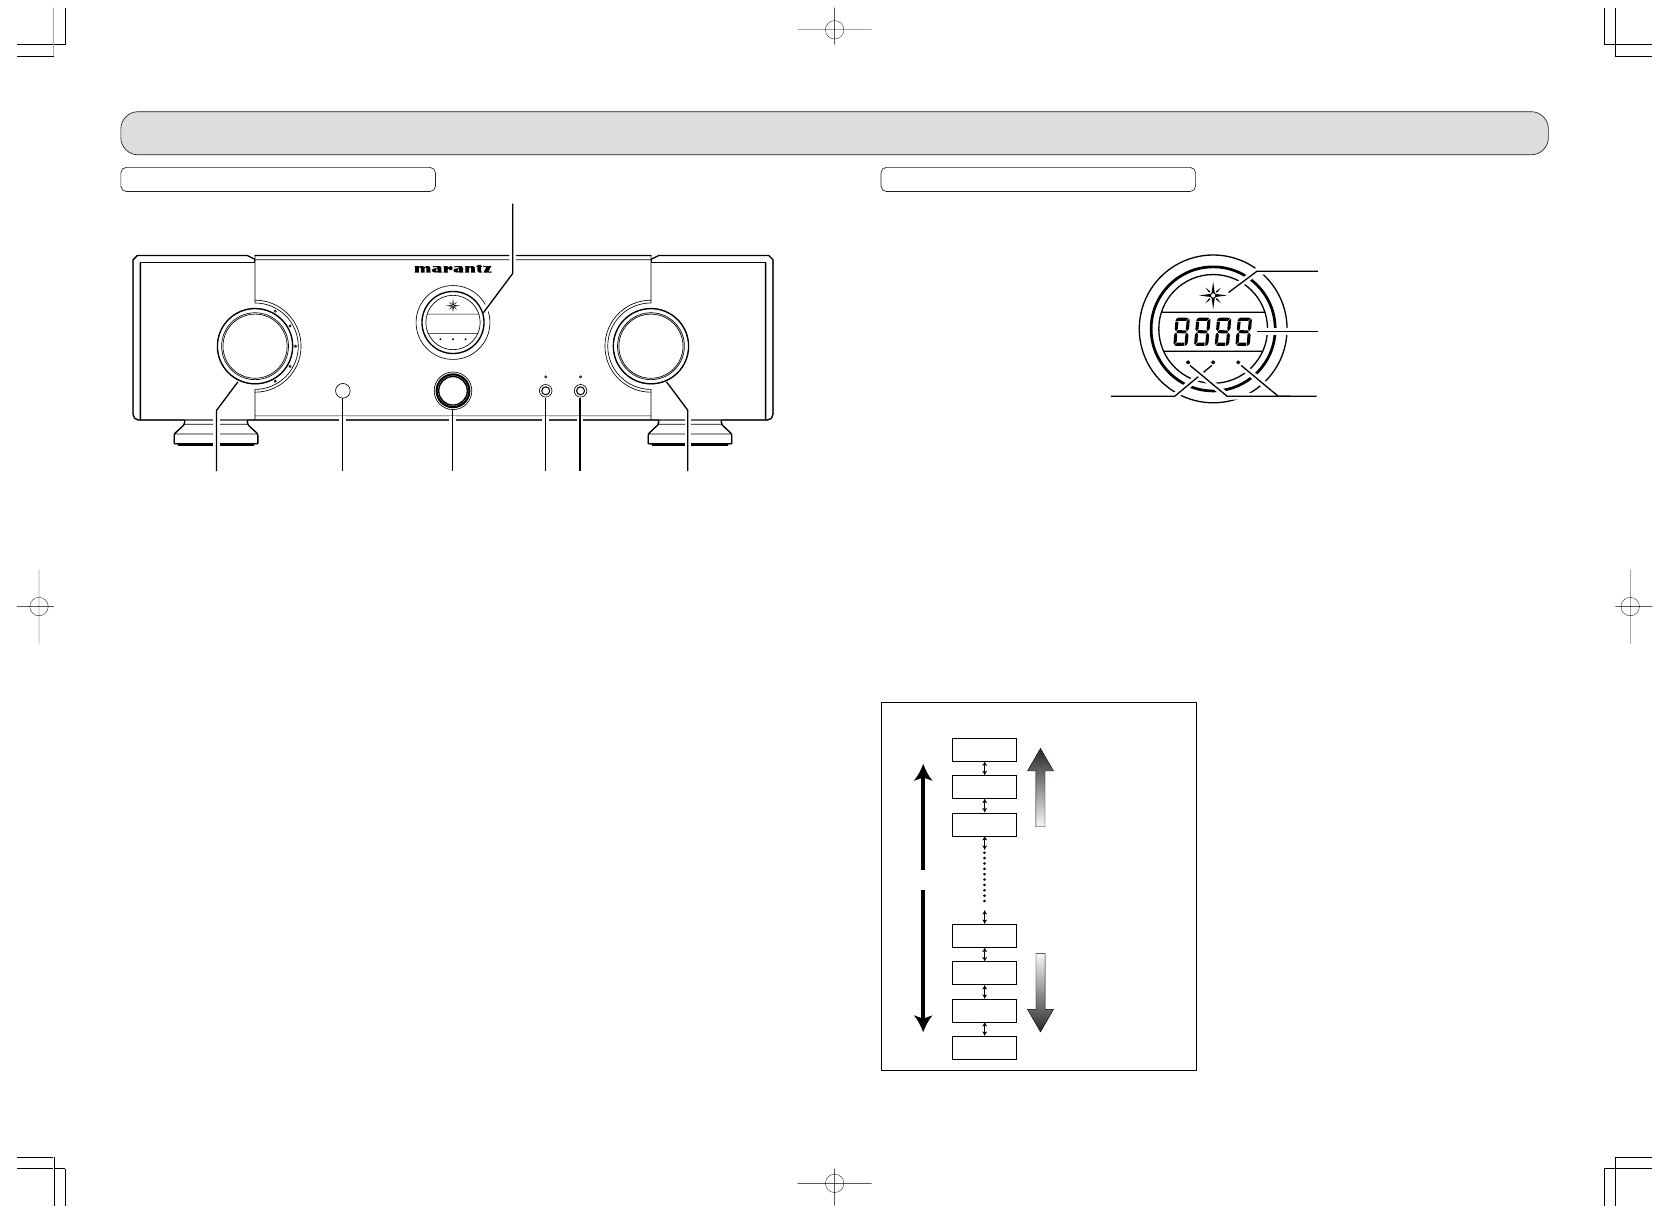
NAME AND FUNCTION
BALANCED
CD
LINE 1
DISPLAY
ATT
LINE 2
RECORDER
A
SYNC
B
i n p u t s e l e c t o r
p o w e r o n / o f f
s t e r e o c o n t r o l a m p l i f i e r s c - 7 s 2
v o l u m e
q
r
u
w
y
t
e
q Power switch
The switch is used to Power the unit ON and or OFF. Once
the unit is powered On, the indicator of the Input Selector
will illuminate for the source selected. The SC-7S2 will be
ready in approximately 8 seconds.
w Remote control sensor
This is the IR (Infra Red) window which receives IR control
signals being sent from the remote controller.
How to use remote control
→ p.14
e Input selector knob
The input Selector Knob will determine what source is being
played as well as well as able to be recorded. When the
Source is selected, the Blue indicator will be illuminated to
verify the source selected. When the unit is powered down,
the last selected source will be held in memory. When the
unit is powered on again, the last selected source will be
selected. When RECORDER is selected, there will be no
signal output, to the record output.
r Display section
Displays the settings & volume level.
t Volume knob
The Volume knob is used to increase & decrease the overall
volume level. By turning the Volume Knob clockwise, the
volume will be increased. By turning the Volume Knob
counter clock-wise, the volume will decrease. When
powering the unit off, the last volume setting will be
memorized.
y ATT (Attenuation) button, indicator
The ATT button is used to reduce the volume quickly, with
just one touch. Once the button is pressed, the volume will
be decreased. The Volume Display will begin blinking &
the Volume Indicator above the ATT button will illuminate.
If you press the ATT button again, the Volume Display will
stop blinking & display the Volume level. You can decrease
the volume by 20dB, 40dB & 60dB. Please refer to page
16 for further information regarding Attenuation functions.
u Display button, indicator
This button is to turn off the Volume Indicator & the Light
for the Volume Indicator. If the volume Indicator & light are
on, and you press this button, they will both be turned off.
Also, the light above this button will be illuminated. If you
make any adjustment the Volume Indicator & Light will come
on for 3 seconds, then shut off again. If you press this but-
ton again, the Volume Indicator & Light will be turned on
and the light above this button, will shut off.
A
SYNC
B
I
II
III
IV
DISPLAY SECTION
I
Power indicator
This Indicator is to show if the power is on. When power is
on, the blue light will be illuminated.
II Volume indicator
This will display the volume level and changes made to
the volume with either the remote controller or the Volume
Knob on the face of the unit. After 3 seconds of being pow-
ered on, the ID number will be displayed. The ID number is
changed by the ID switch on the rear panel of the unit. If
the attenuate function or trim adjustment is being used,
the levels will also be indicated. If using several SC-7S2s,
and they are not connected properly, and error code will
be indicated.
Error message
→ p20
III A/B CH Indicator
During trim adjustment, the indicator lights will be illumi-
nated in accordance to the adjustments.
See Trim adjustment
→ p17
IV SYNC (Synchronized) Indicator
The indicator will be illuminated in accordance with the ID
number setting.
• Green color illuminated:
ID No. is set up <1>.
• Red illuminated:
ID No. is set up 2–6 (several SC-7S2 are connected)
In this state, the unit can not be operated via the remote
controller, or by the unit itself.
• Light off:
There is an error in the remote connections.
• Green or Red color will be flashing:
While trim is being adjusted.
When you use the remote control, please face it towards the
SC-7S2.
max.
min.
0.5 dB step
Tur n the volume knob
clock-wise or press volume
▲ button of the remote
controller.
Tur n the volume knob
counterclockwise or press
volume
▼ button of the
remote controller.
FRONT PANEL
06.8.9, 1:52 PM
Page 12