3 d video, Initial setup 1, Tv features – MITSUBISHI ELECTRIC WD-73C11 User Manual
Page 21
3. TV Features
21
For assistance call 1(800) 332-2119
3 D Video
To display 3D content, your Mitsubishi TV requires:
•
Active-shutter 3D glasses compatible with any one
of the following:
-
A matching external synchronization emitter
connected to the TV’s back panel
-
DLP link
•
A compatible 3D source device connected to the
TV via HDMI and outputting a 3D signal in one of
these formats:
-
Frame Packing 1080p/24-Hz or 720p/60-Hz
-
Top-Bottom 1080p/24-Hz or 720p/60-Hz
-
Side-by-Side format, 1080p, 24/30/60-Hz;
720p, 60-Hz
-
Checkerboard format, 1080p, 60-Hz; (lower resolu-
tions may be supported but will not fill the screen)
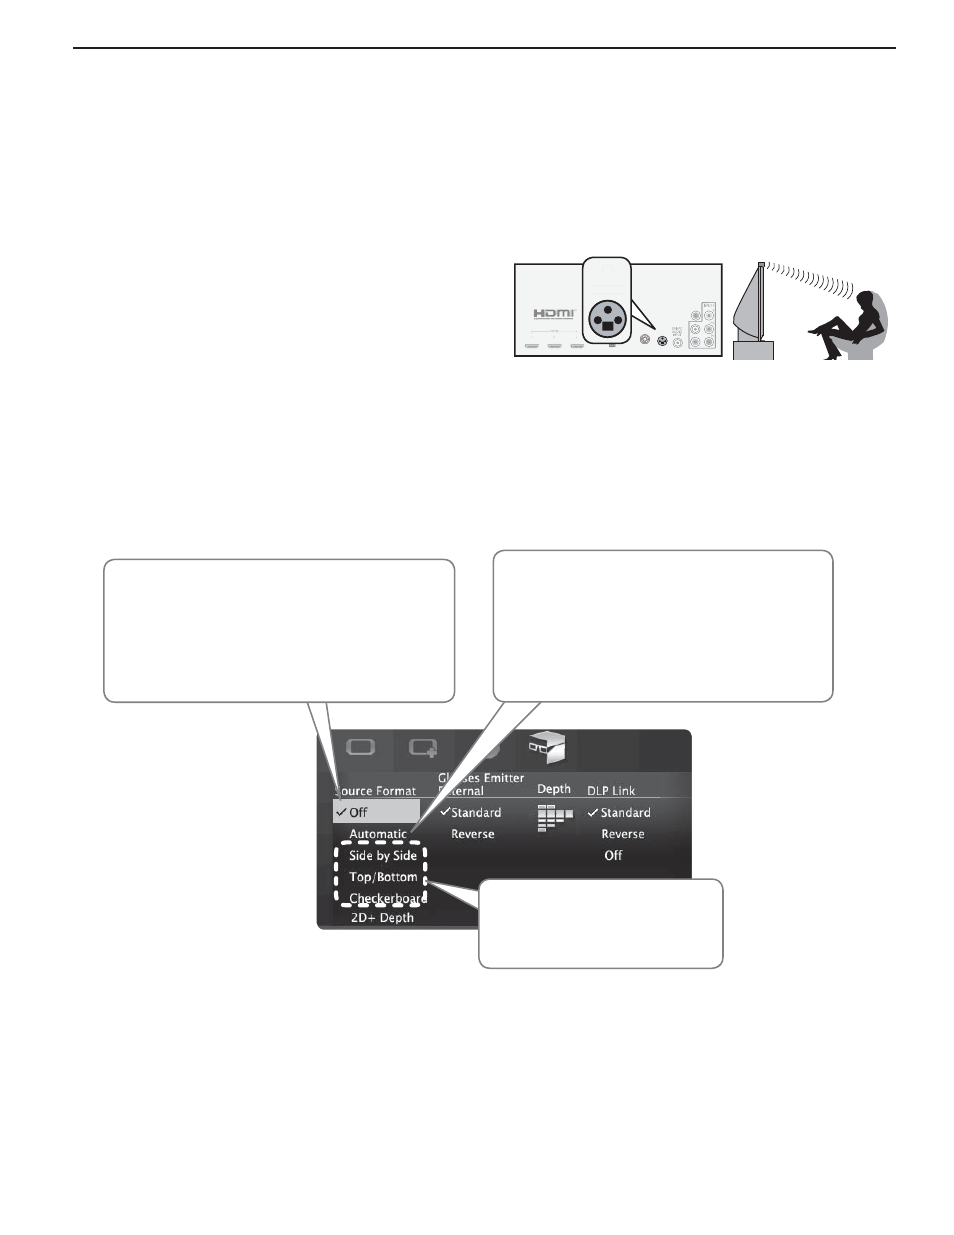
Initial Setup
1.
If your 3D glasses came with a synchronization emitter,
connect the emitter to the 3D GLASSES EMITTER jack.
Place the emitter at the front of the TV where there is a
clear path to the glasses.
Note: No emitter is required if using DLP Link.
3D
GLASSES
EMITTER
ANT
L
R
DIGITAL
AUDIO
OUTPUT
3D
GLASSES
EMITTER
ANT
L
R
R
DIGITAL
AUDIO
OUTPUT
3D
GLASSES
EMITTER
3D
GLASSES
EMITTER
3D
GLASSES
EMITTER
3D
GLASSES
EMITTER
2.
Power on the TV and the source device.
3.
Connect the source device to the TV’s HDMI input.
4.
When the New Device Found screen displays,
name the input.
5.
Press EXIT to close the New Device Found screen.
Use the Picture > 3D Mode
menu to enable 3D video.
Choice of Source Formats
If your device is not HDMI 1.4a
compliant, you must choose the
correct setting from this list.
Off
•
Turns off 3D images; displays 3D
content as 2D (you may see two
images).
•
Restores normal TV adjustment
options when viewing an ordinary 2D
signal.
Automatic
•
Switches the TV to 3D mode and selects the
correct 3D format when the TV detects a 3D
signal from an HDMI 1.4a-compliant device.
•
Automatically switches the TV out of 3D
mode when receiving a normal 2D signal.