Blade collar removal/installation, Removing the inner blade collar – Multiquip Concrete Saw SP-6457 TD User Manual
Page 49
49
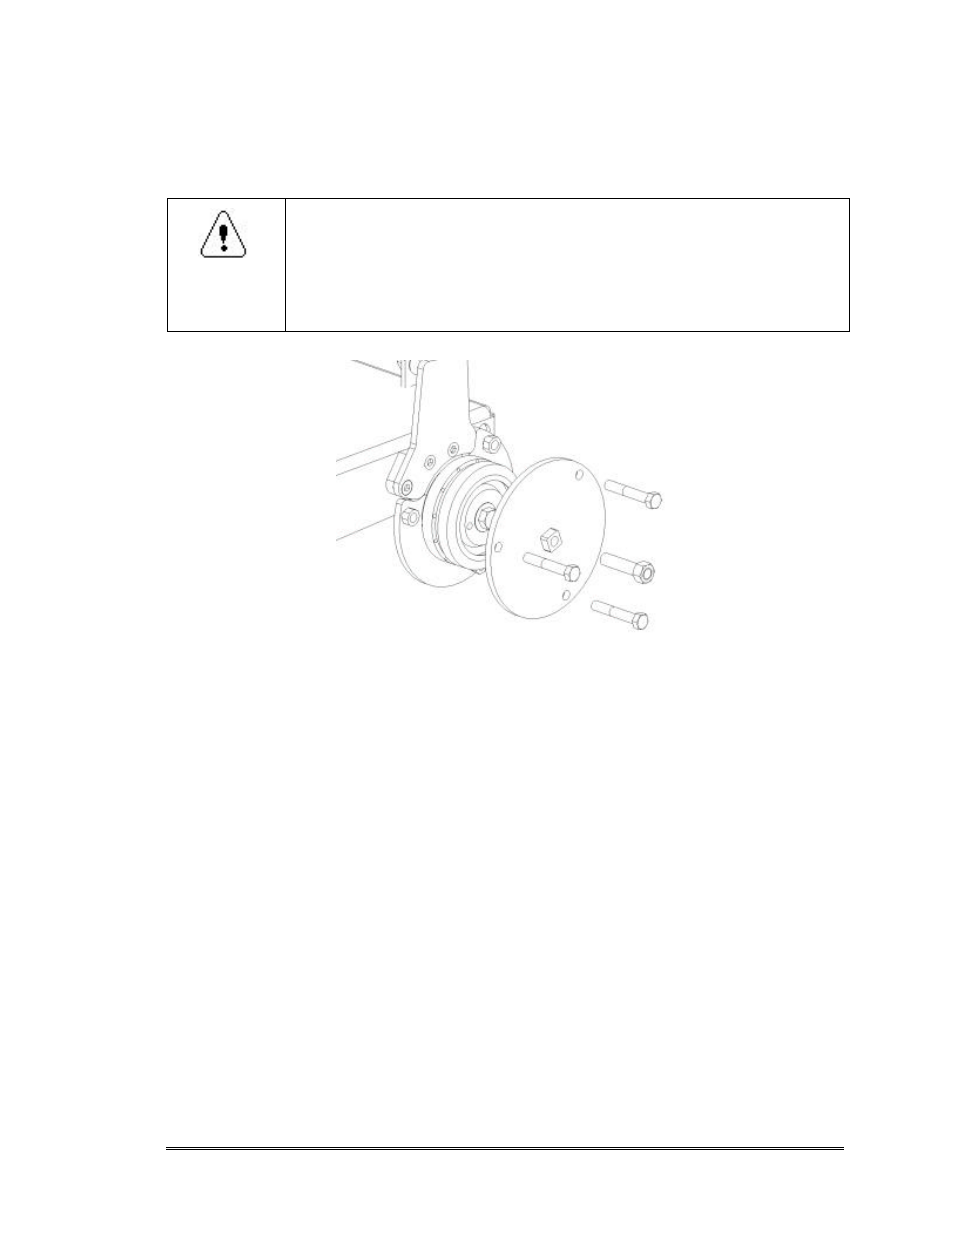
Blade Collar Removal/Installation
Correct removal or installation of the Inner Blade Collar or Flange requires the
Collar Puller (option Part Number 18503) shown in Figure 31.
WARNING
Follow instructions closely to prevent injury from flying Blade Collars!
Because of the tapered fit between Blade Collar and Blade Shaft,
5-10 tons of force is needed to release the inner collar. Parts and
tools can become dangerous projectiles if instructions are not
followed properly.
Fig. 31 — Using the Collar Puller
Removing the Inner Blade Collar
With the Outer Blade Collar in place, and the Blade Mounting Bolt loosened
approximately ¼”:
1. While the three perimeter bolts hold the two Puller Plates together, slide
the Horseshoe Plate of the Collar Puller behind the (Shaft) side of the
Inner Collar as shown above.
2. Tighten the center Puller bolt to remove the Inner Collar from the Blade
Shaft.
•
Having the Outer Collar in place prevents the Puller and Inner Collar from flying
off when the taper breaks loose, and causing injury!
•
If the Inner Collar does not readily come free from the tapered Blade
Shaft, lightly tap on the central Puller bolt. This should cause the collar to
break free from the shaft.