Step 7, Step 6 – Gateway GT5448E User Manual
Page 44
CHAPTER 4: Upgrading Your Computer
38
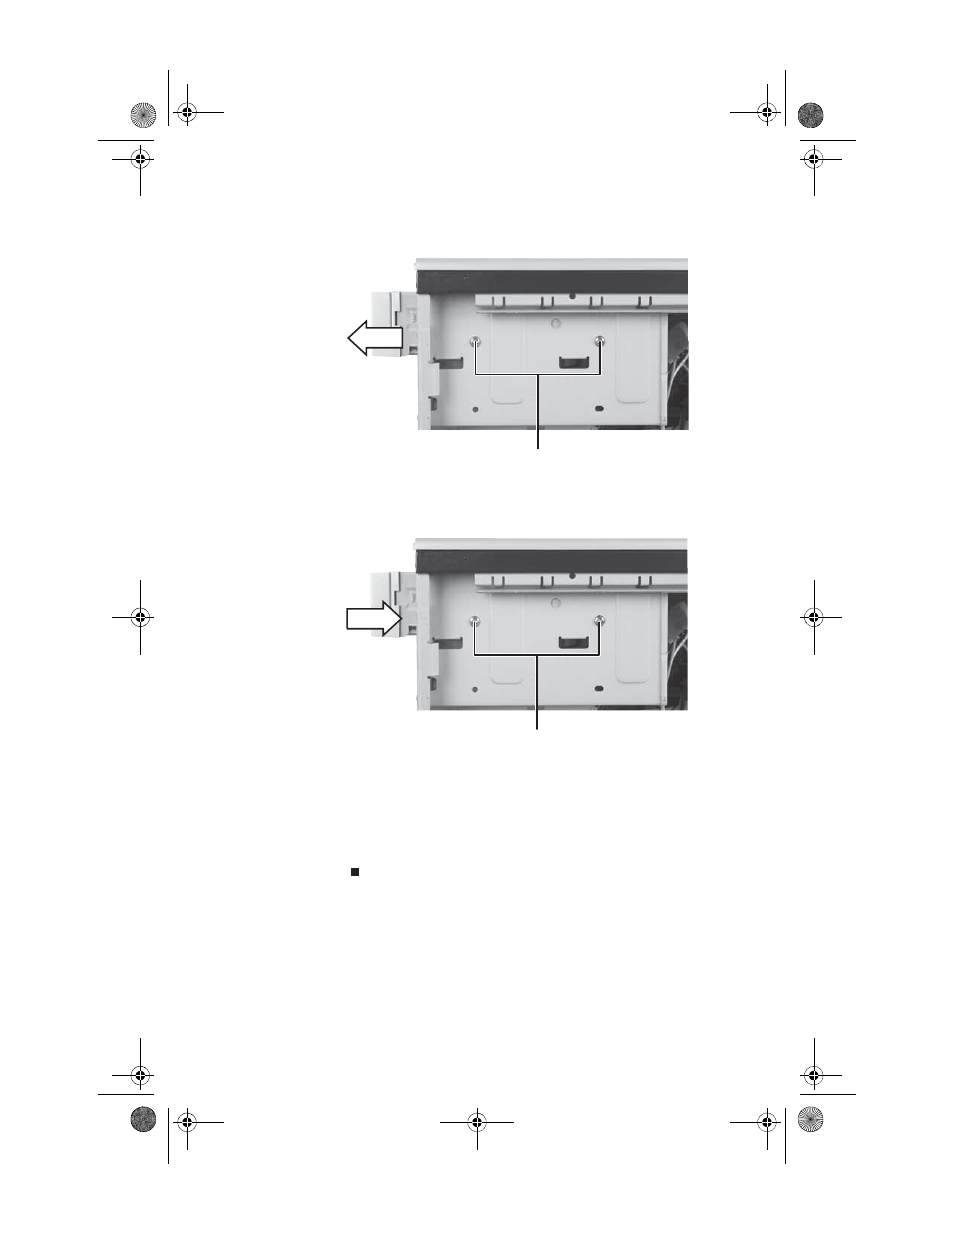
6
Remove the two drive retention screws, then slide the
drive forward and out of the drive bay.
7
Slide the new drive into the drive bay, line up the screw
holes on the drive bay with the screw holes on the drive,
then replace the two drive retention screws.
8
Reconnect the drive cables using your notes from
, or according to the manufacturer’s instructions.
9
Replace the front bezel by following the instructions in
“Replacing the front bezel” on page 32
10
Replace the side panel by following the instructions in
“Replacing the side panel” on page 33
.
Drive retention screws
Drive retention screws
8511861.book Page 38 Monday, December 18, 2006 11:20 AM
See also other documents in the category Gateway Computers:
- E-2300 (134 pages)
- E-4100 (144 pages)
- ALR 7300 (138 pages)
- E-4650 (134 pages)
- E-6300 (136 pages)
- E-9232T (96 pages)
- 610 (108 pages)
- ProfileTM 5 (292 pages)
- Profile 6 (130 pages)
- E SERIES E-6000 (190 pages)
- SZSL95IN0XXXXXXXX (132 pages)
- 8400 (34 pages)
- DX4800 (94 pages)
- GR380 F1 (17 pages)
- MAN FX510 (150 pages)
- GM5688E (140 pages)
- GR585 F1 (14 pages)
- 6400 (148 pages)
- GM5478 (2 pages)
- 7400 (156 pages)
- E-5250 (46 pages)
- FX6710 (1 page)
- E-9425R (118 pages)
- ALR 7200 (134 pages)
- FX542X (154 pages)
- 7250R (26 pages)
- 7250R (135 pages)
- DX430X (96 pages)
- 8450R (4 pages)
- 8450R (172 pages)
- 7450R (124 pages)
- E-5400 (130 pages)
- E-5200 (46 pages)
- PC (110 pages)
- GR160 F1 (14 pages)
- ALR 8300 (128 pages)
- eMachine 3 (96 pages)
- 9415 (188 pages)
- 980 (131 pages)
- 9210 (106 pages)
- E1400 (136 pages)
- FX542XT (94 pages)
- E3400 (126 pages)
- Media Center (28 pages)
- MT-6733 (3 pages)