Gold's Gym GR 7000 GGBE6974.1 User Manual
Page 11
11
9
90
13
84
6
84
79
33
93
98
84
93
5
3
103
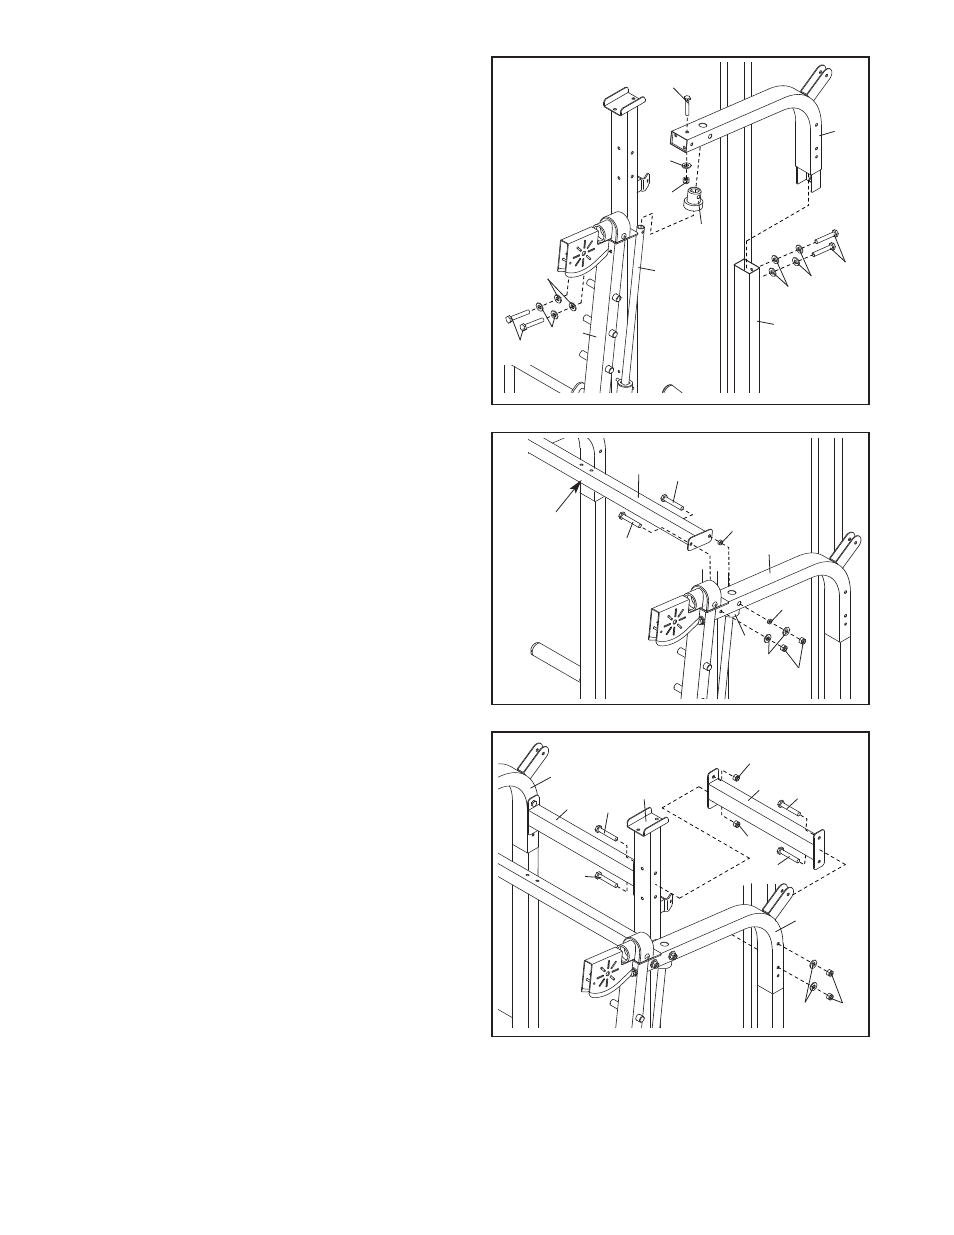
9.
Insert a Side Rod Cap (33) into a Side Top Frame
(13). Set the Top Frame onto the left Guide Rod
(5) and insert it into the Left Support (6).
Attach the Side Top Frame (13) to the Left
Upright (3) and the Left Support (6) with two M10
x 73mm Button Screws (103), two M10 x 25mm
Button Screws (98), four M10 Split Washers (93),
and four M10 Washers (84).
Do not tighten the
Button Screws yet.
Insert an M10 x 67mm Button Bolt (90) through
the Left Upright (3) and the Side Top Frame (13).
Hand tighten an M10 Washer (84) and an M10
Nylon Locknut (79) onto the Button Bolt.
Repeat this step with the other Side Top Frame
(13) and the right side of the weight rack.
10. Orient the Center Top Frame (14) with the decal
in the position shown.
Make sure that the Rod
Cap (33) is inside of the left Side Top Frame
(13).
Attach the Center Top Frame (14) to the Side Top
Frame (13) with two M10 x 93mm Button Bolts
(97), two 17mm Spacers (66), two M10 Washers
(84), and two M10 Nylon Locknuts (79).
Do not
tighten the Nylon Locknuts yet.
Repeat this step with the right Side Top Frame
(not shown).
97
14
13
33
66
79
84
97
Decal
10
66
11
13
13
15
15
97
97
79
79
92
8
92
79
84
11. Attach a Support Frame (15) to the left Side Top
Frame (13) with two M10 x 93mm Button Bolts
(97), two M10 Washers (84), and two M10 Nylon
Locknuts (79).
Do not tighten the Nylon
Locknuts yet.
Attach the other Support Frame (15) to the
right Side Top Frame (13) in the same manner.
Attach the two Support Frames (15) to the
Backrest Upright (8) with two M10 x 95mm Button
Bolts (92) and two M10 Nylon Locknuts (79).
Do
not tighten the Nylon Locknuts yet.