Grizzly G0528 User Manual
Page 17
model g0528 (mfg. 5/04+)
-15-
Note: For the next few steps, do not com-
pletely tighten the fasteners until instructed.
6. position the legs on the outside of the side
supports, and secure the legs to the supports
with (12)
5
⁄
16
"-18 x
1
⁄
2
" carriage bolts,
5
⁄
16
" flat
washers,
5
⁄
16
" lock washers, and
5
⁄
16
"-18 hex
nuts.
Note: In the normal upright view if looking at
the machine from the front, the leg with the
switch cut-out should be on the right hand
side to allow for switch mounting clearance.
7. Secure the shelf to the stand legs with (16)
5
⁄
16
"-18 x
1
⁄
2
" carriage bolts,
5
⁄
16
" flat washers,
5
⁄
16
" lock washers, and
5
⁄
16
"-18 hex nuts.
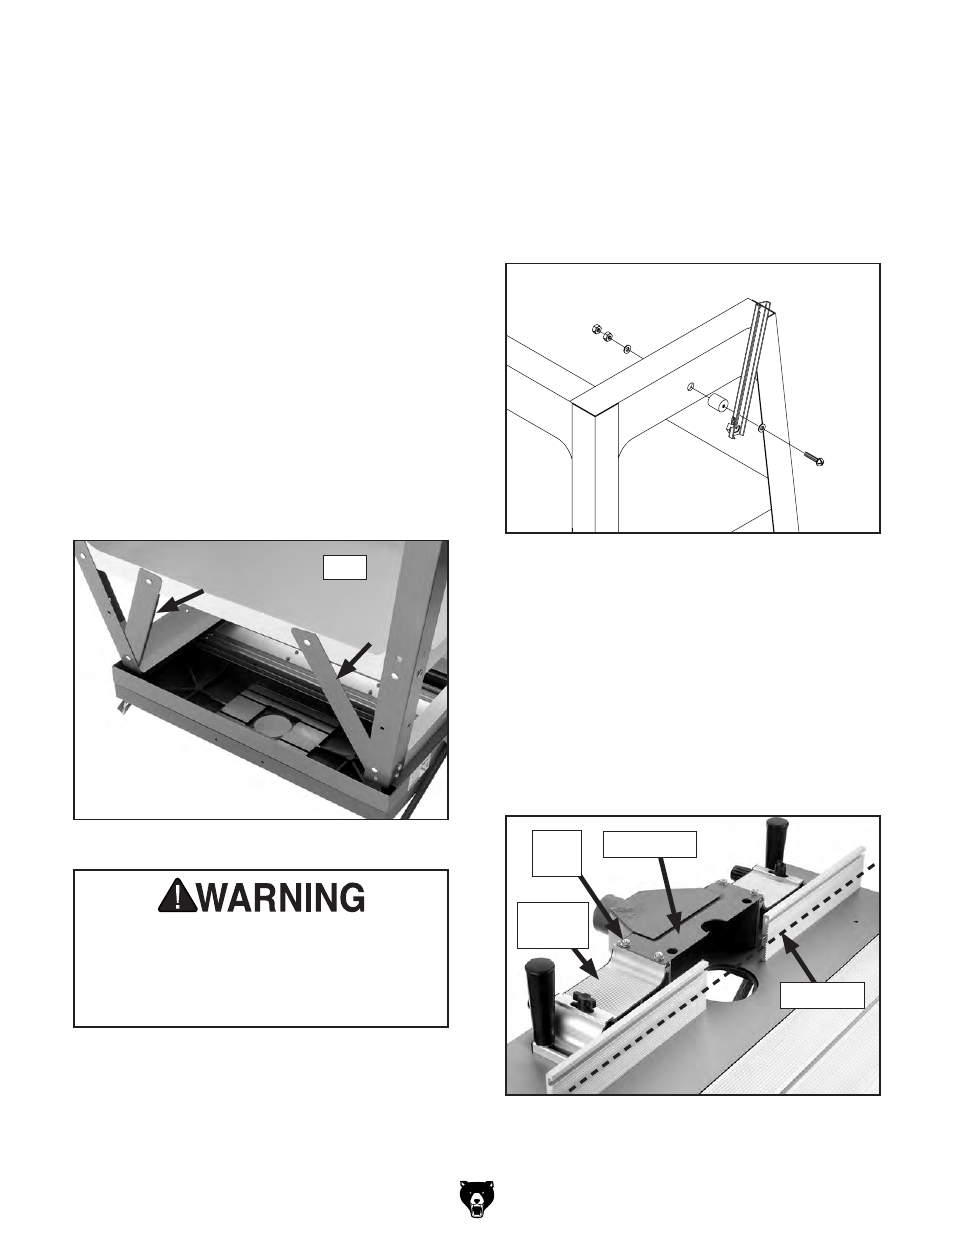
8. Secure the diagonal supports (figure 10)
to the legs and the shelf with (4)
5
⁄
16
"-18 x
1
⁄
2
" carriage bolts,
5
⁄
16
" flat washers,
5
⁄
16
" lock
washers, and
5
⁄
16
"-18 hex nuts.
9. in the order shown in figure 11, slide a
washer onto each screw, and insert the
screws through the holes in each brace, then
thread the screws through the spacers.
Note: Allow just enough of a gap between the
washers and spacers for the table braces to
slide freely.
figure 11. assembling the table braces.
g0528
Sliding router table
hands and fingers can become seriously
injured if they are pinched between the
stand edge and the table. DO NOT place
hands or fingers near the stand edge while
the table is in the raised position.
figure 10. table diagonal support positions.
Shelf
10. Secure with the washers and hex nuts.
11. Secure the left and right fence assemblies to
the table with the fence lock handles in the
holes located closest to the edge of the cast
iron table.
12. Secure the dust hood to the top of each fence
assembly with the pre-installed lock nuts
(
figure 12).
figure 12. installed fence and dust hood.
Fence
housing
lock
nuts
dust hood
alignment