2, f, 8: h – GE EPM 3000P User Manual
Page 37
Chapter 9 Programming GROUP 2: Meter Calibration
9.2 G
ROUP
2, F
UNCTIONS
0-8: H
IGH
E
ND
C
ALIBRATION OF
V
OLTAGE
C
HANNELS
, H
IGH
& L
OW
E
ND
C
ALIBRATION OF
A
MPERAGE
C
HANNELS
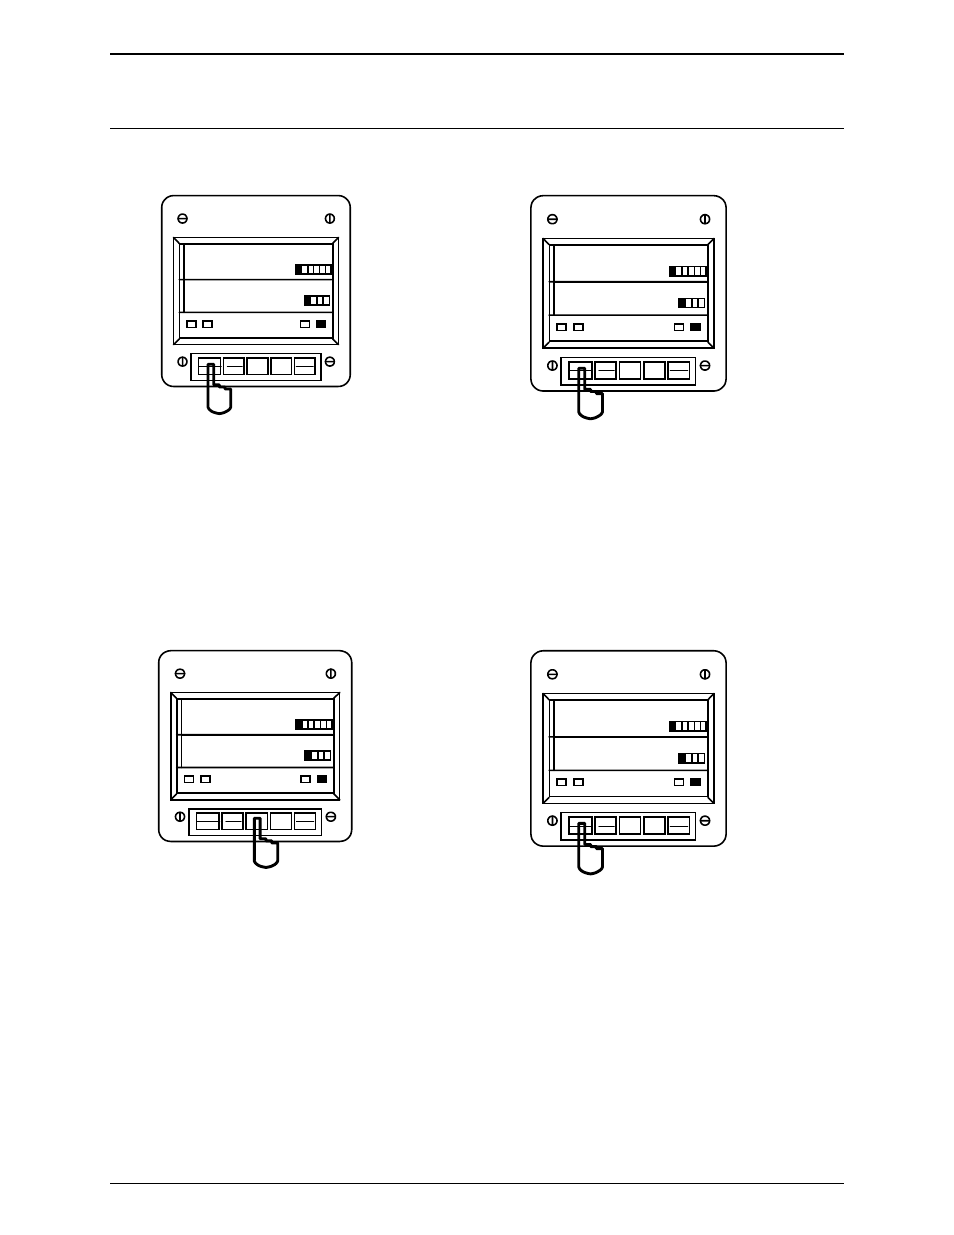
To change the CALIBRATION, follow these steps:
NOTE: PRESS MAX/MIN/LIMITS, AT ANY TIME, TO CANCEL BEFORE STORING THE LAST DIGIT OR SWITCH.
MAX
AC VOLTS
A B C N
AC AMPS
MAX/MIN
LIMITS
VOLTS
PRINT
PROG
PHASE
NEXT
2.
AMPS
B C A
I I I
A B C
N N N
I I I
A B C
LM2
LM1
MIN
MAX
AC VOLTS
A B C N
AC AMPS
MAX/MIN
LIMITS
VOLTS
PRINT
PROG
PHASE
NEXT
2 I.
AMPS
B C A
I I I
A B C
N N N
I I I
A B C
LM2
LM1
MIN
I20
Step 1:
a. Enter Group Level of Programming Mode,
(see Chapter 6).
b. Press MAX/MIN/LIMITS until 2. appears in upper
display.
c. Press VOLTS activate the Group.
A one-digit password is required to continue.
d. Press PRINT/PROG until 5 appears.
e. Press VOLTS to select.
Step 2:
Refer to Table 9-0 for Function Number that
corresponds to channel requiring calibration.
a. Press MAX/MIN/LIMITS (to calibrate VOLTS BN) until
21. appears in upper display.
(2P is pre-calibrated. This is a factory set value and
should not be altered).
MAX
AC VOLTS
A B C N
AC AMPS
MAX/MIN
LIMITS
VOLTS
PRINT
PROG
PHASE
NEXT
2 I
AMPS
B C A
I I I
A B C
N N N
I I I
A B C
LM2
LM1
MIN
I _ _
MAX
AC VOLTS
A B C N
AC AMPS
MAX/MIN
LIMITS
VOLTS
PRINT
PROG
PHASE
NEXT
2 I.
AMPS
B C A
I I I
A B C
N N N
I I I
A B C
LM2
LM1
MIN
I20
Step 3:
Apply the calibration to the appropriate channel.
a. Press VOLTS to activate calibration.
b. Press PRINT/PROG for desired number.
Press PRINT/PROG once and the blank signifies a zero.
Press PRINT/PROG twice and 1 appears.
c. Press VOLTS to store.
When complete, lower display indicates the calibrated
reading after 10-15 seconds.
Step 4:
a. Press MAX/MIN/LIMITS to exit calibration sequence.
Proceed to calibrate another function, or exit.
See Chapter 12 to Exit.
R
EPEAT THIS PROCEDURE FOR
FUNCTIONS 0
-
5.
32
GE Industrial Systems