Assembly – Grizzly G1071 User Manual
Page 16
-14-
model g1071 (mfg. 1/02+)
Assembly
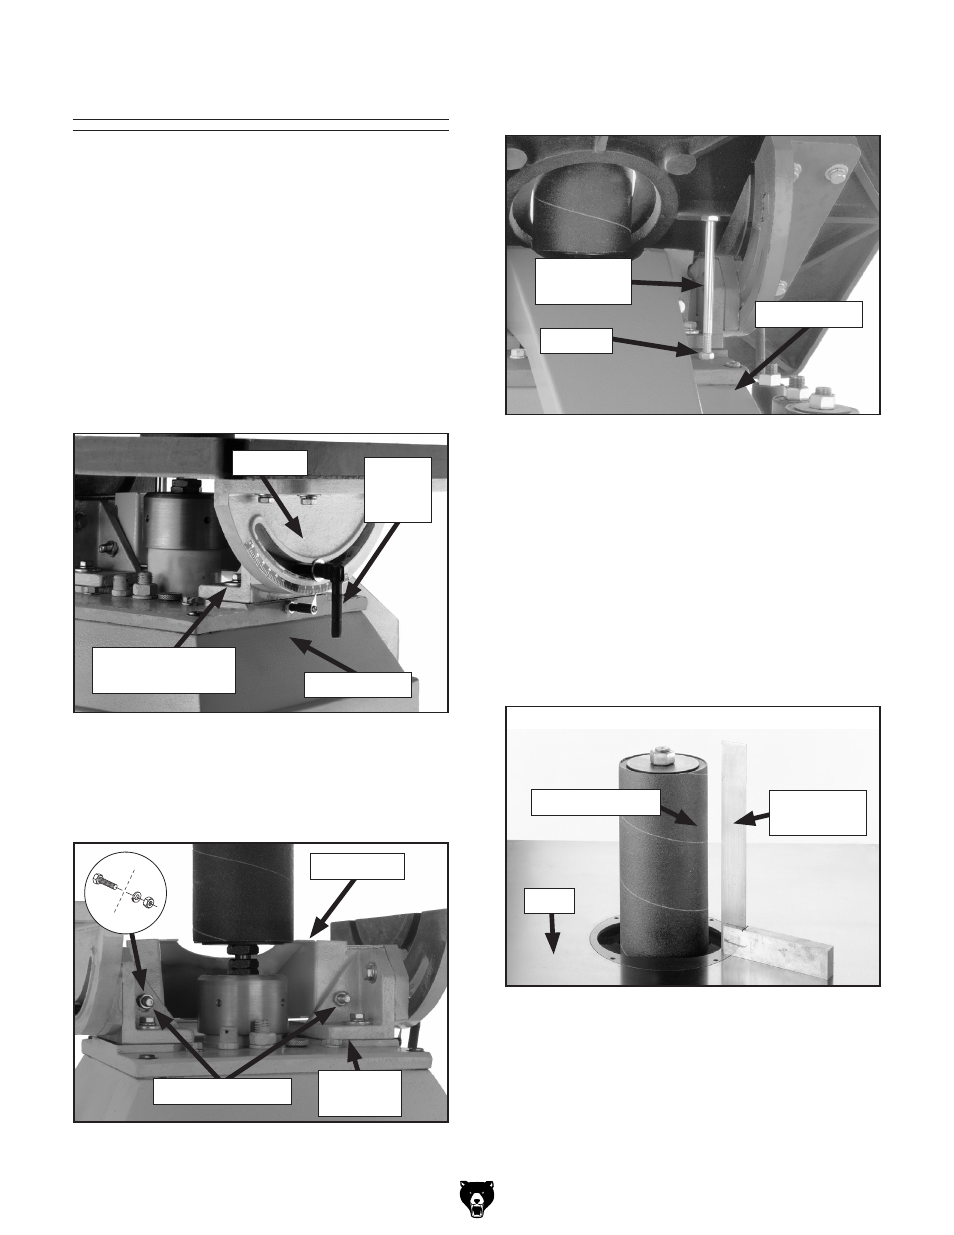
To assemble your new machine:
1. With the assistance of a helper, carefully lift
the table/trunnion assembly onto the top of
the sander base.
2. align the mounting holes in the trunnions with
the mounting holes in the sander base.
3. using the (4)
3
⁄
8
"-16 x 1
1
⁄
4
" hex bolts and
3
⁄
8
" lock washers, secure the table/trunnion
assembly to the sander base as shown in
figure 8.
figure 8.
Table mounting.
figure 10.
Table stop bolt.
4. secure the dust chute to the trunnion assem-
bly with (2)
3
⁄
8
"-16 x 1
1
⁄
2
" hex bolts,
3
⁄
8
" lock
washers and
3
⁄
8
"-16 hex nuts (
figure 9).
5. thread the table stop bolt and jam nut into
the sander base, as shown in
figure 10.
6. loosen the table lock handles located on
each side of the table trunnion assembly
(
figure 8).
7. using a machinist square, bring the table sur-
face square to the spindle surface as shown
in
figure 11.
Note: It may be necessary to thread the table
stop bolt further into the base in order to
make the table square to the spindle.
mounting
hardware (1 of 4)
trunnion
sander Base
sander Base
Jam nut
table stop
Bolt
figure 11.
Checking table for square.
table
machinist's
square
spindle surface
figure 9.
Dust chute.
dust Chute
trunnion
assembly
hex Bolts & nuts
lock
handle
(1 of 2)