Step 1, install framing for hood support, Step 2, install mounting brackets, Installation instructions – GE Monogram MONOGRAM ZV950 User Manual
Page 9: 1 install framing, For hood support, 2 install mounting brackets
9
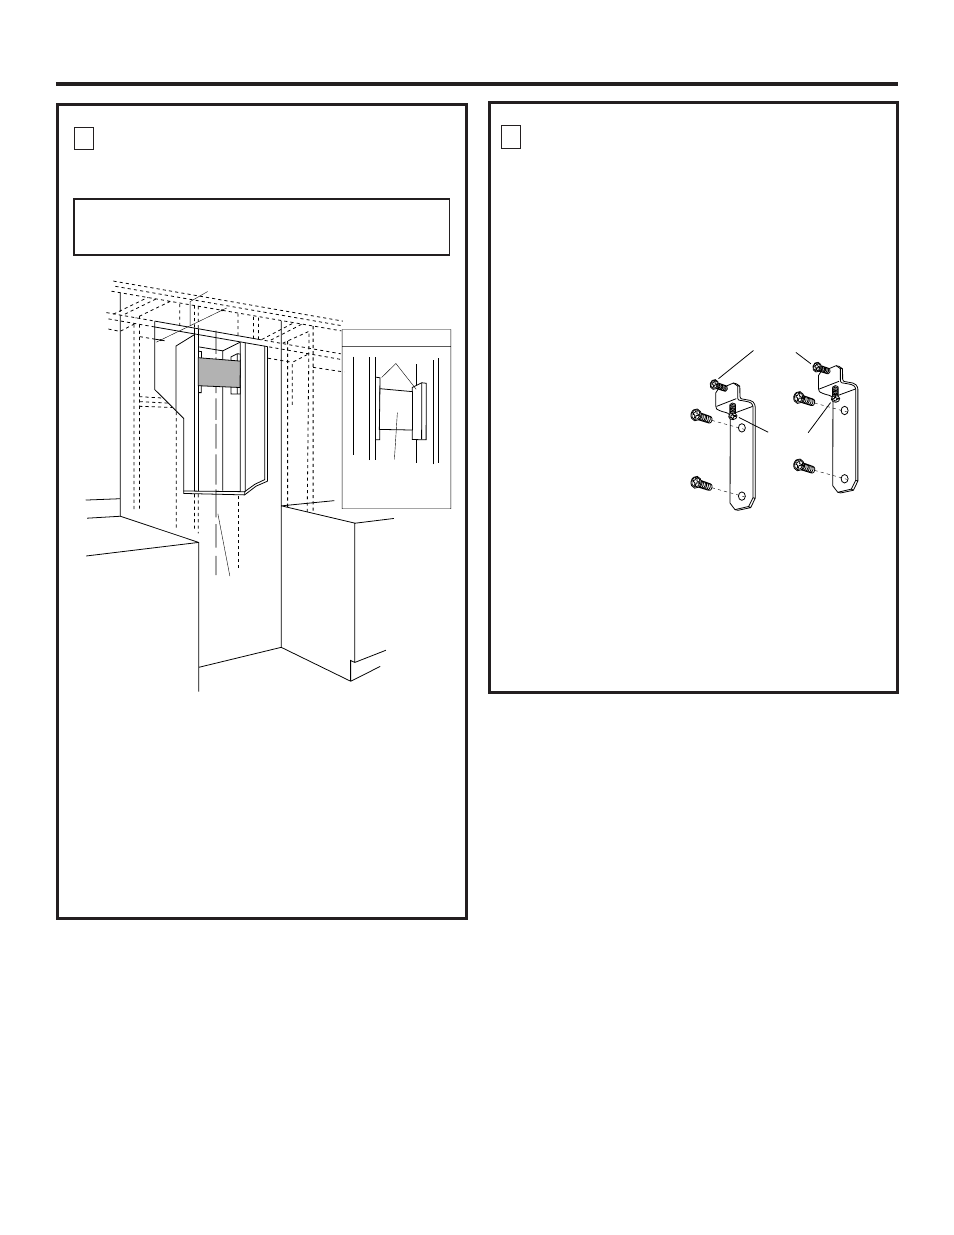
1 INSTALL FRAMING
FOR HOOD SUPPORT
IMPORTANT: Framing must be capable
of supporting 100 lbs.
Installation Instructions
If drywall is present, mark the screw hole locations for
the top mounting brackets. Remove the template.
• Cutaway enough drywall to expose 2 vertical studs at
the bracket location indicated on the template.
• Install a horizontal support at least 1" x 6" between two
wall studs at the top bracket installation location. The
horizontal support must be flush with the room side of
the studs. Use cleats behind both sides of the support
to secure the support to wall studs.
• Reinstall drywall.
Centerline of
Installation
Space
8" Min. Opening for Ductwork
124Dia25
View From Rear
Cleats
1" x 6" Min.
Mounting
Support
2 INSTALL MOUNTING BRACKETS
This vent hood must be secured to the horizontal support or wall
studs.
• With the template taped in place, use a punch
to mark all mounting screw locations.
• Drill 1/8" pilot holes at the 6 punched locations.
• Remove the template.
• The 4 support bracket holes must enter studs
or the horizontal support.
Note: Screws “A” and
“B” are pre-assembled
onto the brackets. Do not
remove these screws.
124Dia15
Screws
“B”
Screws
“A”
• The two lower holes can be enlarged if they did not
enter studs to 3/8". Tap anchors for wall fasteners
into the bottom holes.
– Screws should be inserted by hand into the fasteners
to allow anchors to expand against the wall material.
Remove the screws for final installation.
• Secure the mounting brackets to the wall studs with
wood screws provided.