Step 3, install duct bracket, Step 4, install the hood, Installation instructions – GE Monogram MONOGRAM ZV950 User Manual
Page 10: 4 install the hood, 3 install duct bracket
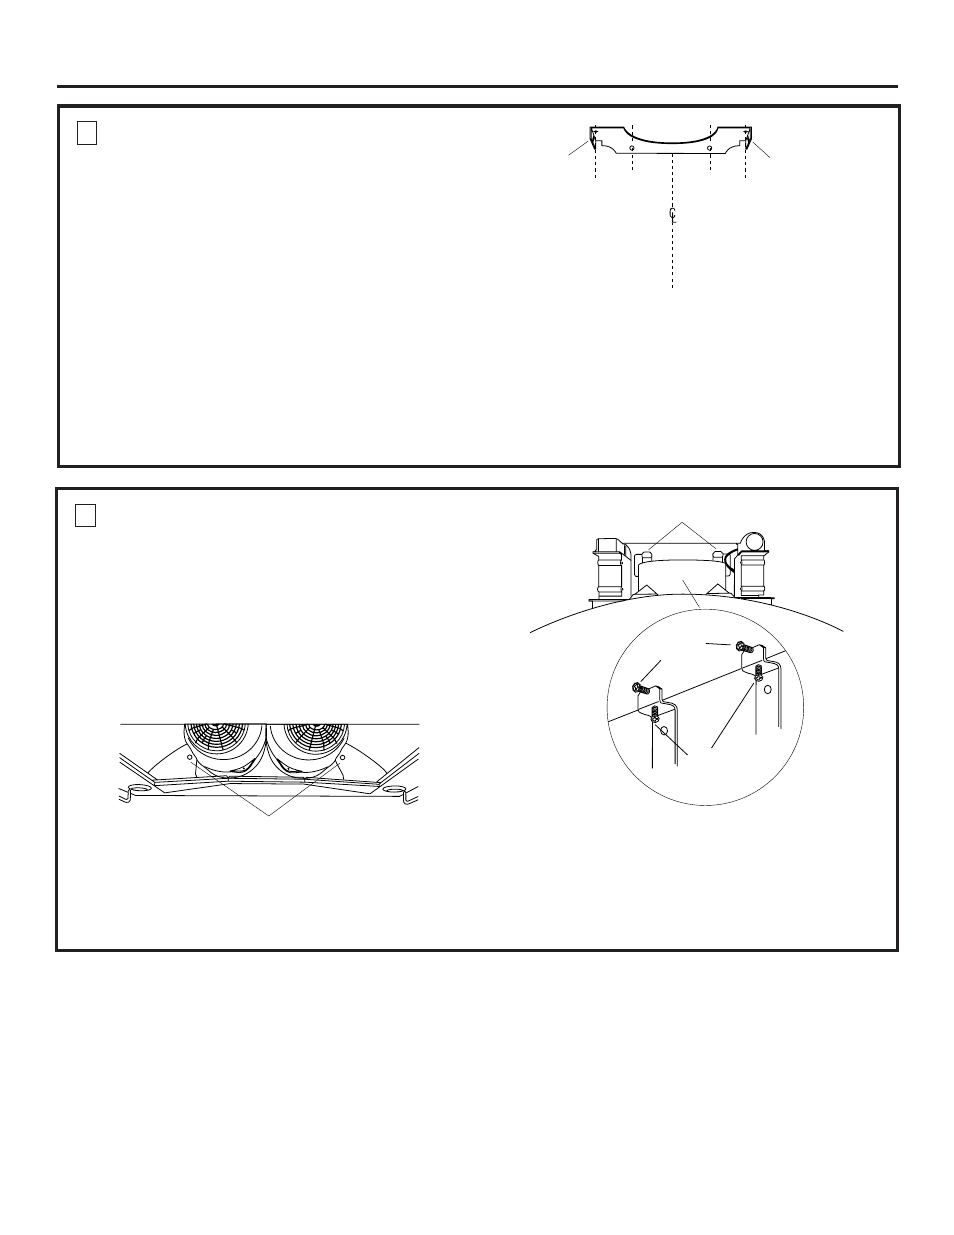
Pre-Tap
Side
Screw
Pre-Tap
Side
Screw
124Dia18
Bracket Tabs
124Dia16
Screws
“B”
Screws
“A”
Installation Instructions
10
4 INSTALL THE HOOD
Place the hood on the brackets and slide left to right
to align with rectangular slots at the top.
• Adjust the installation height by tightening or
loosening the screws “A” at the bottom of the brackets.
• Align the hood lower mounting holes with pilot holes
in the wall.
• Using two large flat washers (supplied), install wood
screws or wall fastener screws, loosely, into lower
mounting holes. Do not tighten.
Lower Mounting Holes
124Dia17
• Level the hood by tightening or loosening the screws
“A” located on the bottom mounting brackets.
• Tighten lower mounting screws.
• Tighten screws “B” located at the top of the mounting
bracket against the hood to clamp the position.
Do not overtighten screws.
3 INSTALL DUCT BRACKET
The duct bracket must be installed against the ceiling.
This bracket will hold the decorative duct cover in place
at the top.
• Install the 2 small screws into the sides of the duct
bracket. Remove the screws. Pre-tapping the holes will
insure ease of final installation.
Secure the bracket to the ceiling and wall:
• Mark the 4 screw hole locations.
• Drill 1/8" pilot holes in marked bracket location.
• If pilot holes do not enter studs, enlarge the holes to
3/8" and install wall fastener anchors.
• Drive screws, by hand, into the fasteners to allow
anchors to expand. Remove the screws.
• Secure the bracket to the ceiling and wall with wood
screws and/or fasteners.