Installation – Wolf 60 Inch Outdoor Pro Wall Hood Installation Guide User Manual
Page 7
wolfappliance.com | 7
INSTALLATION
Installation
2
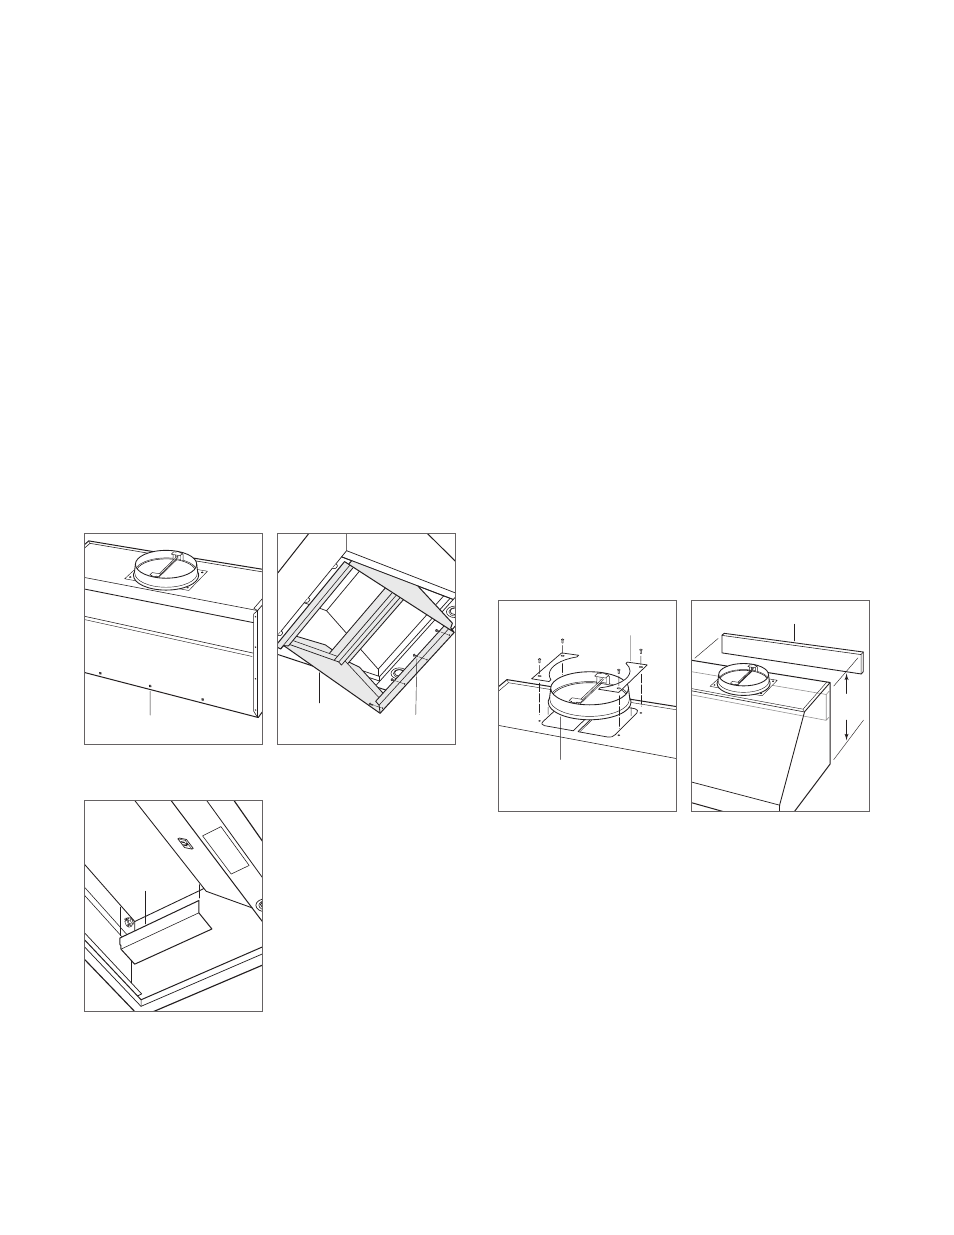
For 60"
(1524)
wide hoods only, remove and discard three
shipping screws from the back of the hood. Refer to the
illustration below.
3
Remove the hood’s internal frame indicated by the
shaded area. Remove only the four screws indicated in
the illustration below.
4
Remove one of the two electrical knockouts from the
back of the hood.
5
Remove the wood mounting strip from the back of the
hood by extracting the screws from inside the hood.
6
Remove the electrical cover from inside the hood. Refer
to the illustration below.
7
Remove the transition, hold-down brackets, and screws
from the packaging and use the hold-down brackets and
screws to secure the transition to the top of the hood.
Refer to the illustration below.
8
Position the mounting strip on the wall and secure it to
the wall framing with the wood screws provided. Refer to
the illustration below.
9
Lift the hood into position and insert Romex
®
wire(s) into
the electrical box knockout and secure with the provided
connector.
10
Secure the hood to the mounting strip and wall structure
with the provided screws and washers.
11
Connect the ducting to the transition and secure with
duct sealing tape.
12
Reinstall the internal frame.
SHIPPING SCREWS
INTERNAL
FRAME
SCREWS
Screws (60" wide hoods only)
Internal frame
HOLD-DOWN
BRACKET
TRANSITION
16"
(406)
MOUNTING STRIP
Transition mounting
Hood installation
ELECTRICAL
COVER
Electrical cover