Photogenic Professional Lighting Matrix MCD400R Monolight with Ion Inverter, Beauty Dish, Grid, and Stand User Manual
Page 12
P a g e
12 | 16
To discharge the Flash unit:
a. Make sure the Flash unit is ON and set to the lowest power level. The LED display should
show “1.0” and should not be flashing.
b. Push the red "TEST" button on the rear panel of the Flash.
c. Immediately turn off the power switch on the rear panel of the Flash. Do not allow more
than 1/2 second between pressing the "TEST" button and the power switch.
d. Remove power cord from power source before removing the flashtube. It is
recommended to wait at least 30 minutes before touching/removing the flash tube.
Note
: Use cotton gloves or a clean cloth to prevent fingers from touching the flash tube.
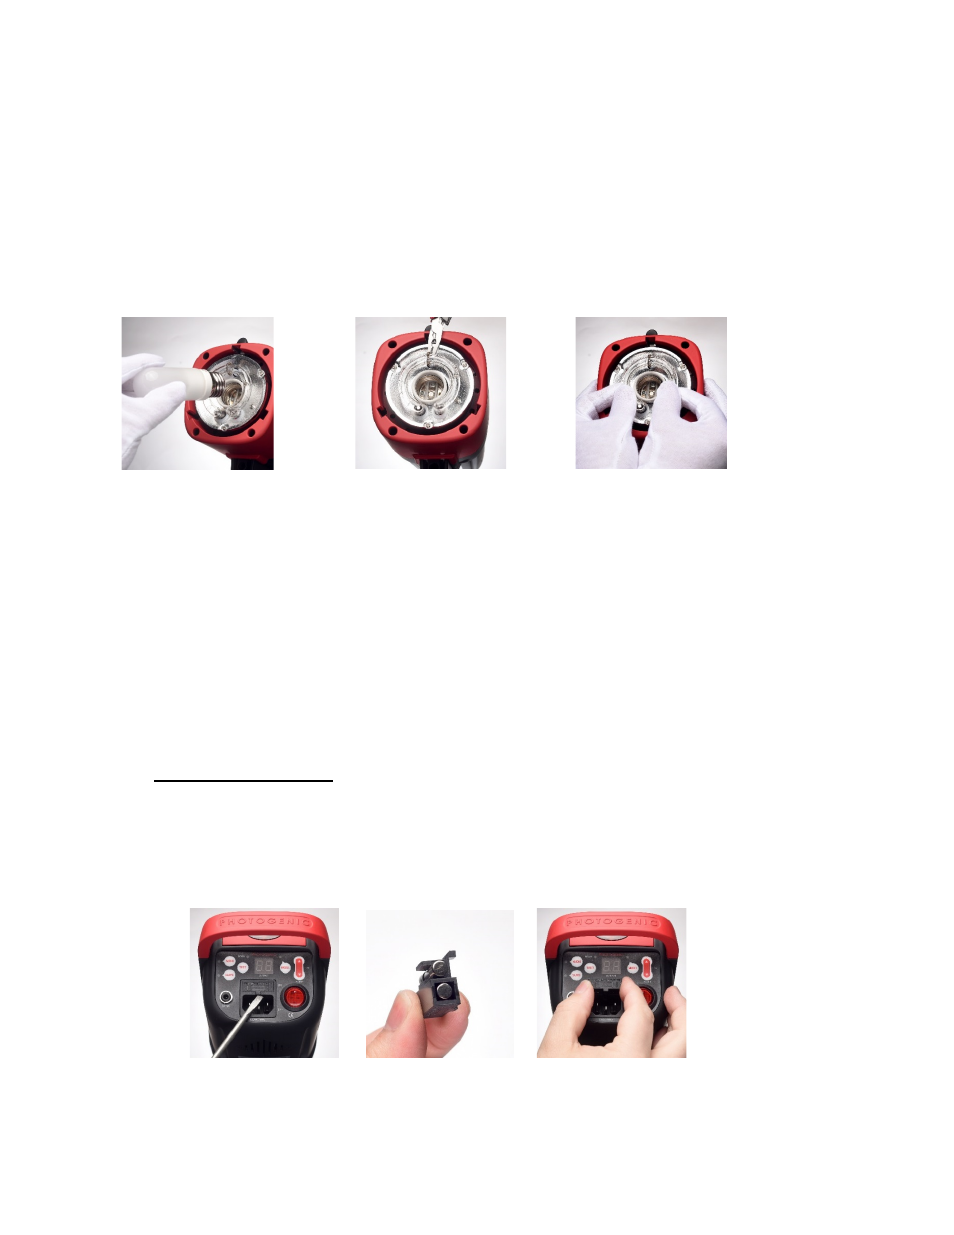
10.2 Remove Old Flash Tube
First, remove the reflector. Then, using cotton gloves or clean cloth, remove the modeling lamp (Fig. 19).
Remove the retention spring wrapped around the top of the flash tube. With needle-nose pliers, unhook
the retention spring loop (Fig. 20). Again using cotton gloves or a clean cloth, grip the base of the flash
tube on each side and carefully pull the flash tube from the flash unit (Fig. 21).
10.3 Install New Flash Tube
Make sure the power switch is off and the power cord is disconnected from the source. Locate the two
flash tube pin sockets above the modeling lamp socket. Using cotton gloves or a clean cloth, push the
pins of the flash tube into the sockets using firm, even pressure at the base of the flash tube. With
needle-nose pliers, hook the retention spring over the hook above the flash tube. Re-insert the modeling
lamp using white cotton gloves or a clean cloth. Re-install the reflector.
11.0 Changing the Fuses
a. A 6.3A fuse, mounted on the rear panel, protects the circuitry in the flash unit.
Switch off the
unit,
and
disconnect the power supply before changing the fuse.
Never replace with a fuse
of a different type or rating. A spare 6.3A fuse is fitted in the fuse holder K (Fig. 5).
b. Use a small screwdriver to release the fuse cover. Remove the old fuse, place the new fuse
in the slot, and then replace the fuse holder (Fig. 22).
Figure 22
Figure 19
Figure 20
Figure 21