Climate logic – Irritrol Climate Logic User Manual
Page 10
10
Weather Sensor Installation
• Press the
ExIT
key (three times) to return to the Home screen.
After a brief time, the current temperature, watering history
graph line, and signal-strength bars will be displayed.
Note: A single Weather Sensor can be paired to multiple Receiver
Modules when additional Climate Logic systems are installed
within reception range.
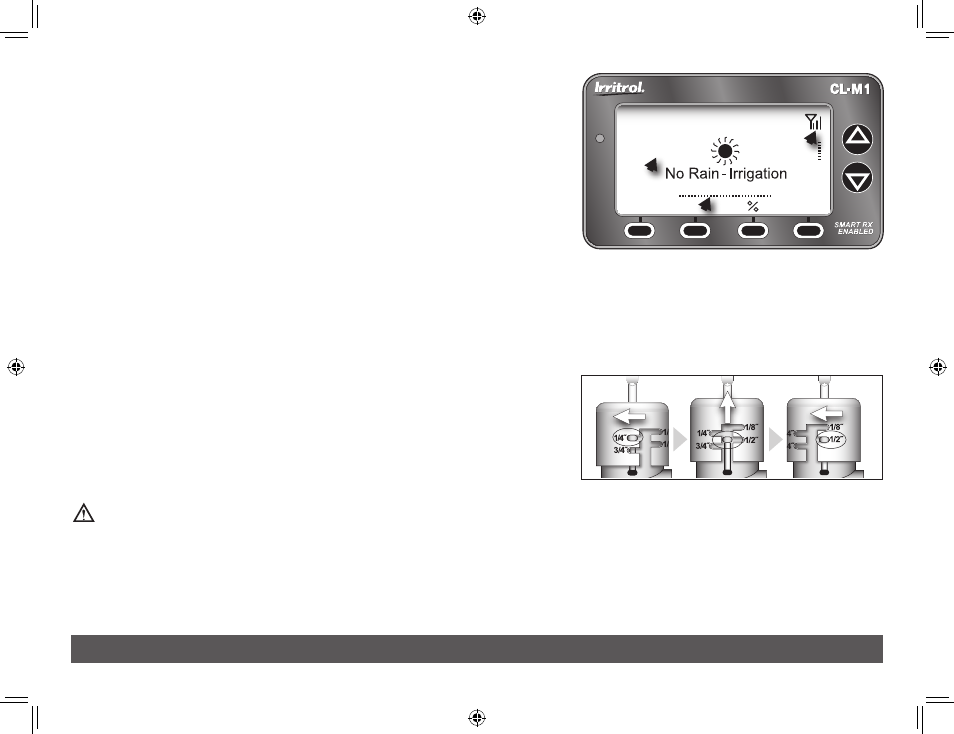
2. The Rain Sensor default threshold is 1/4” (6 mm) of accumulated
rainfall (nominal). The threshold can be lowered to 1/8” (3 mm) or
raised to 1/2” (12 mm), or 3/4” (19 mm) as preferred. Prior to install-
ing the Weather Sensor, adjust the threshold to the preferred setting as follows:
Note: Increasing the threshold extends the length of time required for the Weather Sensor to signal the
Receiver Module to stop irrigation, as well as extending the dry-out period before scheduled watering can
resume. In areas where heavy fog, mist or high humidity is common, the 1/8” (3 mm) setting is not recom-
mended due to the increased sensitivity to moisture.
• Turn the Rain Sensor cap slightly, releasing it from the
retention pins, allowing the cap to move vertically.
• Turn the cap to engage the retention pins at the preferred
slot position.
Important: The Weather Sensor must have full exposure to sun, wind and rain, and must not be installed
inside a rain gutter, or in any location where immersion, runoff, or contact with irrigation spray will occur.
Avoid installation near a heat source, such as a heater vent or chimney. Wooden surfaces are preferred
to concrete or asphalt shingles to reduce reflected heat. Installation over a planted area is preferred to a
driveway, walkway etc. Avoid installation near any large metal structure, or high current-draw equipment
that can cause signal interference. Ensure the antenna wire hangs vertically without contact.
CLIMATE LOGIC
MENU
2:32
p
11/16
69
F
40%
CL User Guide Final Edit.indd 10
2/11/11 5:19 PM