Changing the hopping feet – Baby Lock Crown Jewel II (BLCJ18-2) Manual User Manual
Page 24
17
NOTE: Before threading the needle test that
the machine is threaded properly and the
tension is correct by carefully pulling the top
thread. It should pull smoothly with light to
medium tension. If thread pulls freely with
no tension - rethread the machine.
4.
Once the thread is in place, be sure that the
thread catches on the take up spring and then
pull it down under the stirrup thread guide D.
5.
Bring the thread up and through the take-
up lever from back to front, and then down
through thread guide E.
6.
Pull the thread down to the needle thread
guide and thread through the hole
(Detail 3 in Diagram F).
7.
Make sure the thread is following the groove
down the front of the needle and insert thread
through the eye of the needle from front to
back. While pulling thread through the eye of
the needle be careful that the thread does not
twist around the needle.
IMPORTANT NOTES: The Baby Lock Crown
Jewel II quilting machine does not have a
presser foot lever or top tension release like
a home sewing machine. On a home sewing
machine the top tension is released when
the presser foot is raised allowing the thread
to come freely out of the machine. When a
home machine is threaded the tension discs
are released and open to allow the thread to
easily fall between the tension discs. This is
not the case with the Baby Lock Crown Jewel
II quilting machine. Consequently the top
tension is always tight and the tensions discs
are never open. Therefore the thread must
be pulled up or “flossed” between the ten-
sion discs or it will stay outside the discs and
float without tension, causing serious tension
problems and/or thread nests. It is also pos-
sible to bend the needle while it is threaded if
care is not taken while moving the machine
around the quilt because the top tension is
never released.
Your machine comes with two hopping feet: a ruler foot
and an open-toe foot. Use the ruler foot for ruler work and
everyday quilting, and the open-toe foot when you need
greater stitch visibility (such as micro quilting).
1.
Remove the foot that is
on the mount by using
the 2.5mm Allen wrench
to loosen the mounting
screw far enough that you
can slide the foot off of
the mount.
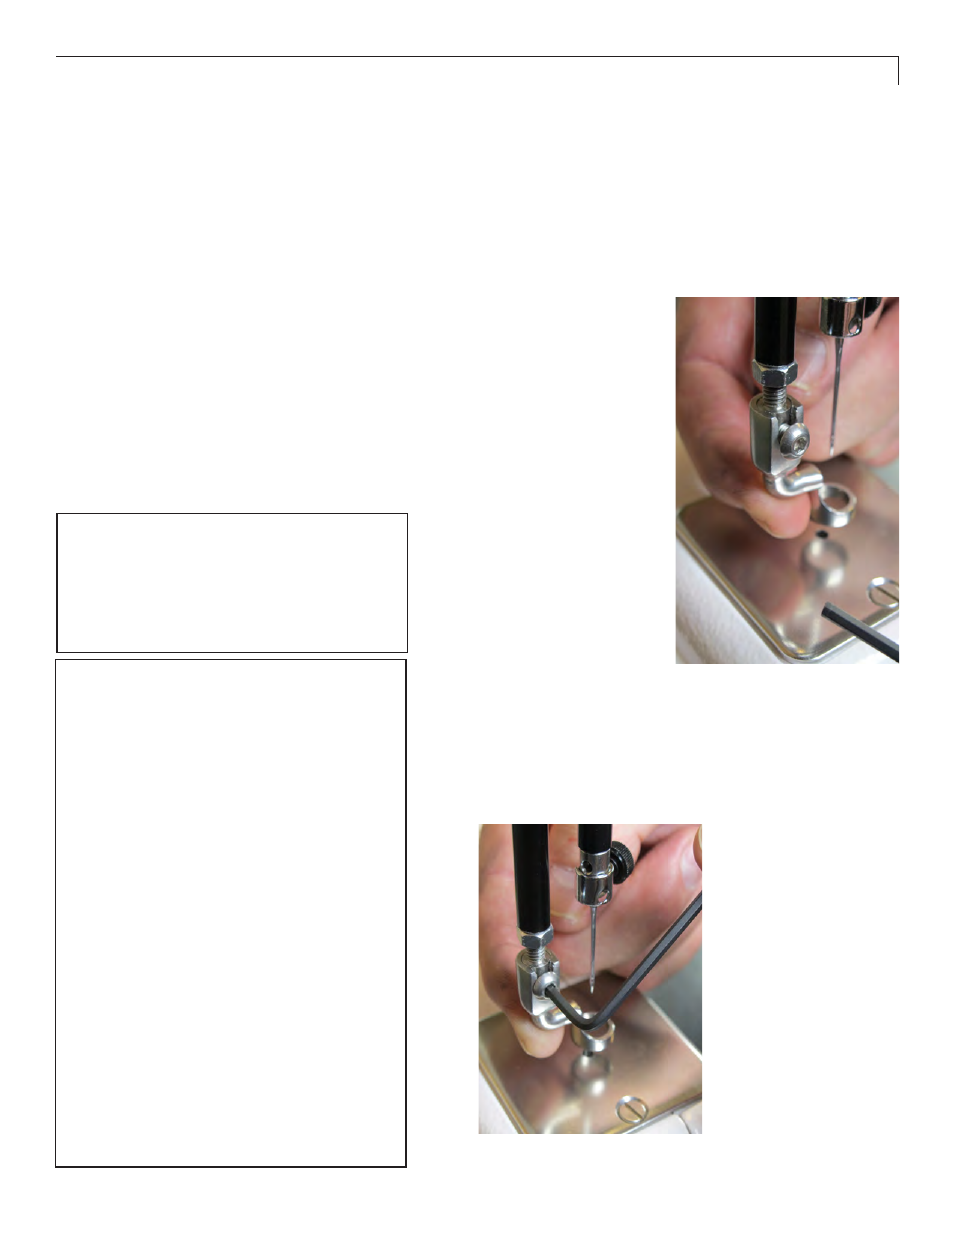
2.
Slide the desired foot onto
the mount (figure 13).
Note that the opening on
the side of the foot is lined
up with the screw hole.
Push the foot up as far as
it will go.
3.
Ensure the foot is centered with the needle when the
foot is fully tightened with the 2.5mm Allen wrench. If
it isn’t properly centered, loosen the lock nut; center
the foot with the needle; hold the foot in position; and
firmly tighten the lock nut (Figure 14).
Changing the Hopping Feet
Figure 13
Figure 14