Installing rear handles – Baby Lock Crown Jewel II (BLCJ18-2) Manual User Manual
Page 18
11
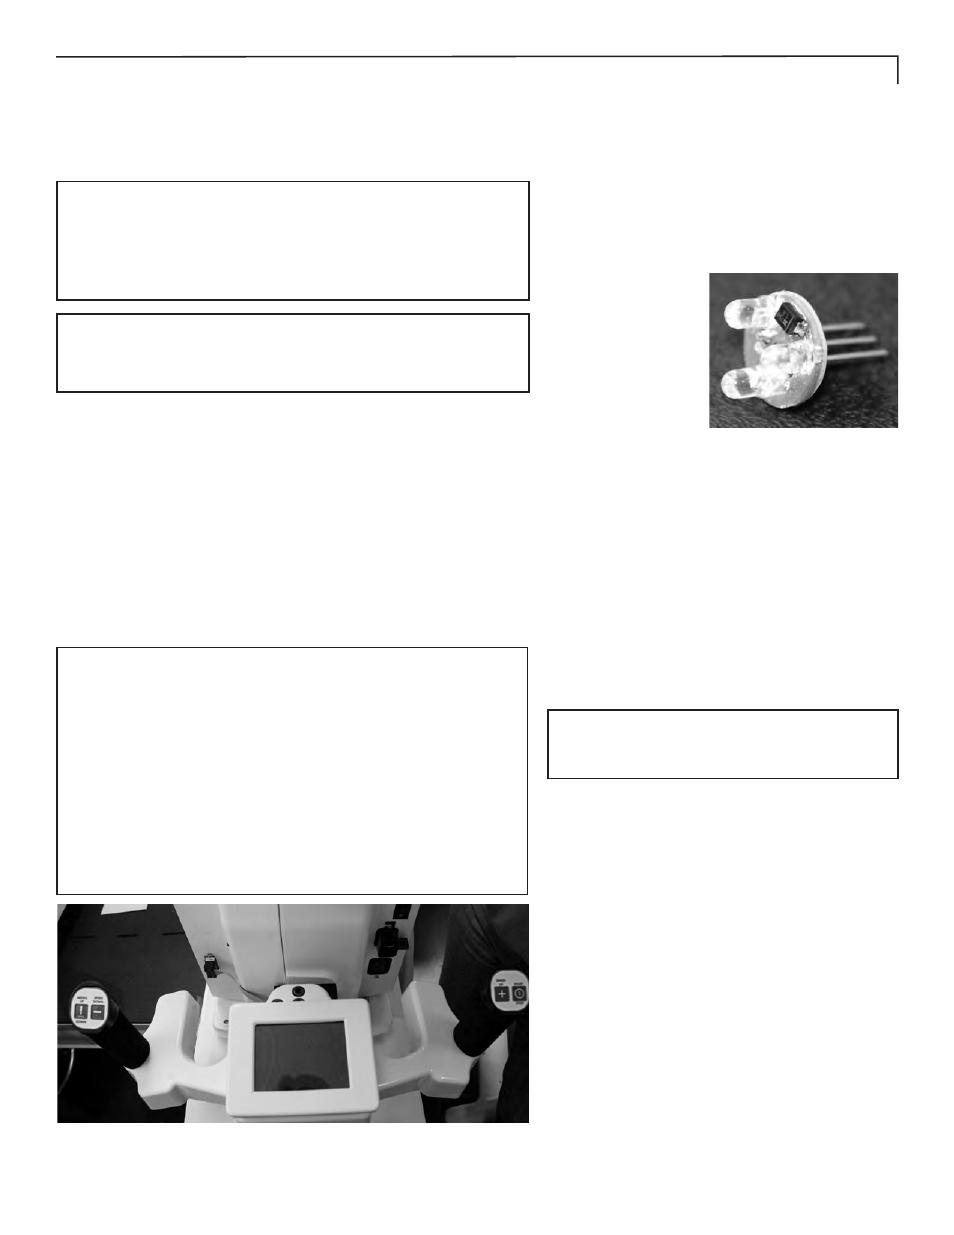
Cluster LED Pin Light
Installation and/or
Replacement
The Cluster LED
(Figure 7) pin lights
are located on the
underside of the
front handles. While
LED lights have
a very long life
expectancy, oc-
casionally you may
need to replace one
or you may choose to add more Cluster LED pin
lights for additional lighting (available from your
Baby Lock retailer). You may add up to 10 addi-
tional LED Clusters on the front handles if desired.
Removal:
1.
Shut off the power to the machine.
2.
Grasp the Cluster LED pin light by the base of
the cluster with your fingertips.
NOTE: Do not grasp the LEDs themselves, as
they may break.
3.
Pull straight downward without twisting (slight
rocking back and forth may be required).
4.
If you are unable to remove the lights with your
fingers, you may use an extraction tool or a pair
of needle-nose pliers to carefully grasp the base
of the light cluster and pull downward.
Installation:
1.
Shut off the power to the machine.
2.
Insert the new Cluster LED pin light, match-
ing the three pins with the three holes in the
receptacle (orientation is not critical).
3.
Press firmly until the LED pin light is fully
inserted (the base will be against the metal
closing plate of the handle).
Installing Rear Handles
CAUTION: Check that the Baby Lock Crown Jewel II is un-
plugged from the electrical outlet. All power to the machine
must be turned off when installing the back handles. Failure to
do so can result in damage to the machine.
IMPORTANT NOTE: Care must be taken to not pinch the rib-
bon cable under the handle when it is tightened to the machine.
The rear handles already come mounted by three Allen screws into an
“L” bracket. Line up the two holes in the “L” bracket with those on the
rear of the machine. Slide the two short Allen screws into holes until
they stop. Hand tighten, and then use the 5.0mm Allen wrench to
securely fasten the handle to the back of the machine.
Once the two Allen screws are in place, plug the 9-pin ribbon con-
nector into the serial port underneath the rear handle (Rear Dia-
gram C, #33 page 7). Ensure the pins are lined up so they are not
damaged when the plug is pushed in. Push the plug securely in place.
NOTE: After the handles have been completely installed and
plugged in, test them by turning the Baby Lock Crown Jewel II
on/off switch to “on”. The handles will run a self-test by briefly dis-
playing their version during boot up, and then the LED lights on
the front handles will illuminate. After the boot up is completed,
both LCD displays (front handle and rear handle) will display
the same menu. If nothing is displayed or if the lights don’t il-
luminate, check that the handle cable on the side of the machine
is plugged in securely, that your machine is turned on, and that
the power cord is plugged into the machine as well as a power
source.
Figure 7
Figure 6