One time v cr setup, To set the language, channels and clock, 1 turn tv and vcr on – Panasonic OMNIVISION PV-8660 User Manual
Page 12: Using awm, Keys, 12 to set the language, channels and clock
Attention! The text in this document has been recognized automatically. To view the original document, you can use the "Original mode".
One Time V CR Setup
‘Important; If the remote control POWER, ACTION, PROG, CHA/T, INDEX or ADD/DLT button does
not work when pressed, press the VCR button on the remote and try the button again.
When the VCR is turned on for the first time,
it automatically enters the setup mode.
Setup includes the following:
• Choose the language for on-screen menus
and messages.
• Tell the VCR how your equipment is hookup
(pages 6-9) so the VCR can correctly place
channels into memory.
• Get the VCR ready for clock set.
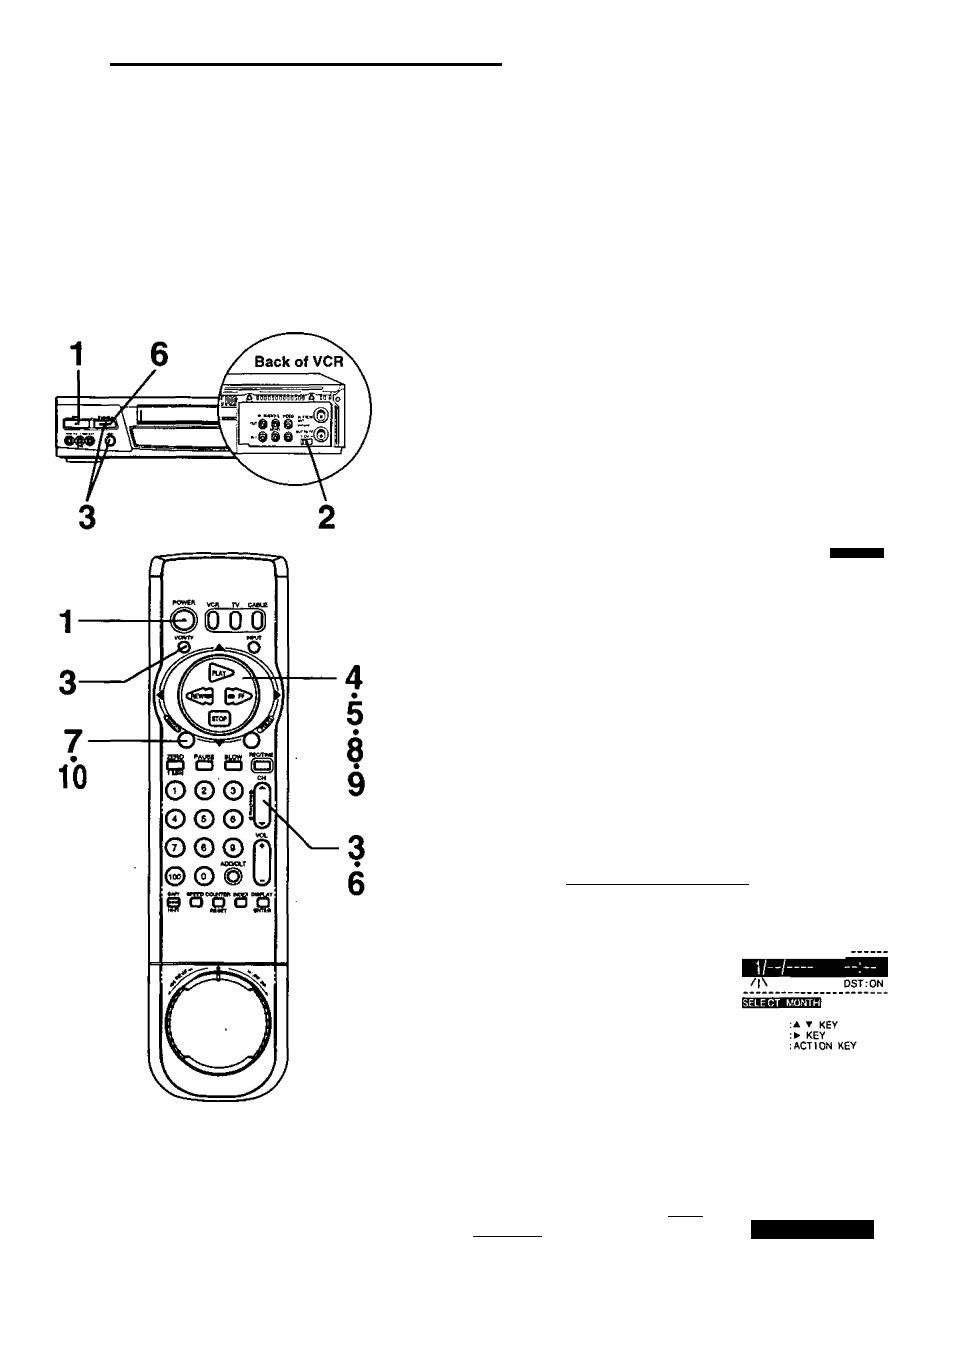
Using AWM
►
keys
When a menu screen is displayed, ^ vriv ^
the PLAY, STOP, REWIND, and FF
buttons on the remote control function ^
as
only. Use the buttons on the VCR for
play, stop, rewind, and fast forward functions.
When a program screen is displayed, the REC, FF,
REW, and PLAY buttons on the remote control and
the VCR function as
ATM
► only. (See Timer
Recording Using VCR Buttons on page 19.)
12
To Set the Language, Channels and Clock
1
Turn TV and VCR on.*
2
Tune TV to VCR output channel
(the same one you set
on the back of the VCR; CH3 or CH4),
SELECT LANGUAGE
PUSH VCR CH A: ENGLISH
OPR IMIH VCR CH V ESPAÑOL
APP. VCR/TV : FRANÇAIS
Press CH
A
for English
on-screen displays.
Or, press CH ▼ for Spanish
on-screen displays.
Or, press VCR/TV for French
on-screen displays.
• You can also set the language using the buttons on the VCR.
• If wrong language is set, see the “Reset all VCR Memory
Functions" section on page 5.
• The VCR should be connected to an antenna or cable box (page 6-9).
SELECT HOOKUP
CABLE/OSS BOX»VCR^TV
vcrk
:
able
/
oss
box
►
tv
VCR/TV
Press
AT
to select your hookup,
and then press ^ to set.
• If you selected “CABLE/DSS BOX ►
VCR ► TV." continue with step 5.
If not, go to step 6.
• If you are using the CABLE/DSS BOX ►
VCR ► TV connection method, only
the cable box output channel will be placed in memory.
SELECT
SET
END
A
▼ KEY
► KEY
ACTION KEY
SELECT HOOKUP
CABLE/DSS BOXAVCR^TV
CABLE/DSS BOX OUTPUT CH
O Press
AT
to select your cable
box or DSS receiver output
channel number, and then
press ► to enter.
• If necessary, refer to your cable
box manual.
____ ______________
• If you are using Audio/Video jack connections to your cable box,
select and set VIDEO OUT" as the output channel.
6 Press CH
A
to start Channel Auto Set.
• “PLEASE SET CLOCK BY PUSHING ACTION KEY" appears.
SELECT:A V KEY
SET
► KEY
END :ACTION KEY
8
Press ACTION to display the
SET CLOCK screen.
Press
AT
to select the MONTH,
and then press ^ to enter.
• Make each entry within 5 minutes,
or the VCR exits the Set Clock screen.
-\4/— SET CLOCK
SELECT
SET
END
Press
AT
and to select
and set remaining items at right.
• Pressing ◄ will move back to an item
for correction.
Remaining Items
to be set:
• Date • Year
• Time
• DST, (Daylight Saving
Time see page 5.)
10 Press ACTION twice to start
the clock and exit this mode.
SET CLOCK
1/ 4/2000 TUE 12:
SET :■* ► KEY
START -.ACTION KEY