Ilt the, Elease the, Ads from the – Wood’s Powr-Grip MRTALPR4FS10TDC User Manual
Page 22
Rev 6.0/5-14
20
MRTALPR4-DC: #35057
T
O
T
ILT THE
L
OAD
WARNING: Never disengage both the rotation latch and the tilt latch at the
same time.
This lifter is not designed for rotation and tilt functions to be used at the same time.
Disengaging the rotation and tilt latches simultaneously could cause uncontrolled and
unpredictable load movement, potentially resulting in load damage or injury to the operator.
WARNING: Make sure load is positioned correctly on lifter (see T
O
A
PPLY
);
unbalanced loads may tilt unexpectedly when latch is disengaged.
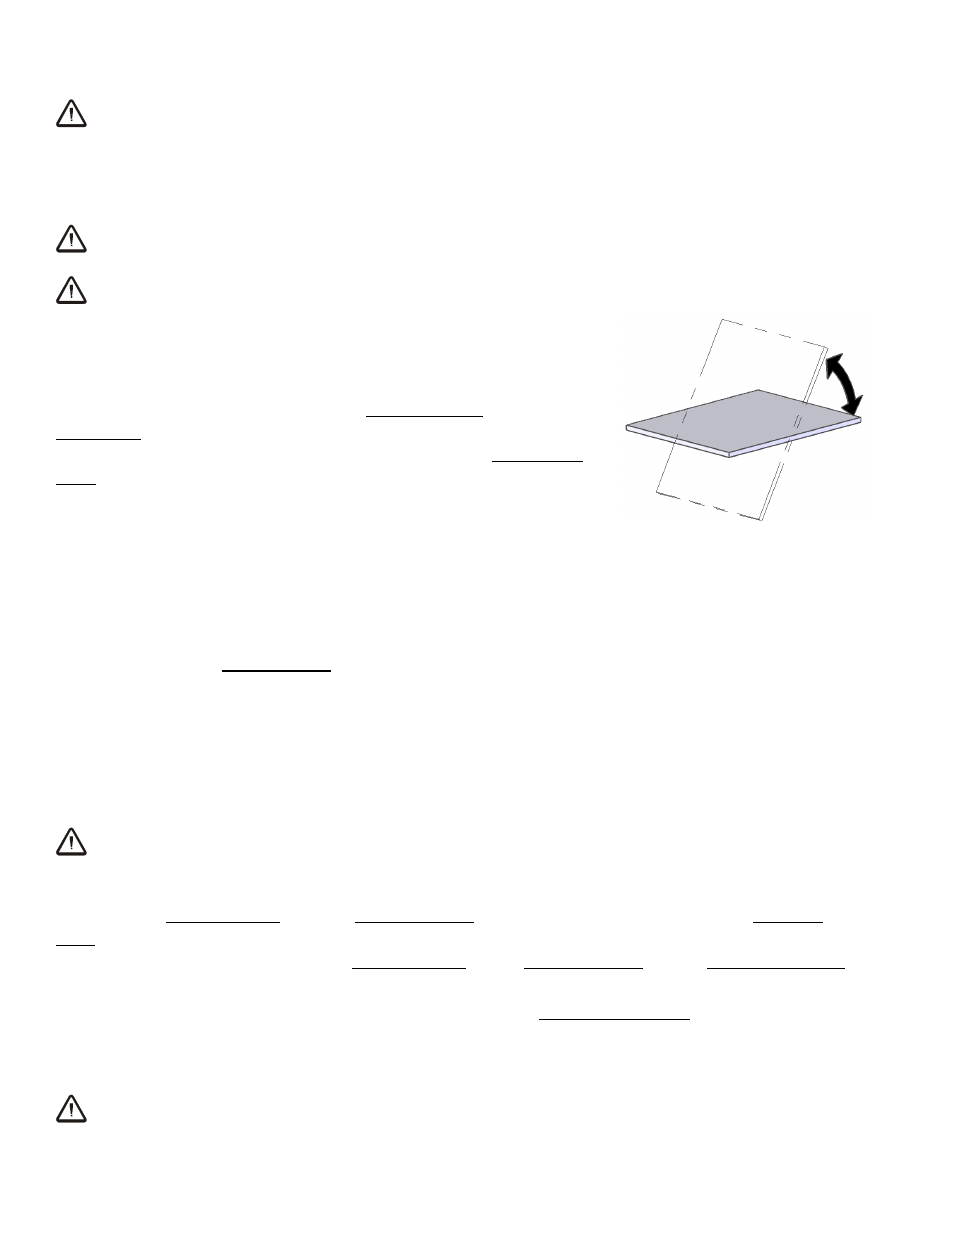
WARNING: Always keep hands and fingers away from bars of tilt linkage.
Remember that the load requires more vertical space when tilted
to the upright position, as well as more horizontal space when
tilted to the flat position. Make sure there is sufficient clearance
for the load to tilt without contacting the operator or any nearby
objects. Maintain a firm grip on the control handle (located on
pad frame), to keep the load under control at all times. If the
pad frame is latched in the vertical position, pull the tilt release
lever to disengage the tilt latch. Lift upward or press downward
on the control handle to tilt the load as desired. If load size
permits, maintain control with the handle throughout the tilt. For
loads with overhang, it may be necessary to release the control handle as the load approaches
the flat position. If so, keep the load under control using hand cups or other appropriate
means. The pad frame automatically latches in place when it returns to the vertical position.
Note: When lifting long wall panels or similar loads from the flat position to the upright position,
it may be desirable to position the lifter so that the load will automatically tilt when lifted: In
this case, apply the vacuum pads to the load as previously directed, but first determine which
should be the top edge of the load when lifted. Then center the vacuum pads from left to right
near that edge. This position will maximize stability as you carefully raise the load into the
upright position with the hoisting equipment.
T
O
R
ELEASE THE
P
ADS FROM THE
L
OAD
WARNING: Load must be fully supported before releasing vacuum pads.
The lifter is designed to prevent an accidental load release, which could result from
unintentionally interrupting the apply mode: When the load is at rest and fully supported, press
and hold the enable button and the release button on the lifter, to force air into the vacuum
pads, quickly breaking the vacuum seal. Alternatively, if the lifter is equipped with a Remote
Control System, press and hold the enable button and a release button on the radio transmitter.
Continue to hold both buttons until the vacuum pads disengage completely from the load.
If the lifter is equipped with a Remote Control System, an amber strobe light flashes as long as
the operator is pressing the enable or release buttons. This serves to show the operator when
signals are being transmitted successfully from a remote location and also to warn other
personnel that the operator is suspending the apply function.
WARNING: If vacuum pads do not disengage completely, do not attempt to
move the lifter or load.