Brother HL-1260 User Manual
Page 68
IV
- 20
,
,
,
,
,
,,
,,
,
,
,,,,,
,,
,
,,
,,
,
,,
,,
,
,,
,,
,
,
,
,
,
,
,
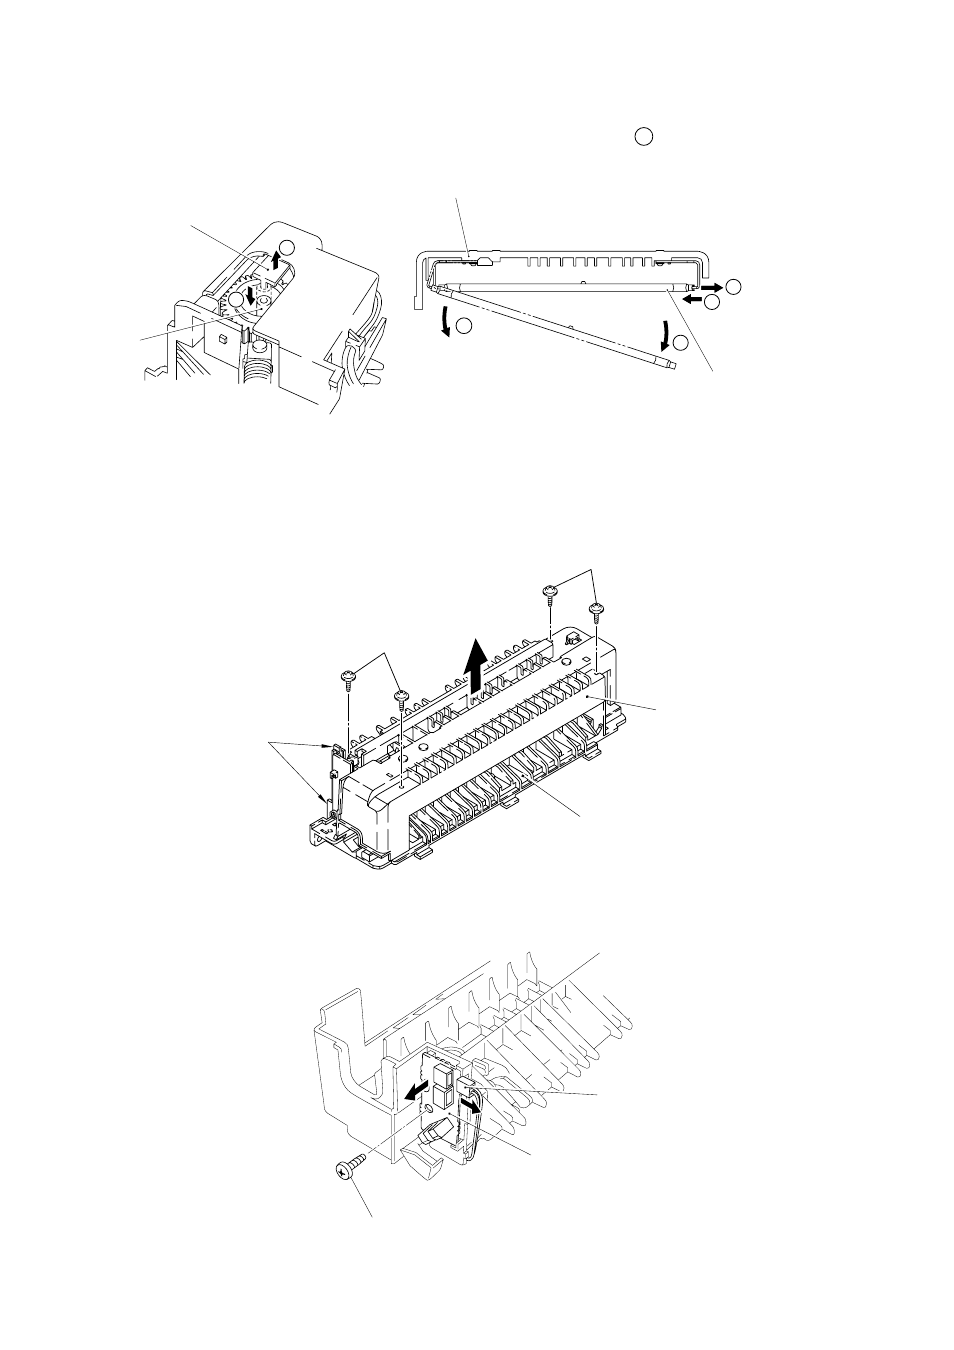
(4) Take off the halogen heater from the heater support spring, remove the halogen heater by
pushing it and pulling the heater support spring at the same time ( A ).
Figure 4.50
(6) Loosen a screw and remove the fixing PCB assy.
Figure 4.51
(5) Loosen 4 screws and remove the thermistor lead wire connector (2P) of the fixing PCB (see
Figure 4.51), and remove the fixing unit cover by detaching the wire from the hooks of the fixing
unit chassis.
Heater support spring
Halogen heater
Figure 4.48
Screws
Fixing unit cover
Fixing unit chassis
Hooks
Screws
Screw
Connector
A
A
Fixing PCB assy
Fixing unit
C
Halogen heater
B
A
Heater Push
A
Support spring Pull
Figure 4.49
See also other documents in the category Brother Printers:
- HL-2240 (522 pages)
- HL-2240 (21 pages)
- HL-2240 (150 pages)
- HL-2240 (2 pages)
- HL 5370DW (172 pages)
- HL-2170W (138 pages)
- HL 5370DW (203 pages)
- HL 2270DW (35 pages)
- HL 2270DW (47 pages)
- HL 5370DW (55 pages)
- HL-2170W (52 pages)
- HL-2170W (137 pages)
- PT-1290 (1 page)
- DCP-383C (7 pages)
- DCP-385C (122 pages)
- MFC 6890CDW (256 pages)
- DCP-585CW (132 pages)
- DCP-385C (2 pages)
- Pocket Jet6 PJ-622 (48 pages)
- Pocket Jet6 PJ-622 (32 pages)
- Pocket Jet6 PJ-622 (11 pages)
- Pocket Jet6Plus PJ-623 (76 pages)
- PT-2700 (180 pages)
- PT-2100 (58 pages)
- PT-2700 (34 pages)
- PT-2700 (62 pages)
- PT-2700 (90 pages)
- HL 5450DN (168 pages)
- HL 5450DN (2 pages)
- HL 5450DN (2 pages)
- DCP-8110DN (22 pages)
- MFC-J835DW (13 pages)
- DCP-8110DN (36 pages)
- HL 5470DW (177 pages)
- HL 5450DN (120 pages)
- DCP-8110DN (13 pages)
- HL 5470DW (34 pages)
- HL-S7000DN (9 pages)
- HL 5470DW (30 pages)
- HL-6050D (179 pages)
- HL-6050D (37 pages)
- HL-7050N (17 pages)
- HL-6050DN (138 pages)
- PT-1280 (1 page)
- PT-9800PCN (104 pages)