Perma Pure GASS-2040 User Manual
Page 22
22
GASS-2040 User Manual | Original Instructions
APPENDIX B
1. PD Dryer Disassembly
Special tool needed for Assembly/Disassembly (included) - for item numbers, refer to the dryer assembly
drawing on page 25.
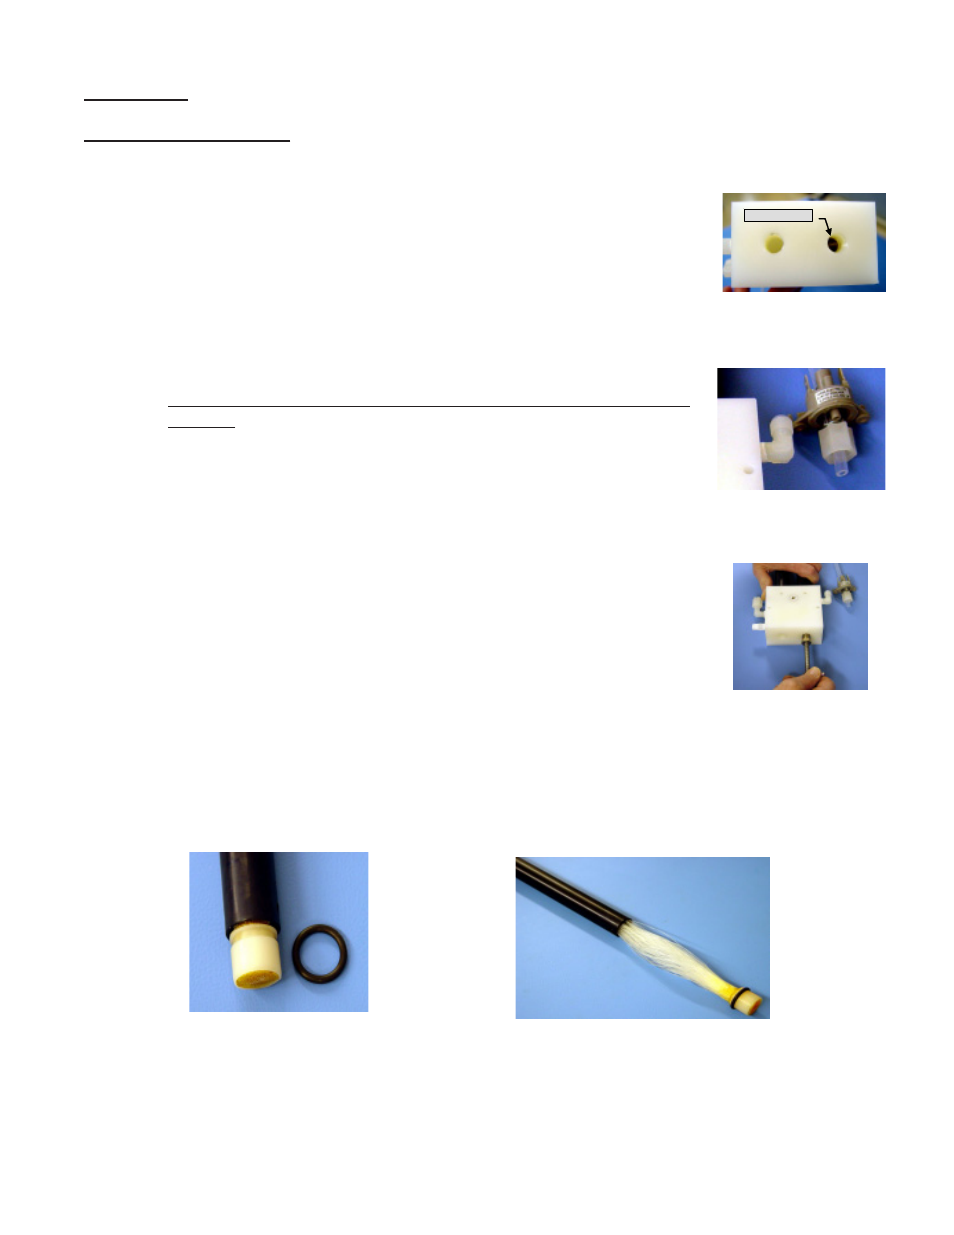
1. Begin by loosening the four set screws (item 11).
2. Remove the four ¼” NPT plugs (item 10) in the end faces of the coupling
fittings (item 1). See Figure 10.
3. Disconnect the differential pressure switch tubing from the
compression fitting.
4. Using the special dryer disassembly tool begin removing the coupling
fittings by performing the following steps:
Single element dryer (only one shell tube contains a membrane tube
element)
a. Look into the ports from which the plugs were just removed and
determine which one contains the dryer element. The membrane
tube ends will be visible (See Figure 11).
b. Thread the tool into this port and tighten by hand.
Turn the handle until resistance is felt.
c. Then slowly turn the handle until the coupling fitting is free of the
shell tubes. Some manual adjustment of the assembly will be
required to keep the coupling fittings parallel with each other while
pressing (See Figure 12).
d. Repeat steps a-c for the other coupling fitting.
e. At this point, the dryer element/shells should be free of the coupling
fittings and the header plugs (item 5) on the unused shell tube side
should still be in the coupling fitting bore.
Figure 10
Membrane element
Figure 11
f. Remove an o-ring (item 8) from one of the element headers (See Figure 13).
g. Slip the element from the opposite end of the shell tube (See Figure 14).
Figure 13
Figure 14
Figure 12