User interface and modes, 1 display and buttons, 2 description of the buttons – GeneralAire GFX50 User Manual
Page 6
6
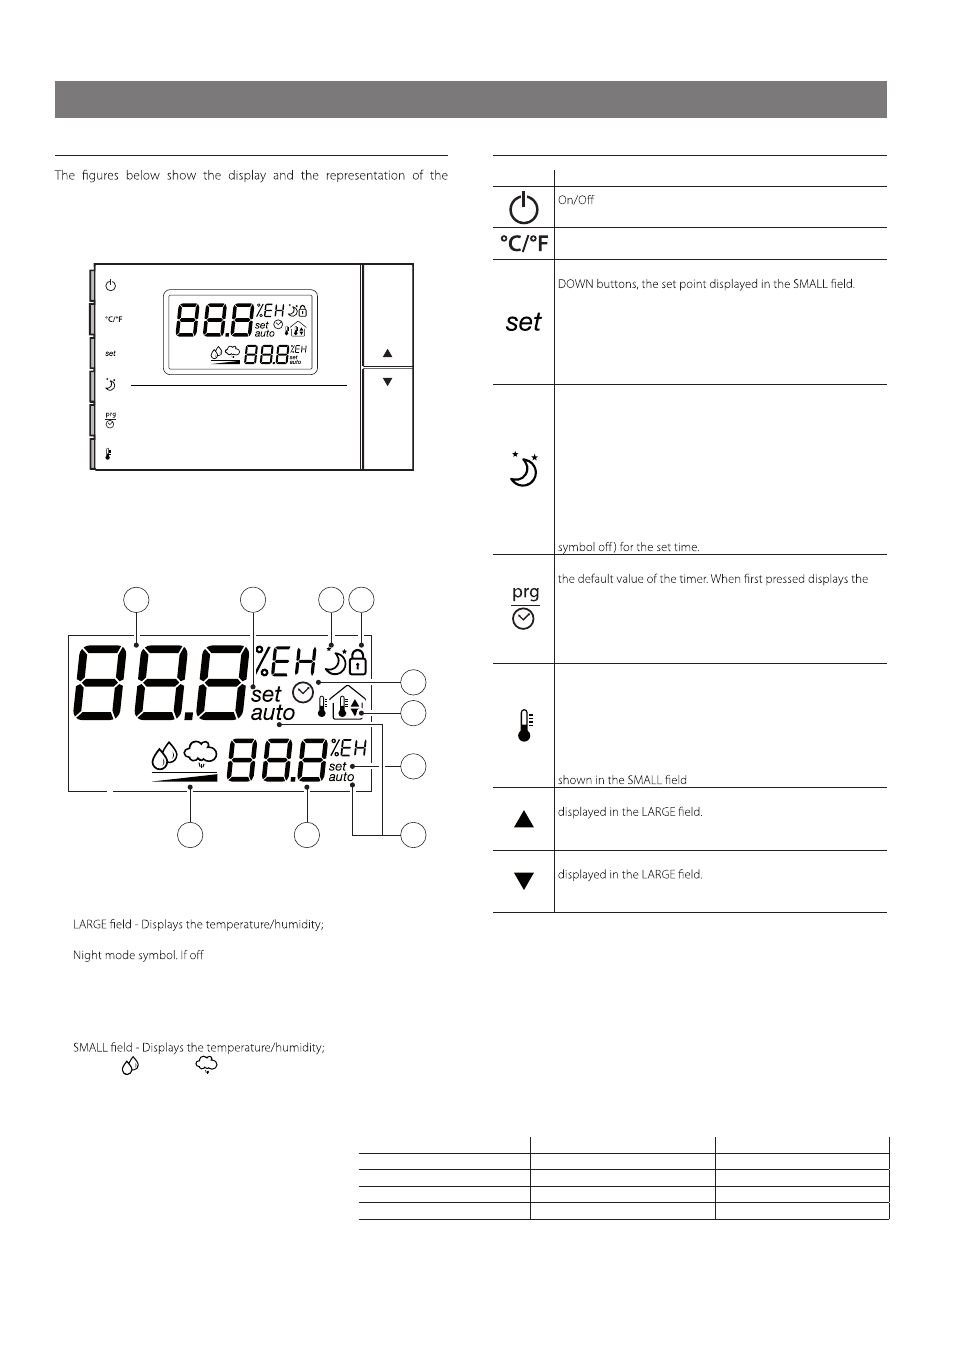
3. USER INTERFACE AND MODES
3.1 Display and buttons
corresponding symbols
side programming
buttons
LCD display
immediately change
the current set point
Fig. 3.a
Description of the display
1
3 4
2
6
7
8
5
9
10
Fig. 3b
Key:
1.
Mode for setting the active value on the large display;
2.
= daytime mode;
3.
Lock mode. The parameter is not accessible;
4.
Active time bands;
5.
Outside/inside/maximum/minimum temperature symbol;
6.
Mode for setting the active value on the small display;
7.
Auto operating mode;
8.
9.
Dehum. (
10.
) /humid. (
) operation. When the ramp symbol is on the
corresponding mode is active;
3.2 Description of the buttons
Button Meaning
. If the remote ON/OFF digital input is
connected, the function of the button may be disabled..
Selects the temperature display mode, degrees Celsius or
Fahrenheit. Whenever pressed switches the temperature units..
Used to display and where necessary change, using the UP and
If held for more than 5 sec accesses the parameters menu
.
To scroll the various parameters use UP and DOWN. To edit hem
press the SET button a second time and to exit the parameters
menu press the PRG button. Access to the parameters is
protected by password if parameter PS is enabled.
Change mode manually: activates the opposite function (and
the corresponding set point) to the current (night if day or day
if night), for the set time. To change or reset the timer use the
UP and DOWN buttons to increase or decrease the time. Press a
second time to exit and return to the main menu.
If sleep mode is already active, pressing the button shows the
time remaining on the timer.
E.g..: if in Night mode (moon symbol on) from time
band, pressing this button activates daytime mode (moon
Accesses the menu for setting the clock, the time bands, and
current time (RTC); to display the other parameters, use the
UP and DOWN arrows. To set a new value, press SET when
displaying the desired parameter and change the value using
the UP and DOWN buttons. Press a second time to exit and
return to the main menu.
Accesses the menu for displaying the temperature: current,
maximum and minimum outside (from instrument power on),
inside and outside. To display the various temperatures, press
the button repeatedly. Their meaning is displayed in the box
with the home symbol.
Also displays the value of the analogue output when “Out” is
From the main menu increases the value of the set point
In the other menus displays the variables or the parameters, or
alternatively sets the value after having pressed SET.
From the main menu decreases the value of the set point
In the other menus displays the variables or the parameters, or
alternatively sets the value after having pressed SET
Tab. 3.a
dyS
LARGE FIELD
SMALL FIELD
t
n
i
o
p
t
e
s
y
ti
d
i
m
u
h
y
ti
d
i
m
u
h
1
y
ti
d
i
m
u
h
t
n
i
o
p
t
e
s
y
ti
d
i
m
u
h
2
t
n
i
o
p
t
e
s
y
ti
d
i
m
u
h
3
y
ti
d
i
m
u
h
4
The values displayed in the LARGE and SMALL fields
(Fig 3.b.) depend on the setting of parameter dyS as
shown in the following table: