2c-3. event list, P.104, P.104) – KORG D3200 User Manual
Page 114: Manual, “2c-3. event list
104
5. Mode
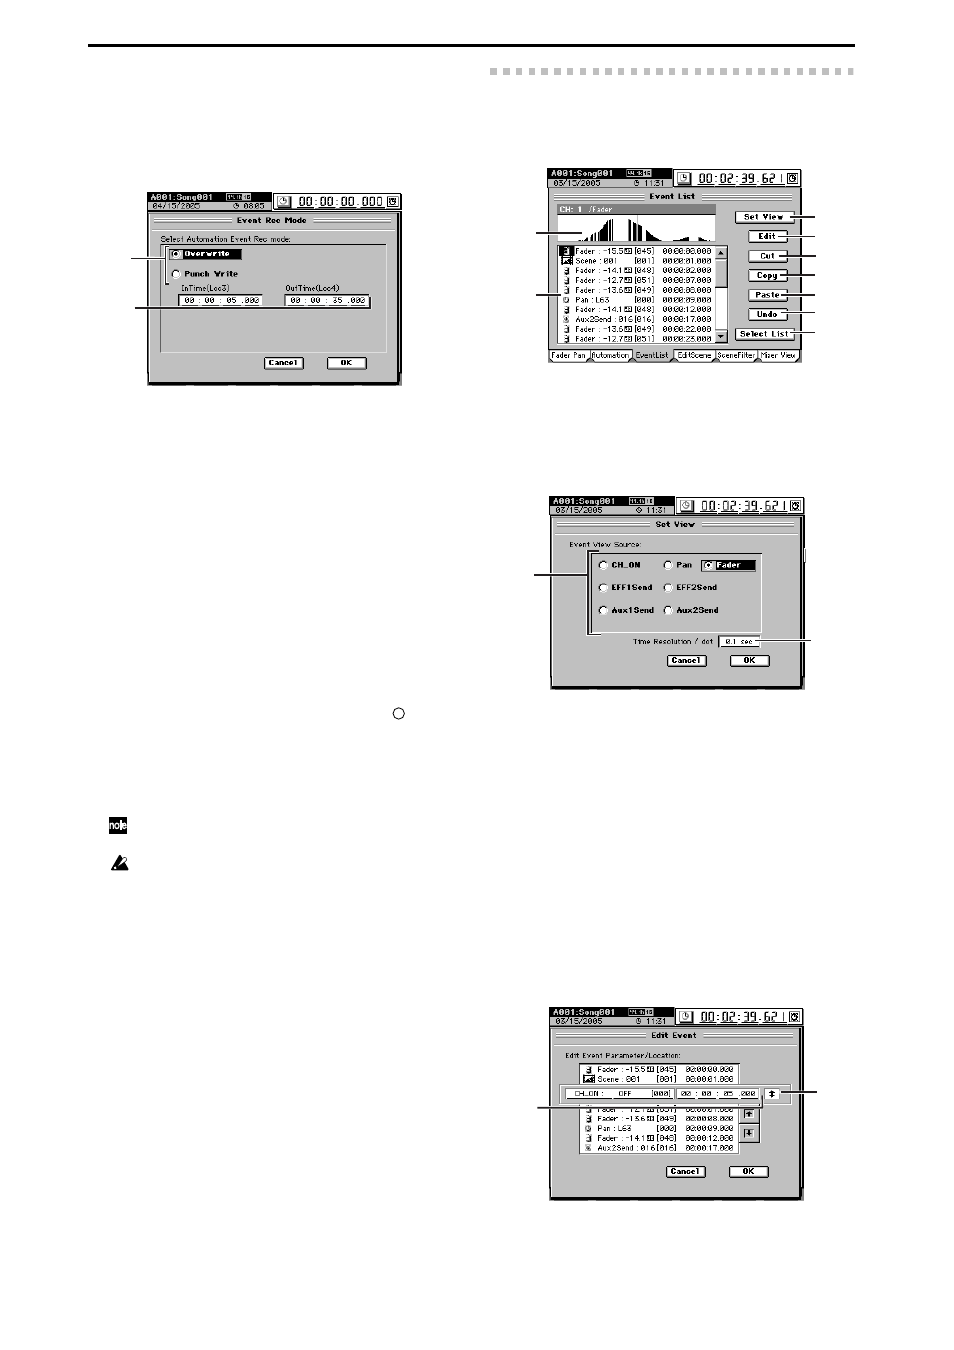
When you click this button, the Event Rec Mode dialog
box will appear, allowing you to select the automation
recording method. Click the OK button (or press the
panel YES key) to apply your selection, or click the Can-
cel
button (or press the panel NO key) to cancel it.
5a. Recording mode
Overwrite:
Automation data will be overwritten from
the point you begin playing/recording the song until
the point where you stop. If you do not record events,
all the previously-recorded events will be erased.
Punch Write:
Parameters you adjust between the In
Time (the location where you begin recording events)
and Out Time (the location where you stop) will be
recorded.
5b. In Time, Out Time
If the recording mode is “Punch Write” and you
selected a parameter other than Fader as the parame-
ter to be recorded, these settings specify the locations
at which event recording will begin and end.
6. SnapShot
Clicking this button when “4. Automation” is on and the
recorder is stopped will record a “snapshot” of events for
channels whose record channel button is set to
(Rec).
7. Undo
Click this if you want to revert the recorded automation
to its prior state. You can revert to the state prior to the
previous operation. If the button indicates Redo, you can
use it to cancel the Undo.
You can use “2c-3. Event List” to make detailed changes to the
recorded events.
This data is held in common with the “8. Undo” data of “2c-3.
Event List.” If you press the Event List’s Undo button imme-
diately after recording automation, not the most recent event
edit but the previously-recorded automation will be erased.
8. Free event memory amount
This indicates the amount of remaining memory in which
you can record events.
2c-3. Event List
Here you can view or edit the events and scenes that you re-
corded using automation.
1. Set View
Click this button to open the Set View dialog box. Click
the OK button (or press the panel YES key) to apply your
selections, or click the Cancel button (or press the panel
NO
key) to cancel them.
1a. Event View Source
Click a radio button to choose the parameter that will
appear in the event view.
1b. Time Resolution/dot
[0.05, 0.1, 0.2, 0.5, 1sec]
Specify the range that will appear in the event view.
The range shown will be the time you specify here
× 192.
2. Event view
This area shows the events of the source you selected in
Set View.
3. Event list
Displays the events selected in the “9. Select List.” To edit
an event, select (highlight) it by clicking it in the list.
4. Edit
Click this button to open the Edit Event dialog box.
4a. Event select button
Use this to select the event you want to edit. Click this
button and use the value dial (or +/– keys) to make
your choice.
5a
5b
2
1
3
5
6
7
8
9
4
1a
1b
4b
4a