8 osd (on-screen-display) configuration – Intellinet Network Solutions PRO SERIES INT-PSNC-UM-1106-06 User Manual
Page 54
- 54 -
6.8 OSD (On-Screen-Display) Configuration
Certain camera models are equipped with an OSD function that provides additional functionality.
You can modify image parameters, set up privacy zones, and define motion detection areas and
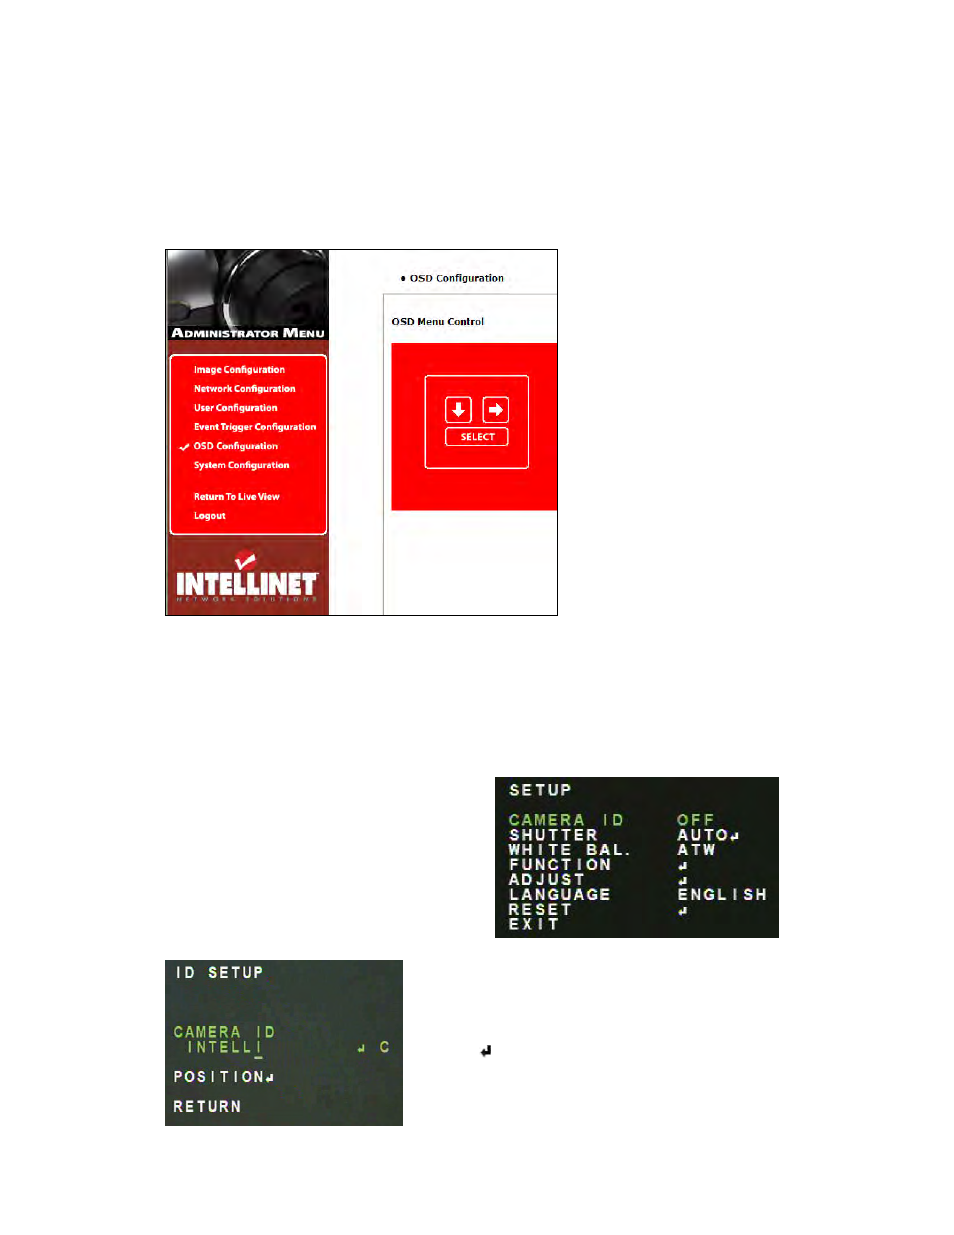
much more. Cameras that support this OSD function display a link in the administrator menu
labeled “OSD Configuration”. OSD control is available in most CCD cameras manufactured after
May 2009.
You control the OSD menu using the arrow keys and ‘select’ button. With the arrow-down button
you change the active row (indicated in green). The right-arrow is used to change values of the
selected parameter. The ‘select’ button works much like the enter key on your computer
keyboard. It allows opening sub-menus for certain menu items and it is used to exit menus and
the OSD setup.
On the following pages you can find information about the individual OSD parameters and their
function.
CAMERA ID
You can assign a “name” to your network
camera using this feature. The camera ID will be
displayed on the live image the same way as
analog CCTV cameras.
Activate the camera ID display by clicking on the
right-arrow. Then click “select”’ to open up the
configuration page where you can define the
camera ID as well as the position on the page.
Use the right-arrow key to move the cursor right and the
down-arrow to move the cursor left. The select button
allows you to change the character (0-9, A – Z).
Deleting characters is possible by selecting “C”.
Click the
symbol in order to leave the Camera ID field.