Figure 37, Servicing the spark plug, Cleaning the blower housing – Hayter Mowers RZT420H User Manual
Page 31: Removing the spark plug, Checking the spark plug, Installing the spark plug
G005177
2
1
3
Figure 37
1.
Oil filter
3.
Adapter
2.
Gasket
15. Slowly pour approximately 80% of the specified oil
into the filler tube (Figure 34).
16. Install the oil fill cap/dipstick and push firmly into
place (Figure 34).
17. Check the oil level (Figure 34); refer to Checking
the Oil Level.
18. Slowly add additional oil to bring it to the full mark.
19. Install the oil fill cap/dipstick and push firmly into
place (Figure 34).
Servicing the Spark Plug
Service Interval: Every 200 hours—Check spark plug
condition and gap.
Every 500 hours—Replace the spark
plug.
The spark plug is RFI compliant. Equivalent alternate
brand plugs can also be used. Spark plug replacement is
recommended at 500 hours.
Type: Champion XC12YC (or equivalent)
Air Gap: 0.030 inch (0.76 mm)
Removing the Spark Plug
1. Disengage the blade control switch, move the
motion controls outward to the park position, stop
the engine, and remove the key.
2. Pull the wire off of the spark plug (Figure 38). Clean
around the spark plug to prevent dirt from falling
into the engine and potentially causing damage.
Note: Due to the deep recess around the spark
plug, blowing out the cavity with compressed air
is usually the most effective method for cleaning.
The spark plug is most accessible when the blower
housing is removed for cleaning.
3. Remove the spark plug and metal washer.
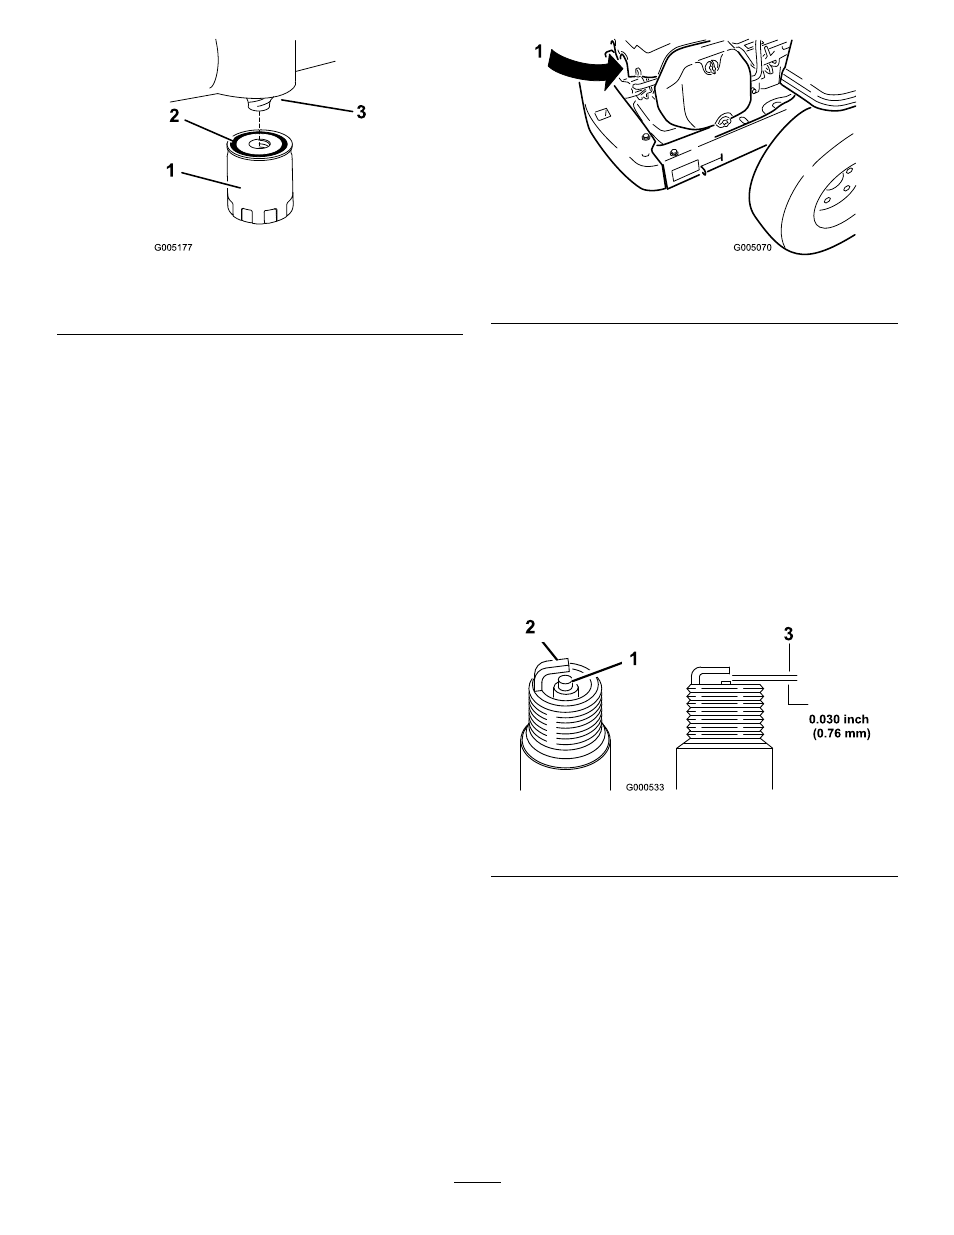
G005070
1
Figure 38
1.
Spark plug and wire location
Checking the Spark Plug
1. Look at the center of the spark plug (Figure 39).
If you see light brown or gray on the insulator, the
engine is operating properly. A black coating on the
insulator usually means the air cleaner is dirty.
Important: Never clean the spark plug. Always
replace the spark plug when it has a black
coating, worn electrodes, an oily film, or cracks.
2. Check the gap between the center and side electrodes
(Figure 39). Bend the side electrode (Figure 39) if
the gap is not correct.
Figure 39
1.
Center electrode insulator
3.
Air gap (not to scale)
2.
Side electrode
Installing the Spark Plug
1. Install the spark plug. Make sure that the air gap is
set correctly.
2. Tighten the spark plug to 30 ft-lb (41 N-m).
3. Push the wire onto the spark plug (Figure 38).
Cleaning the Blower Housing
To ensure proper cooling, make sure the grass screen,
cooling fins, and other external surfaces of the engine
are kept clean at all times.
31