Hayter Mowers RZT420H User Manual
Page 30
2. Park the machine so that the drain side is slightly
lower than the opposite side to assure the oil drains
completely.
3. Disengage the blade control switch and move the
motion controls outward to the park position.
4. Stop the engine, remove the key, and wait for all
moving parts to stop before leaving the operating
position.
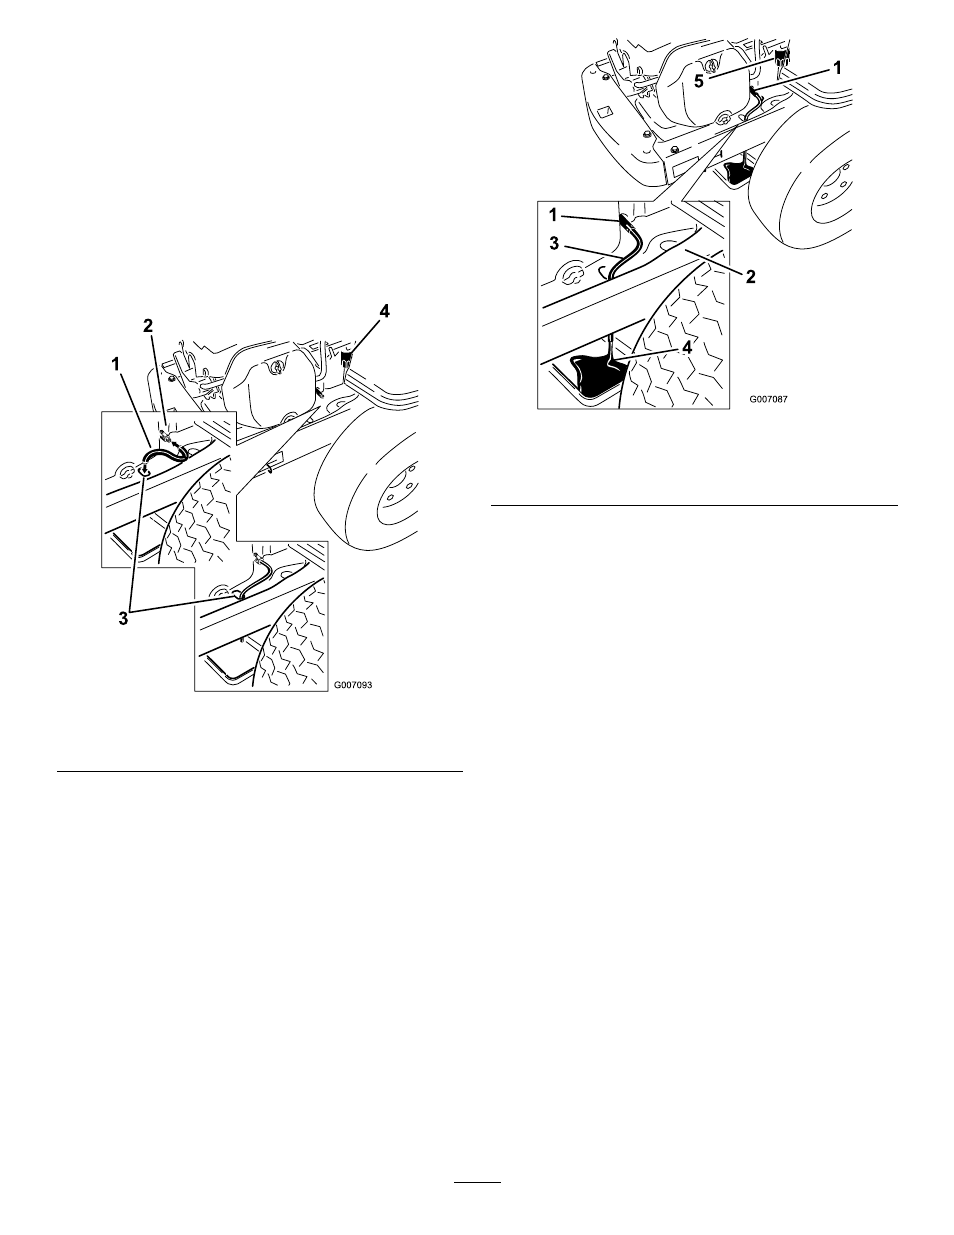
5. Clean the area around the drain valve and on the
machine frame. Locate the oil drain hose and slide
it over the drain valve (Figure 35).
Figure 35
1.
Oil drain hose
3.
Hole in frame
2.
Drain valve
4.
Oil filter
6. Place the opposite end of the oil drain hose through
the drain hole in the frame (Figure 35).
7. Place a pan underneath machine directly below the
drain hole in the frame as shown in Figure 36.
Figure 36
1.
Oil drain valve
4.
Pan
2.
Machine frame
5.
Oil filter
3.
Oil drain hose
8. Turn the drain valve 1/4 counter clockwise to open
and allow the oil to drain (Figure 36). Remove the
oil fill cap/dipstick (Figure 34).
9. Be sure to allow ample time for complete drainage.
10. Remove the old filter and wipe off the mounting pad
11. When oil has drained completely, close the oil drain
valve. Remove the oil drain hose and wipe up any
excess oil on the frame (Figure 36).
Note: Dispose of the used oil at a recycling center.
12. Place the new replacement filter in a shallow pan
with the open end up. Pour new oil of the proper
type, in through the threaded center hole. Stop
pouring when the oil reaches the bottom of the
threads. Allow a minute or two for the oil to be
absorbed by the filter material.
13. Apply a thin film of clean oil to the rubber gasket on
the new filter.
14. Install the replacement oil filter to the mounting pad.
Turn the oil filter clockwise until the rubber gasket
contacts the pad, then tighten the filter an additional
2/3 to 1 turn (Figure 37).
30