Venting, 4 installing into an existing chimney, 5 installing into an existing fireplace chimney – Harman Stove Company P43 User Manual
Page 11
11
P43 Pellet Stove
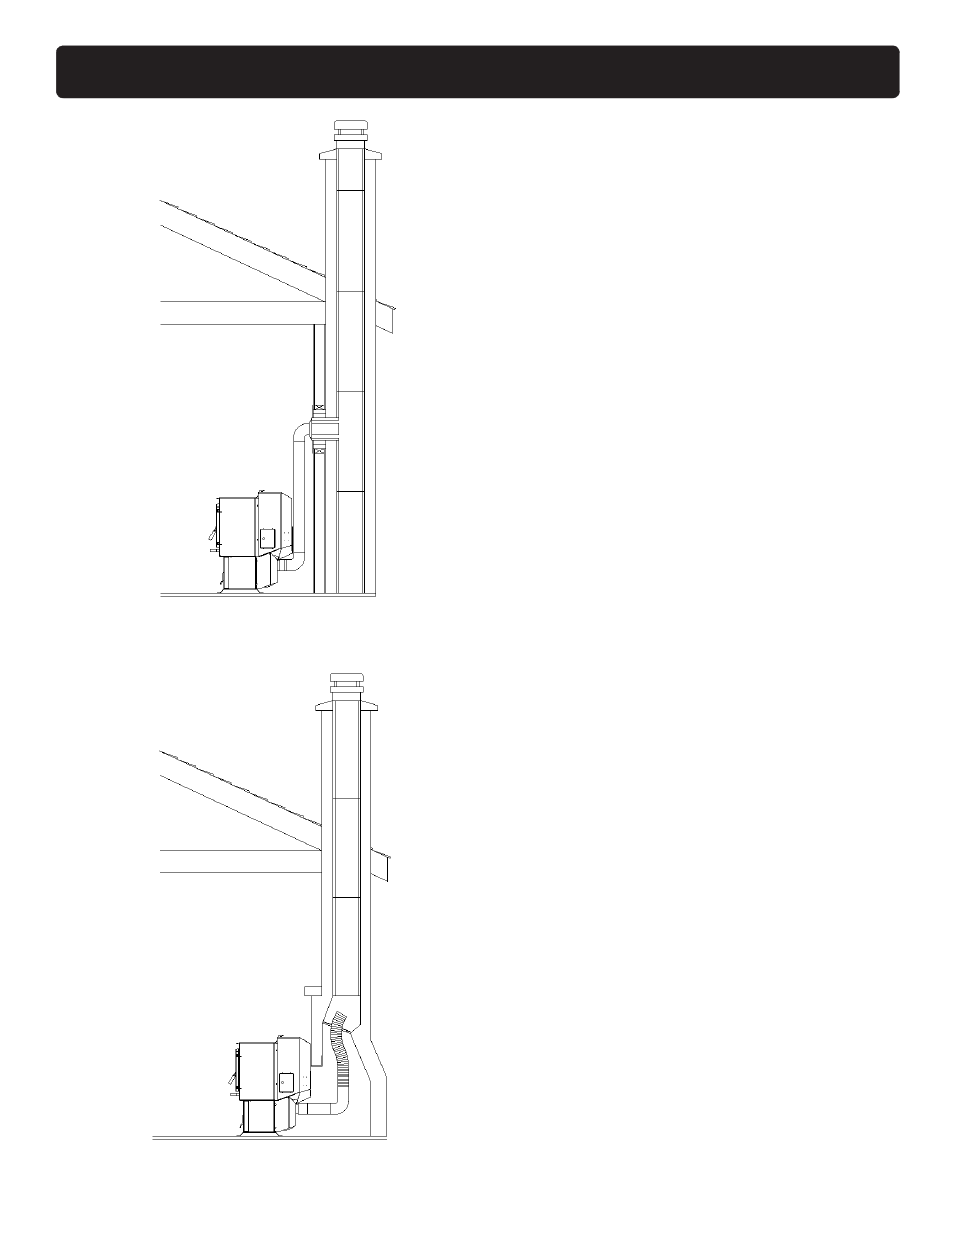
#4 installing into an existing
chimney
This method provides excellent venting for
normal operation. This method also provides
natural draft in the event of a power failure. If the
chimney condition is questionable* you may want
to install a liner as in method #7.
In some places in the US and Canada it is
required that the vent pipe extend all the way to the
top of the chimney.
*The chimney should be inspected and cleaned
before installing your stove. If you discover that the
chimney does not have a clay tile liner or has cracks
or flaking of the tile liner you will need to install a
stainless steel liner within the chimney. In most cases
the inside diameter of this liner should be 4". Either
flexible or rigid liner may be used for this purpose.
Refer to Method 6 & 7.
Be sure to design the venting so that it can be easily
cleaned.
#5 installing into an existing
fireplace chimney
This method provides excellent venting for
normal operation. This method also provides natural
draft in the event of a power failure. If the chimney
condition is questionable* you may want to install a
liner as in method #6.
In some places in the US and Canada it is
required that the vent pipe extend all the way to the
top of the chimney.
*The chimney should be inspected and cleaned
before installing your stove. If you discover that the
chimney does not have a clay tile liner or has cracks
or flaking of the tile liner you will need to install a
stainless steel liner within the chimney. In most cases
the inside diameter of this liner should be 4". Either
flexible or rigid liner may be used for this purpose.
Refer to Method 6 & 7.
The chimney should be sealed at the damper
using a steel plate, or with insulation at the first flue
tile. In both cases the connector pipe should extend
through the smoke chamber to the base or into the
first flue tile.
Be sure to design the venting so that it can be
easily cleaned.
Fig. 10
Fig. 11
venting