Harbor Freight Tools Trailer 94564 User Manual
Page 16
Page 16
SKU 94564
For technical questions, please call 1-800-444-3353.
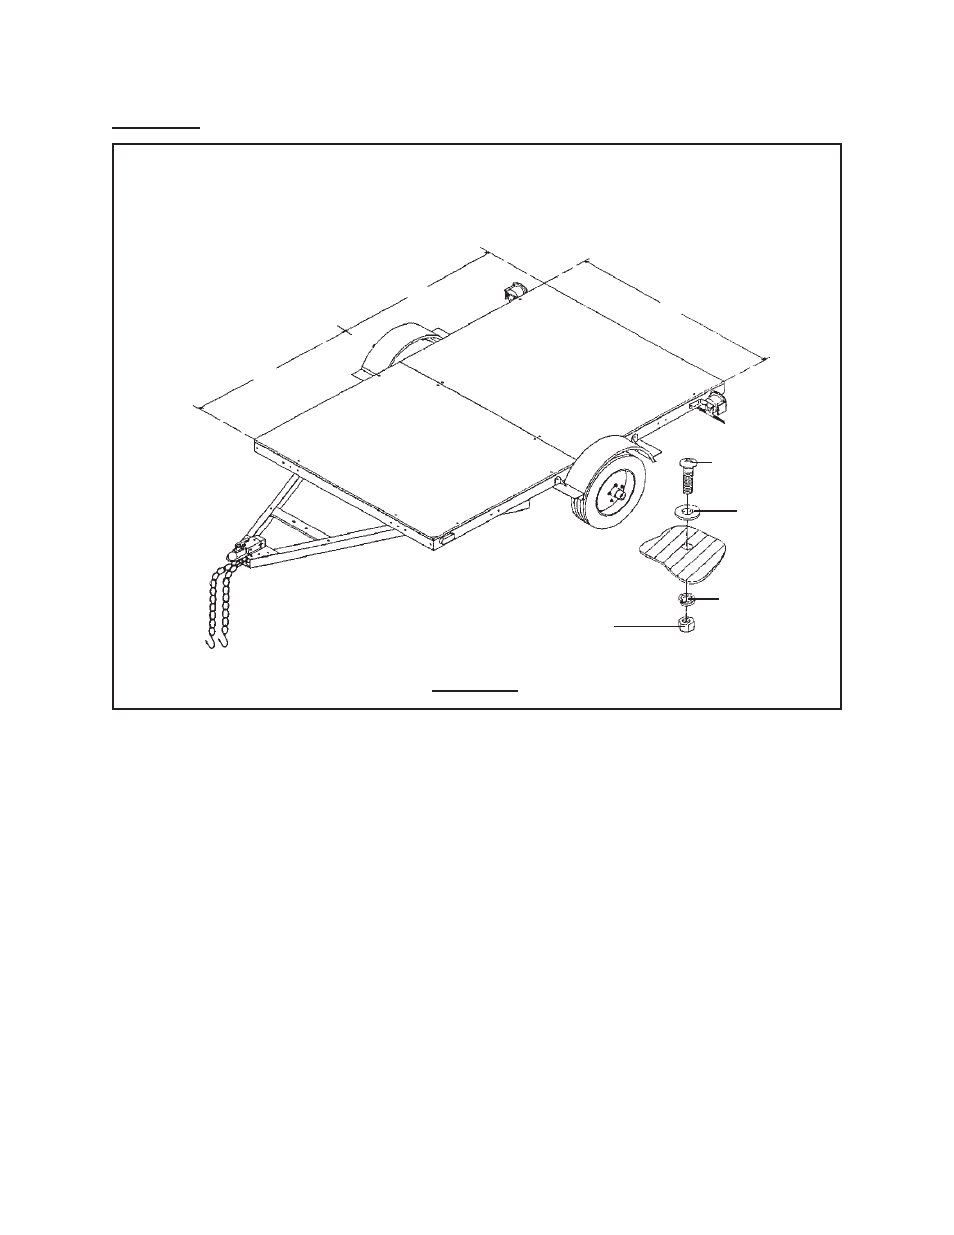
Phase 10:
48”
48”
3/4” THICK PLYWOOD
3/4” THICK PLYWOOD
3/8”
CARRIAGE BOLT
3/8”
WASHER
3/8”
LOCK WASHER*
3/8”
NUT
3/8”
HARDWARE
&
PLYWOOD
(NOT INCLUDED)
FIGURE J
48”
1.
To install a Bed for the Trailer, cut two pieces of 3/4” thick plywood (not included)
at 48” x 48”. NOTE: It may be necessary to slightly trim the plywood to fit.
(See Figure J.)
Mark 7 locations in each piece of plywood to correspond with the 14 mounting holes
2.
located on the front and rear Cross Members (2A, 2B) and Left and Right Side Rails
(1FL, 1FR, 1RL, 1RR). Set the plywood aside, and drill the 14 marked locations
with a 3/8” bit. Then, replace the plywood on the Trailer frame. (See Figure J.)
Secure the two pieces of plywood to the front and rear Cross Members (2A, 2B) and
3.
Left and Right Side Rails (1FL, 1FR, 1RL, 1RR), using 3/8” diameter, rust resistant
Carriage Bolts, Washers, Lock Washers, and Nuts (none included). Make sure the
bolt heads do not protrude up through the plywood. (See Figure J.)