6 • assembling the blades – Hunter 28688 44 Stratford Five Minute Fan User Manual
Page 11
11
42443-01 • 09/20/10 • Hunter Fan Company
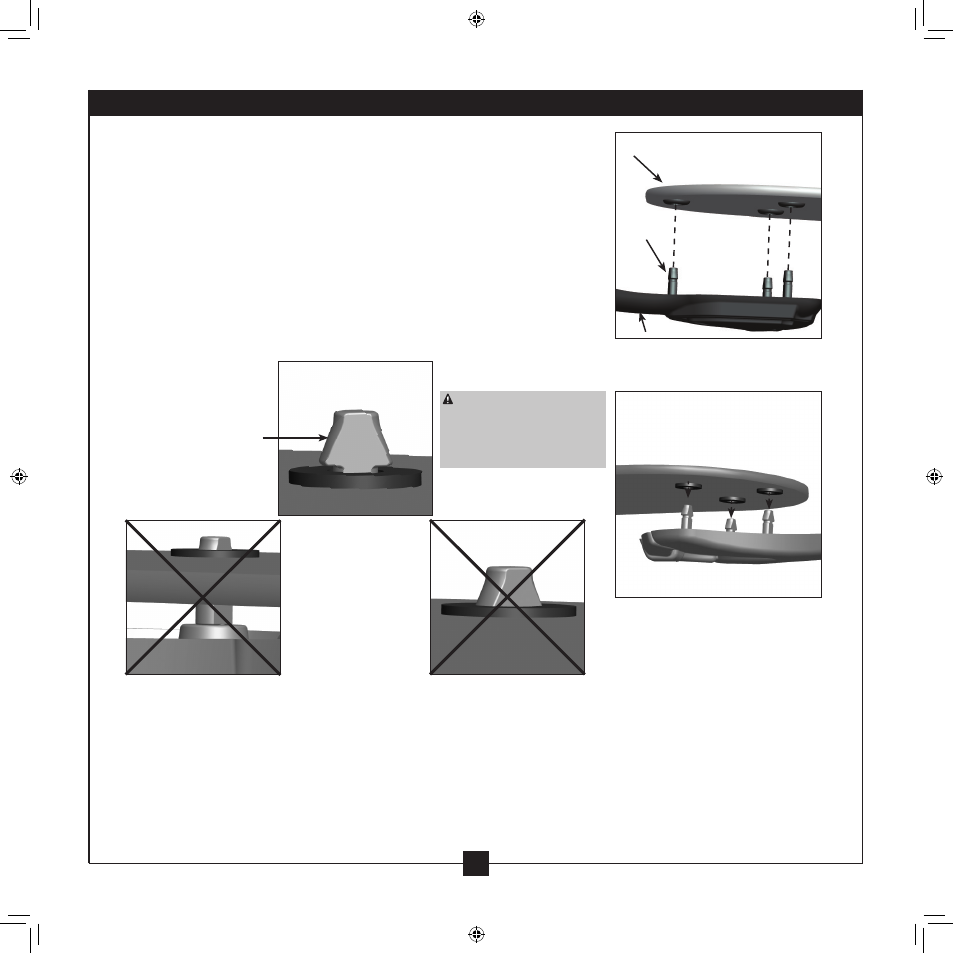
6 • Assembling the Blades
Our blade assembly enables you to lock the blades in place without tools and to
remove the blades easily for cleaning .
6-1 . Align the three holes in the blade with the three blade iron posts .
6-2 . Using two hands, squeeze the blade and blade iron together with your
thumbs under the blade iron and your fingers on top of the blade . You will
feel the blade lock into place .
6-3 . Make sure the blade is securely attached to the blade iron and the flared
tops of the blade iron posts are fully visible above the blade .
6-4 . Repeat steps 6-1 through 6-3 until all the blades are installed .
Blade Removal:
1 . Cover the blade iron posts with a protective cloth to prevent scratching the
blades .
2 . Using pliers, loosen the blade iron posts by turning them counterclockwise .
Once they are loosened, finish unscrewing them by hand until they are
completely separated from the blade iron .
3 . Carefully remove the blade .
Step 6-2
Step 6-1
Blade
Blade Iron
Blade Iron
Post
CAUTION:
Be sure blade
is locked into place and that
the head of each blade iron
post is completely visible .
WRONG
Step 6-3b
WRONG
Step 6-3c
RIGHT
Flared Top
Step 6-3a
Note: The blades on this fan
have been treated with Hunter’s
Dust Armor protection, making
the blades less likely to attract
dust and dirt . Use a dry or
slightly damp lint free cloth
to clean the blades . Do not
use a furniture polish or any
other cleaners that leave any
residue, as they will damage the
protective Dust Armor on the
blades .
6 • Assembling the Blades