Vacuum assembly, Cleaner assembly, Notice – Hoover E1 User Manual
Page 5: Carton contents
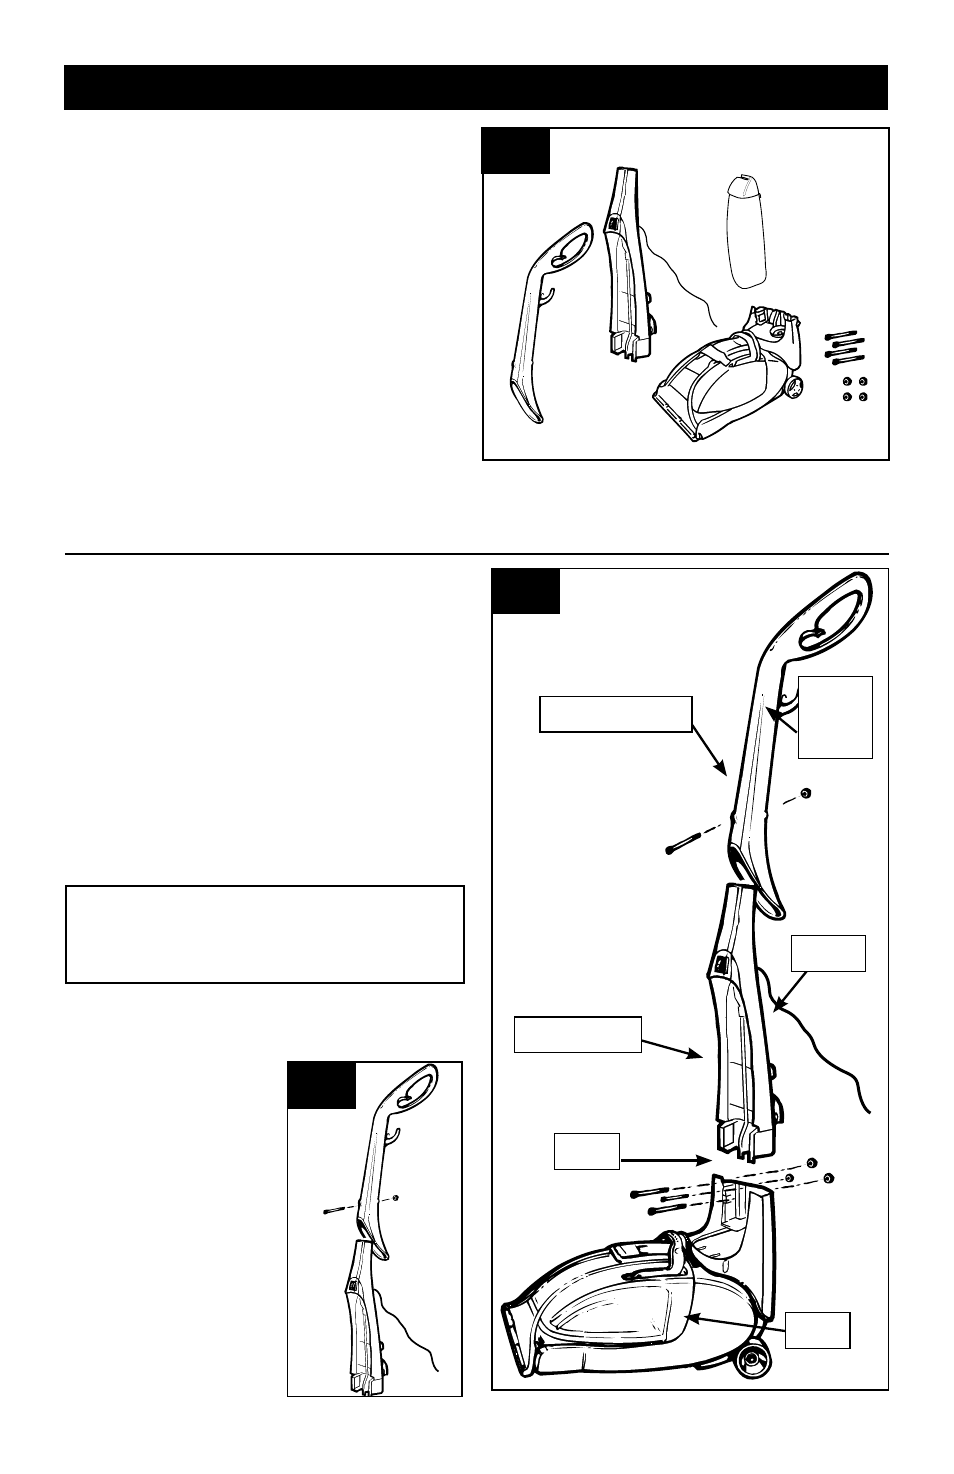
asseMblY- base & Midsection
asseMblY- Handle
1. VacuuM asseMblY
5
G
carton contents
1.1
E
UPPER HANDLE
UPPER
CORD
HOOK
CORD
MIDSECTION
TABS
BASE
1.3 Slide upper handle
down onto unit. Place nut
into recess in back of
upper
handle.
While
holding nut in place, insert
screw through front of
upper handle and tighten.
Route cord above upper
cord hook and snap into
cord clip on upper handle.
1. cleaner asseMblY
A. Handle
B. Cleaner Base
C. Midsection
D. Dirty Water Tank
E. Clean Water Solution Tank
F. Screws (4)
G. Nuts (4)
Remove all parts from carton and identify each
item shown.
Make sure all parts are located before
disposing of packing materials.
5
A
B
C
F
Using a Phillips screwdriver
1.2 Stand base in upright position. Push midsection
onto base by aligning tabs on the backside of
midsection with the pockets on the backside of
base.
One at a time, place nut into recess located on the
back of the left, right and middle back of the base.
While holding nut in place, insert screw through
front of midsection and tighten.
Repeat this process with the remaining two (2) nuts
and screws
carton contents
1.1
1.2
1.3
D
• NOTICE •
Make sure the power cord is out of the way
to avoid pinching.