Hoover QS Quiet User Manual
Page 18
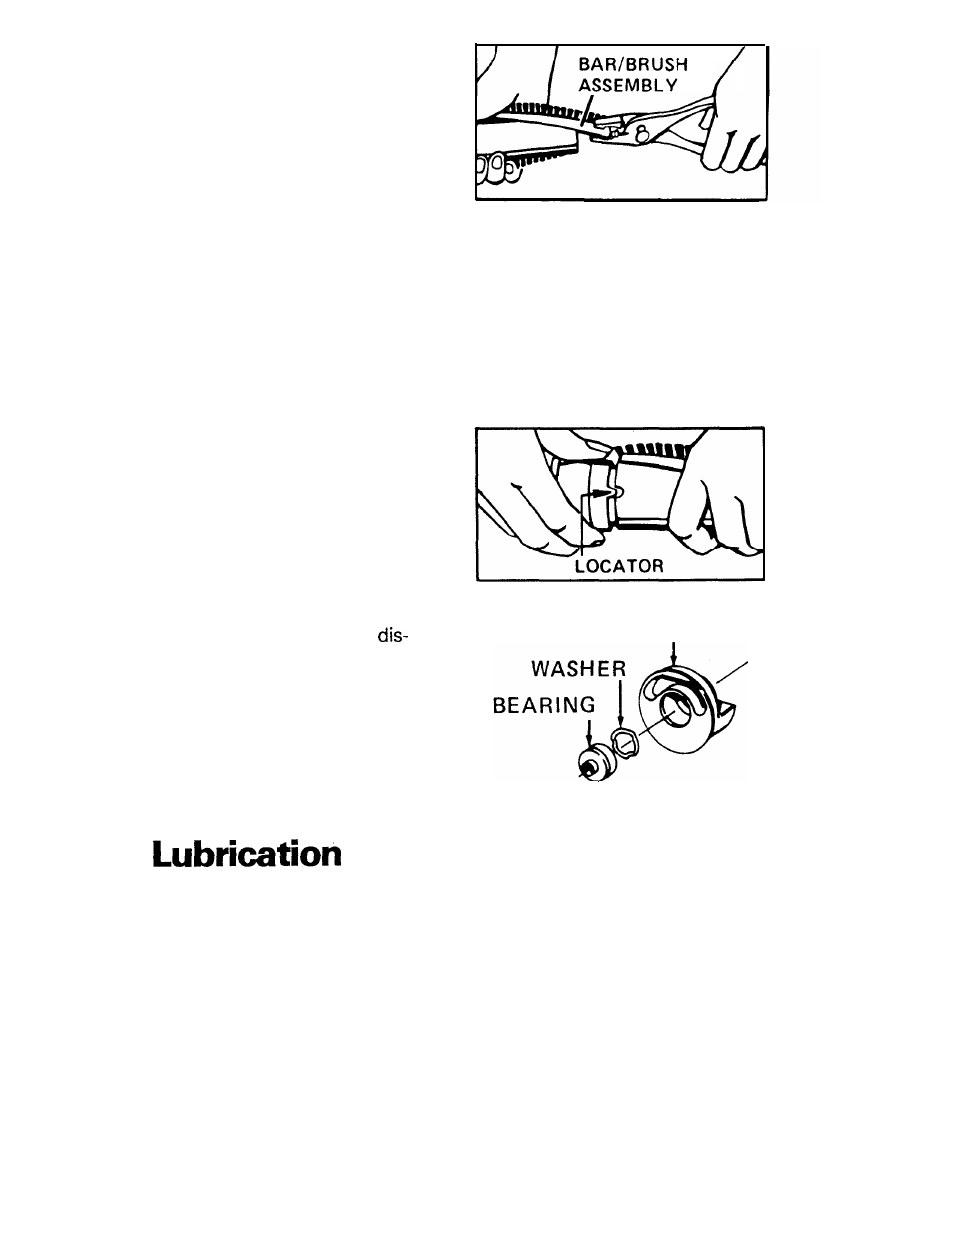
3. Note position of bar-brush as-
.
semblies to insure correct replace-
ment.
Remove bar-brush assemblies by
pulling them from agitator slots.
Use pliers if necessary.
The word “BAR” is stamped near
the slots on the agitator.
Match the bar side of the bar
brush assembly with the label on
the agitator shell. Slide the new
assemblies into the slots, while
twisting the assemblies in a coun-
terclockwise motion. Push in as
far as possible, tapping the other
end lightly if necessary. Be sure
brushes and bars are aligned for
full length of agitator.
4. Reassemble agitator parts. Line
up locator on end sections with
slot on agitator. Push end sections
into position.
Screw on end plates and tighten.
5. Should you accidentally
place the bearing during disas-
sembly, reassemble as shown.
END SECTION
Replace belt, agitator and nozzle
cover.
The motor is equipped with one ball bearing and one sleeve bearing. These
bearings contain sufficient lubrication for the life of the motor. The addition
of lubricant could cause damage.
Therefore, do not add lubricant to
either motor bearing.
The agitator is equipped with two ball bearings that should be lubricated
periodically. This should be done by a Hoover Factory Service Center or an
Authorized Hoover Warranty Service Dealer.
17