Safet y op era tion m aintenan c e setu p – Harbor Freight Tools 95838 User Manual
Page 9
Page 9
For technical questions, please call 1-800-444-3353.
Item 95838
SAFET
y
Op
ERA
TION
M
AINTENAN
c
E
SETU
p
3. After all Bolts have been threaded into the Knife
Holder completely, remove the Knife Holder.
Be careful to not move either of the two set screws
on the Knife Holder, they keep the knife in alignment.
4. Clean the exposed slot in the Drum.
5. Slide the old Knife (8c) carefully out of the Knife
holder.
cAUTION! The Knife has two sharp
edges. Heavy-duty leather work gloves
are required when handling the Knife.
6. Clean the Knife Holder. Carefully examine
the Knife Holder for loose parts or signs
of damage. Replace if damaged.
7. Install new Knife (8c). If the old knife is in good
condition, the Knife can be flipped and the second
edge can be used instead. The groove in the knife
should face away from the Knife Holder Bolts (8d).
8. Insert Knife Holder all the way into the slot
in the Drum. Make sure that it is installed
in the same orientation as earlier and the
same orientation as the other knife.
9. Turn the three Knife Holder Bolts in the direction
shown in the picture below to secure the knife
holder in place. Only snug the Bolts for now.
Turn
this way
to secure
knife holder
8a
8d
49
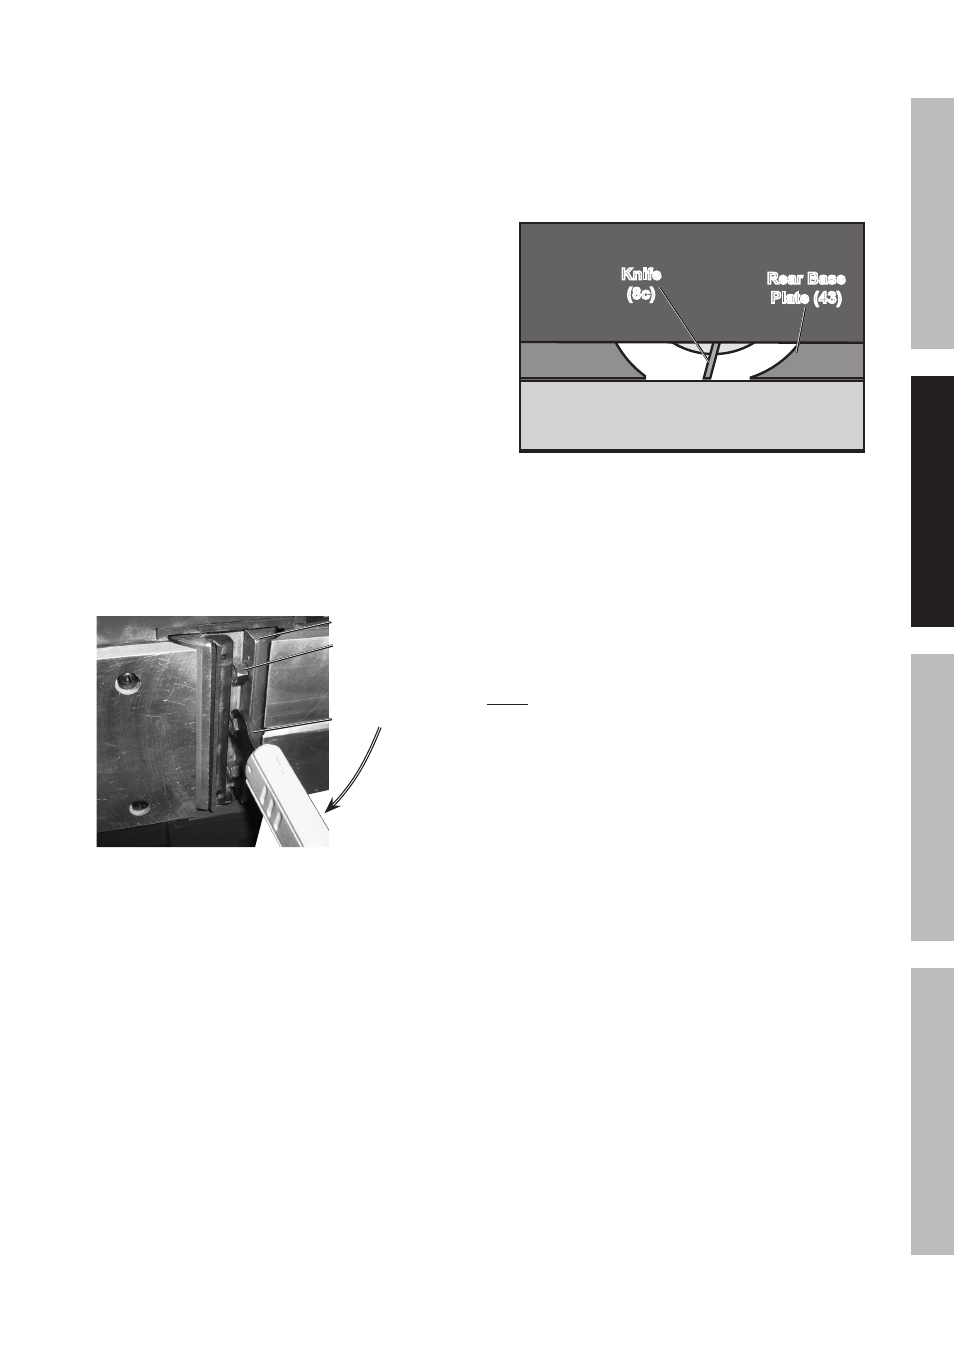
10. Set the Depth Adjustment Knob (24) to 0 (shown
on illustration on next page). Have an assistant
hold a straightedge (sold separately) against the
bottom of the Rear Base Plate (43). Adjust one Knife
Adjustment Set Screw (8e) until the knife just touches
the straightedge on that side - see illustration below.
Adjust the other Knife Adjustment Set Screw until the
Knife just touches the straightedge on that side also.
Straightedge
(sold separately)
Knife
(8c)
Rear Base
plate (43)
11. Turn the three Knife Holder Bolts firmly
in the direction shown to the upper left
to secure the knife holder in place.
12. Rotate the Drum 180° and change and
adjust the other knife at the same time
according to the steps above.
13.
IMpORTANT! Carefully double check that
the Knives and Knife Holders are secure
and that the Knives are level before use.
Note: If a knife is adjusted to cut farther than
the Rear Base Plate (43) then it may create
burned spots on the wood. If a knife is adjusted
to not cut deeply enough, then the planer will not
be able to travel smoothly across the wood.