Heat & Glo Fireplace TIARAP-CES User Manual
Page 34
Page 34
August 1, 2008
Heat & Glo · Tiara Petite B · 7026-101K
I. Blower Installation
Figure 8.12
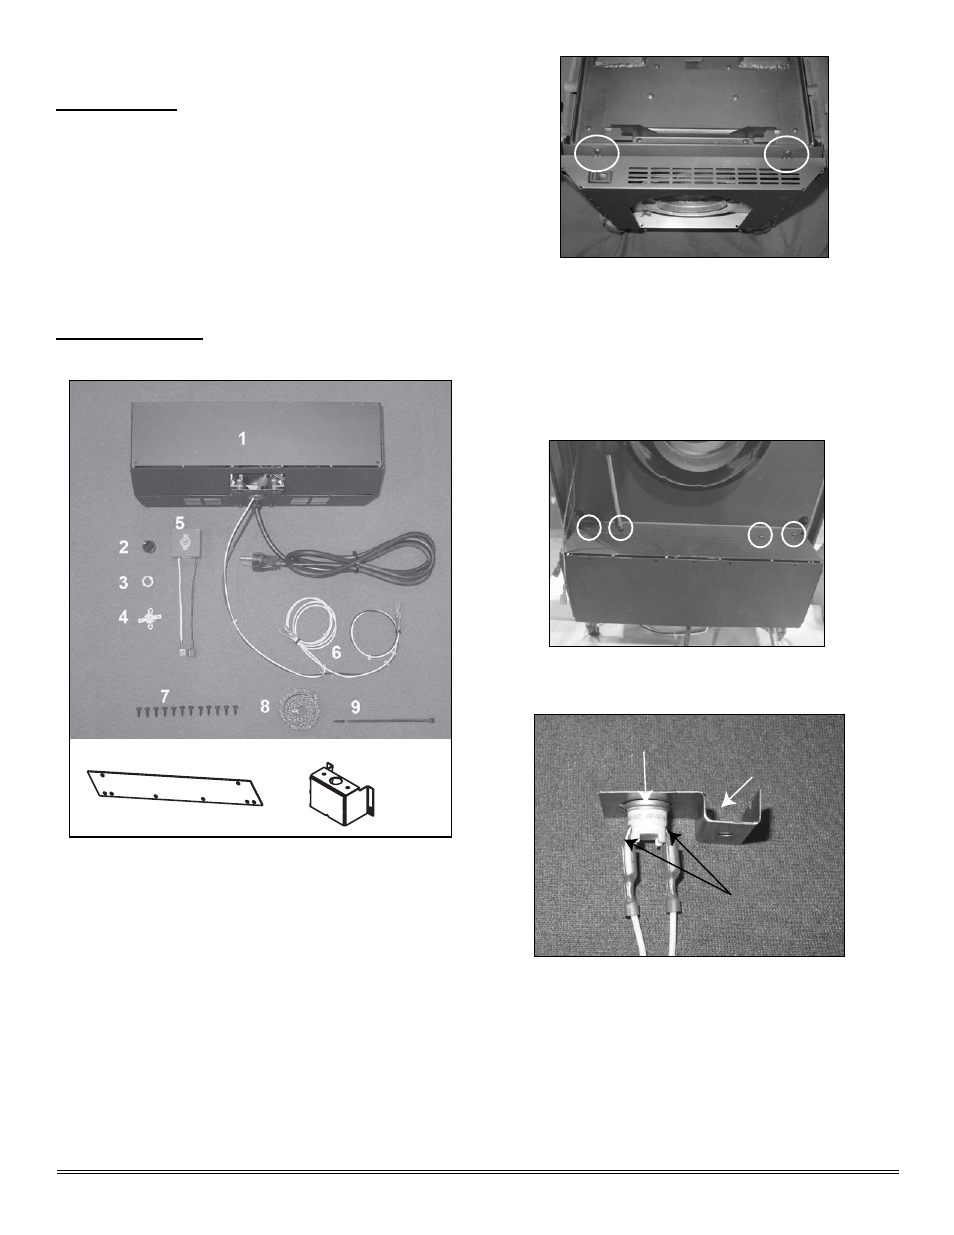
Open and inspect contents of the blower kit.
The contents of the kit are listed above. If any of the parts
are missing or damaged, please contact your dealer for
replacements.
NOTE: Not all parts will be used for this
install.
TOOLS REQUIRED: Short #2 Philips screwdriver; 11/16"
wrench.
KIT CONTENTS:
1 - Blower Mounted in Housing
2 - Speed Control Knob
3 - Pal Nut
4 - Ceramic Snap Disk
5 - Speed Control (Rheostat)
6 - Wire Harness (attached to Blower)
7 - 12 Screws
8 - 12 inch Glass Tape
9 - 1 Zip Tie
10 - Bracket #1
11 - Snap Disc Bracket
10
11
Figure 8.13
Lift off the appliance top and place it on a flat
surface, with the porcelain side up to prevent damage.
Remove the back shield by removing the two screws along
the top of the shield.
Place the blower on the fl oor behind the appliance and route
the ends of the wiring harness through the rubber grommet
on the underside.
Figure 8.14
Holding the blower in place, attach it to the
appliance with four of the screws provided.
SNAP DISC
BRACKET
SNAP DISC
SPADE
TERMINALS
Figure 8.15
Install the snap disc. A snap disc bracket is
located in the appliance's component bag. Bend the two
spade teminals on the snap disc from a horizontal to a
vertical position. Insert the snap disc through the hole in the
snap disc bracket and attach the two white wires from the
wiring harness to the snap disc.
NOTE: The mounting fl ange is on top of the bracket.