Heat & Glo Fireplace Heat-n- Glo BE-41 User Manual
Page 30
30
Step 11. Before Lighting the Fireplace
Before lighting the fireplace, be sure to do the following:
Remove all paperwork from underneath the fireplace.
Review safety warnings and cautions
Read the Safety and Warning Information section at
the beginning of this Installers Guide.
Double-check for gas leaks
Before lighting the fireplace, double-check the unit for
possible gas leaks.
Double-check vent terminations and front grilles for
obstructions.
Before lighting the fireplace, double-check the unit for
possible obstructions that could be blocking the vent ter-
minations or the front grilles.
Double-check for faulty components
Any component that is found to be faulty MUST BE re-
placed with an approved component. ampering with the
fireplace components is DANGEROUS and voids all war-
ranties.
A small amount of air will be in the gas supply lines. When
first lighting the fireplace, it will take a few minutes for the
lines to purge themselves of this air. Once the purging is
complete, the fireplace will light and will operate normally.
Subsequent lightings of the fireplace will not require this
purging of air from the gas supply lines, unless the gas
valve has been turned to the OFF position, in which
case the air would have to be purged.
NOTE: The fireplace should be run for 8 hours on the initial
start-up. This will help to cure the chemicals used in the
paint and logs.
Step 12. Lighting the Fireplace
Youve reviewed all safety warnings, youve checked the
fireplace for gas leaks, you know the vent system is
unobstructed, and youve checked for faulty components.
Now youre ready to light the fireplace.
WARNING: PLEASE REFER TO THE USERS
MANUAL FOR ALL CAUTIONS, SAFETY, AND
WARNING INFORMATION PERTAINING TO THE
LIGHTING AND OPERATION OF THE FIREPLACE.
After the Installation
LEAVE THIS INSTALLATION MANUAL WITH
THE APPLIANCE FOR FUTURE REFERENCE.
!
!
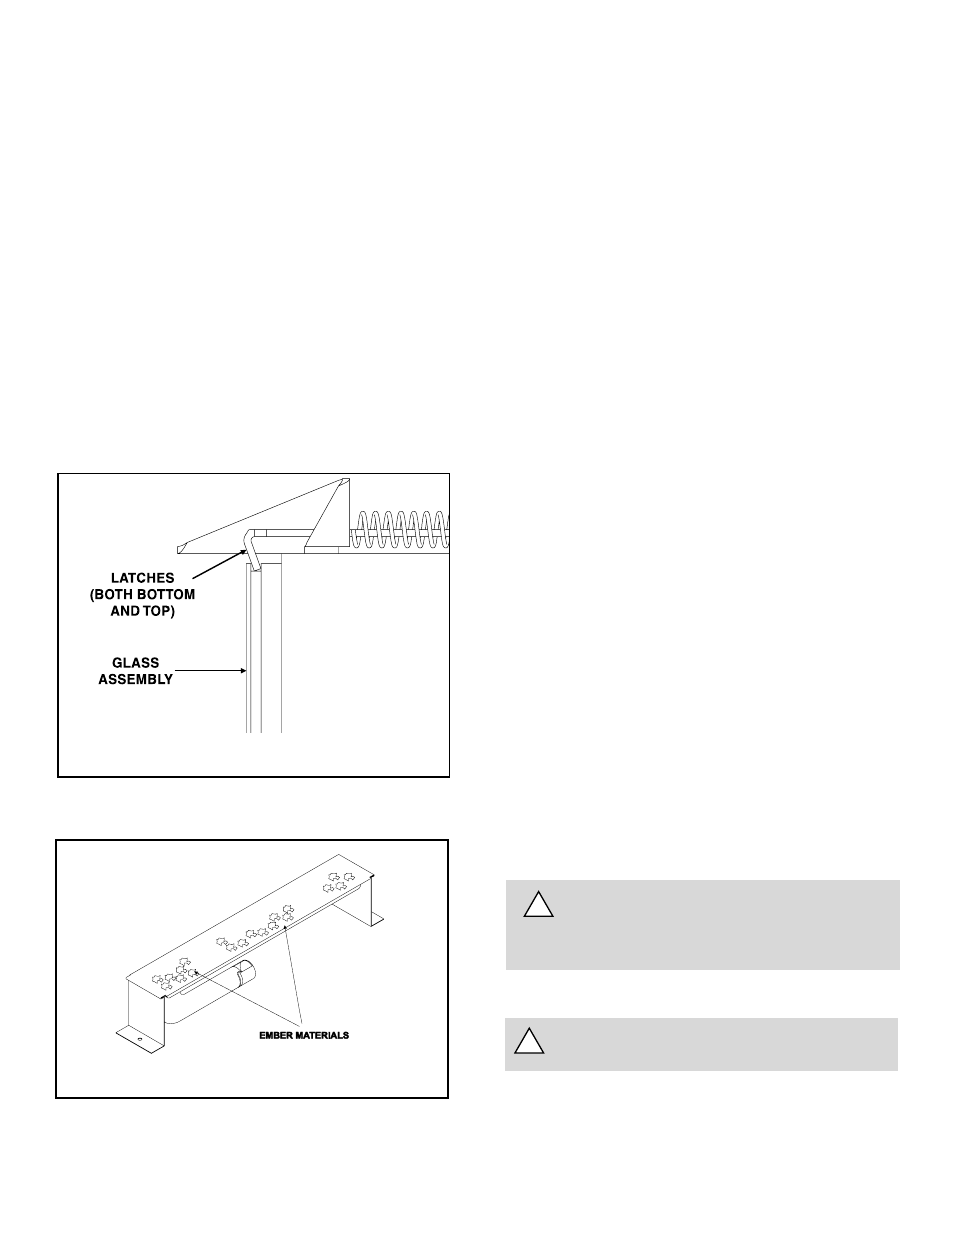
Placing the Ember Material
Ember material is shipped with this gas fireplace. The bag
labeled Glowing Ember (050-721) is standard glowing ember
material. To place the ember material:
Pull the four glass latches out of the groove on the glass
frame. Remove glass door from the unit (see Figure 39).
Place dime size pieces of Glowing Ember (050-721)
ember material about 1/2 inch apart near port holes in
burner top. Do NOT press embers into burner ports. Cover
the top of the burner with a single layer of ember mate-
rial. For best performance do NOT place embers on the
ports at the rear of the burner.
Save the remaining ember materials for use during fire-
place servicing.
Replace the glass door and a front trim door on the unit.
Pull out and latch the glass clips into the groove on the
glass frame.
Glass Specifications:
BE-41: 24 1/2 X 35 1/2 TEMPERED
CAUTION: IT IS STRONGLY RECOMMENDED THAT
TRIM DOORS WITH OPTIONAL MESH SCREENS BE IN-
STALLED ON PROPANE MODELS.
Figure 40. Placement of the Ember Material
Figure 39. Glass Assembly