Operation – Hitachi EM 490 User Manual
Page 10
307-735
10
OPERATION
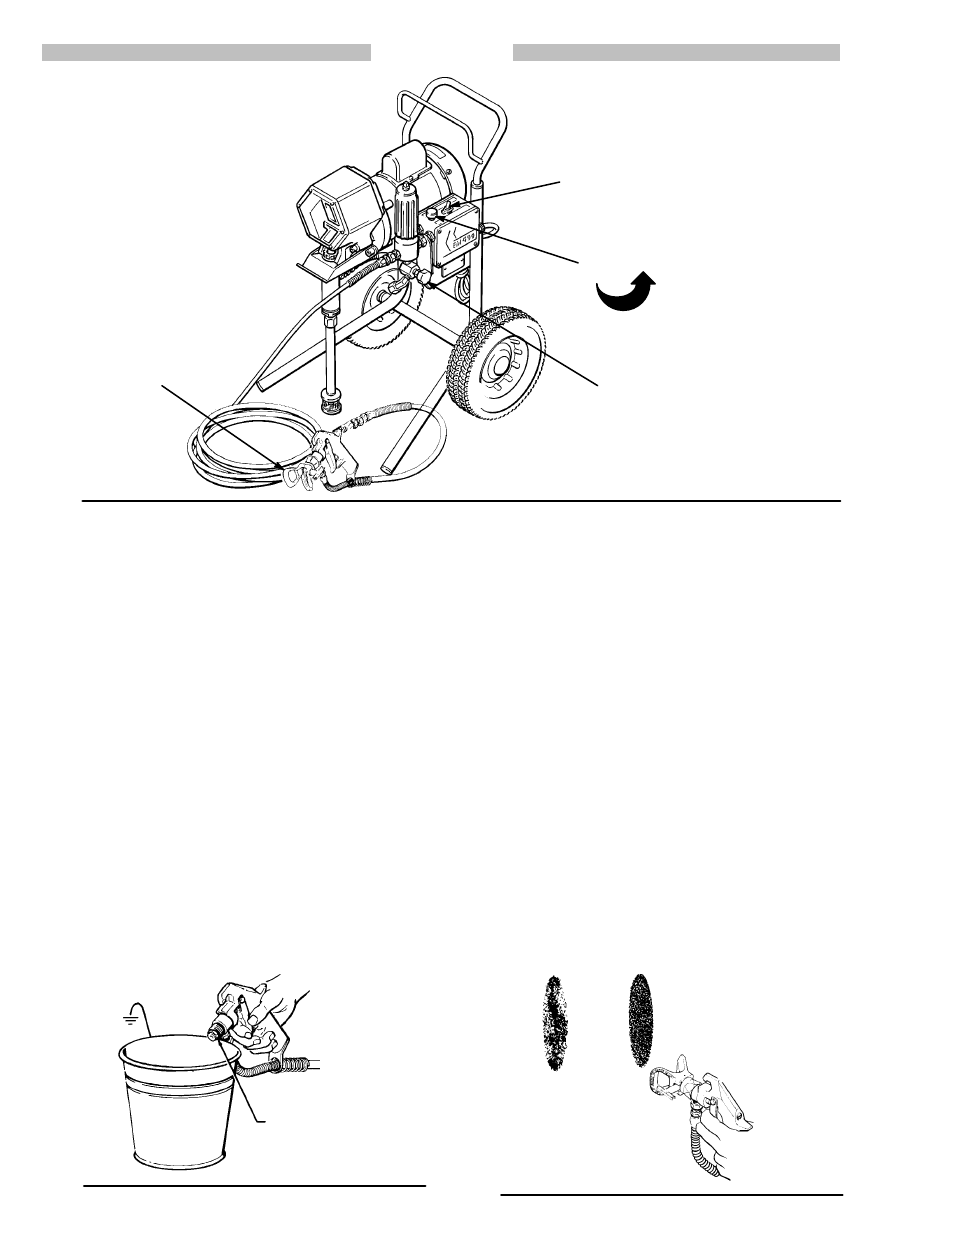
Fig 2
ON/OFF SWITCH
PRESSURE CONTROL KNOB
RAC IV DripLess
TIP GUARD and
SwitchTip
TURN CCW TO
LOWER PRESURE
PRESSURE DRAIN VALVE
1.
Prime the sprayer with paint.
a.
Close the pressure drain valve.
b.
Don’t install the spray tip yet!
c.
Put the suction tube into the paint container.
d.
Turn the pressure adjusting knob all the way
counterclockwise to lower the pressure
e.
Disengage the gun safety latch.
f.
Hold a metal part of the gun firmly against and
aimed into a grounded metal waste container.
See Fig 3. Squeeze the trigger and hold it open,
turn the sprayer ON, and slowly increase the
pressure setting until the sprayer starts. Keep the
gun triggered until all air is forced out of the sys-
tem and the paint flows freely from the gun. Re-
lease the trigger and engage the gun safety latch.
NOTE: If the pump is hard to prime, place a container un-
der the pressure drain valve and open the valve.
When fluid comes from the valve, close it. Then
disengage the gun safety latch and proceed as in
Step 1f, above.
g.
Check all fluid connections for leaks; relieve pres-
sure before tightening connections.
2.
Install the spray tip and tip guard
a.
Be sure the gun safety latch is engaged.
b.
Install the spray tip. If using the RAC IV, refer to
manual 307–848, supplied with the gun, for in-
stallation instructions.
3.
Adjusting the spray pattern
(Refer to Fig 4. )
a. Increase the pressure setting just until spray from
the gun is completely atomized. To avoid exces-
sive overspray and fogging, and to decrease tip
wear and extend the life of the sprayer, always
use the lowest possible pressure needed to get
the desired results.
b. If more coverage is needed, use a larger tip rather
than increasing the pressure.
c.
Test the spray pattern. To adjust the direction of
the spray pattern, engage the gun safety latch
and loosen the retaining nut. Position the tip
guard horizontally for a horizontal pattern or verti-
cally for a vertical pattern. Then tighten the retain-
ing nut.
Fig 3
MAINTAIN FIRM
METAL-TO-METAL
CONTACT BETWEEN
GUN AND GROUNDED
METAL CONTAINER
GROUND
WIRE
Fig 4
SPOTTY
PATTERN
–
INCREASE
PRESSURE
GOOD
FULL
PATTERN