Not for commercial use – ericsson inc – Ericsson A1228di User Manual
Page 7
Not
for
commercial
use
– Ericsson
Inc.
*HWWLQJ 6WDUWHG
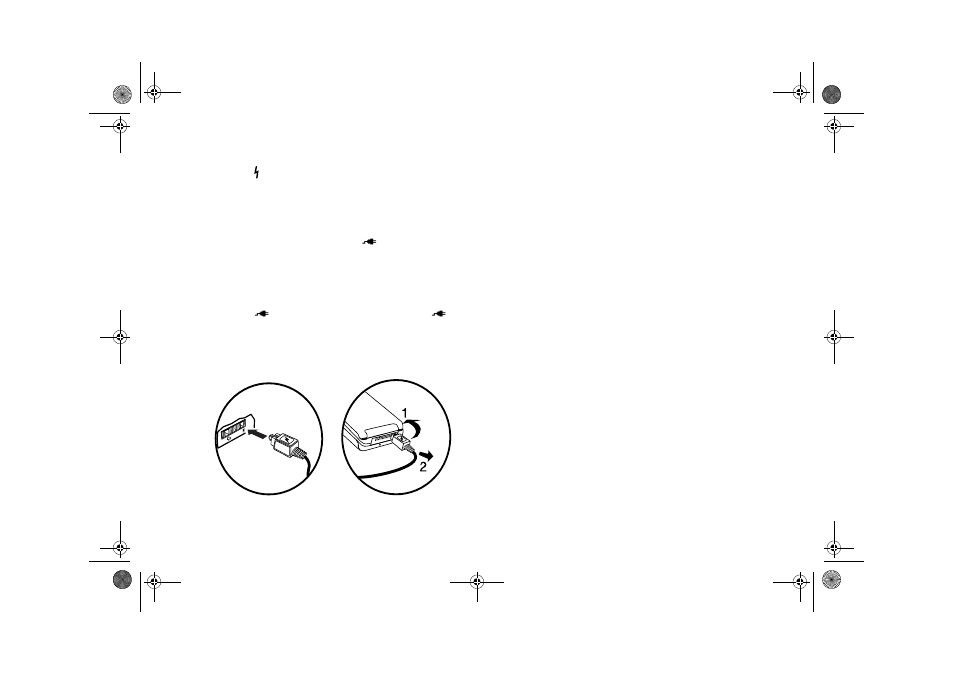
3 Hold the small plug on the charger cord so the lightning bolt
symbol ( ) is up.
4 Align the small plug on the charger cord with the connector on
the bottom of your phone. The connector on the phone is above
the lightning bolt symbol.
5 Press the plug into the connector until the plug “snaps” into place.
The battery icon is alternated with the
icon.
Note!
Do not twist while inserting or removing the small plug on the
charger cord!
6 Continue charging the phone until the battery is fully charged.
Note!
The battery is being charged when the battery icon is alternating
with the
icon. The battery is fully charged when the
icon is constant.
7 To disconnect the charger, lift the plug connected to the phone
upwards (1) and pull it out (2).
&KDUJH2QO\ 0RGH
If your phone is off, attaching the charger will cause the phone to
activate in charge-only mode. When this mode is activated the
message Charging Only appears in the display. Your phone is
now fast (rapid) charging the battery. When your battery is fully
charged, Battery Charged appears in the phone’s display.
Note!
You cannot make or receive calls when your phone is in charge-
only mode.
6ORZ 7ULFNOH &KDUJLQJ D 'HHSO\
'LVFKDUJHG %DWWHU\
The battery may become deeply discharged (for example, when the
battery is stored for a long period). As a result, the phone may not
activate charge-only mode when the charger is connected.
1 Attach the charger to the phone for several hours to slowly charge
(trickle charge) the battery.
2 After trickle charging the battery for several hours the phone
should activate the charge-only mode automatically.
3 Continue charging the phone until the battery is fully charged.
Note!
If the phone is in charge-only mode, Battery Charged appears
in the display when the battery is fully charged.
'LWWR /LQGDERRN 3DJH 7XHVGD\ 2FWREHU 30