Screen menu – Philips D-Line 55BDL4550D 55" 4K UHD Digital Signage Display User Manual
Page 57
43BDL4550D_50BDL4550D_55BDL4550D
45
Color temperature
Adjust the color temperature.
The image becomes reddish as the color temperature
decreases, and becomes bluish as the color temperature
increases.
NOTE: VIDEO source only.
Color Control
The color levels of red, green, and blue can be adjusted by
the color bars.
R: Red gain, G: Green gain, B: Blue gain.
Smart power
Control of lower power consumption based on brightness
setting.
• {OFF}: no adaptation
• {MEDIUM}: 80% of power consumption relative to
current settings
• {HIGH}: 65% of power consumption relative to current
settings
Overscan
If you encounter problems with overscanning, you can
change display area of the image.
• {ON}: Display 95% of the total image area.
• {OFF}: Display 100% of the total image area.
NOTE: VIDEO source only.
Picture reset
Reset all settings in the Picture menu.
Select “RESET” to restore factory preset data.
Press “CANCEL” button to cancel and then return to the
previous menu.
6.2.2. Screen menu
Picture
Screen
Audio
Configuration 1
Configuration 2
Advanced option
H position
V position
Clock
Clock phase
Zoom mode
Custom zoom
Auto adjust
Screen reset
50
50
50
22
Full
Action
Action
Action
H position
Control Horizontal Image position within the display area of
the LCD.
Press + button to move screen to right.
Press - button to move screen to left.
NOTE: VGA input only.
V position
Control Vertical Image position within the display area of
the LCD.
Press + button to move screen to up.
Press - button to move screen to down.
NOTE: VGA input only.
Clock
Press + button to expand the width of the image on the
screen to the right.
Press - button to narrow the width of the image on the
screen to the left.
NOTE: VGA input only.
Clock Phase
Improves focus, clarity and image stability by increasing or
decreasing this setting.
NOTE: VGA input only.
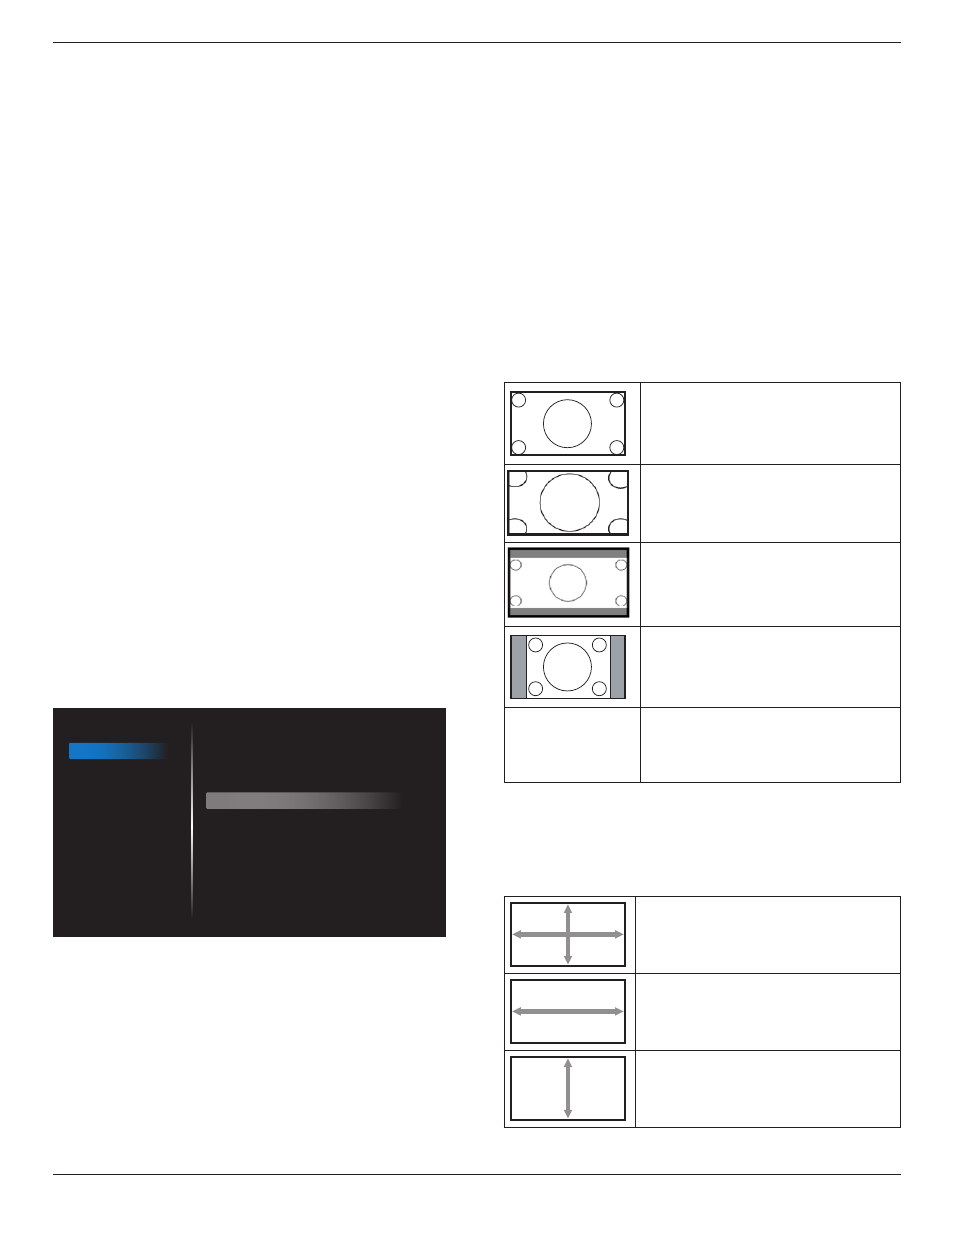
Zoom mode
Choose one for video input: {Full} / {Real} / {21:9}/ {4:3}/
{Custom}
Full
This mode restores the correct
proportions of pictures transmitted in
16:9 using the full screen display.
Real
This mode displays the image pixel-
by-pixel on screen without scaling the
original image size.
21:9
The picture is reproduced in 21:9
format and a black band at the top
and bottom.
4:3
The picture is reproduced in 4:3
format and a black band is displayed
on either side of the picture.
Custom
Choose to apply the custom zoom
settings in the Custom Zoom
submenu.
Custom zoom
You can use this function to further customize the zoom
settings to suit the image you want to display.
NOTE: This item is functional only when the {
Zoom mode
}
is set to {
Custom
}.
Zoom
Expands the horizontal and vertical
sizes of the image simultaneously.
H zoom
Expands the horizontal size of the
image only.
V zoom
Expands the vertical size of the image
only.