Canon EOS 1D X Mark II User Manual
Page 33
33
Batch Transfer
4
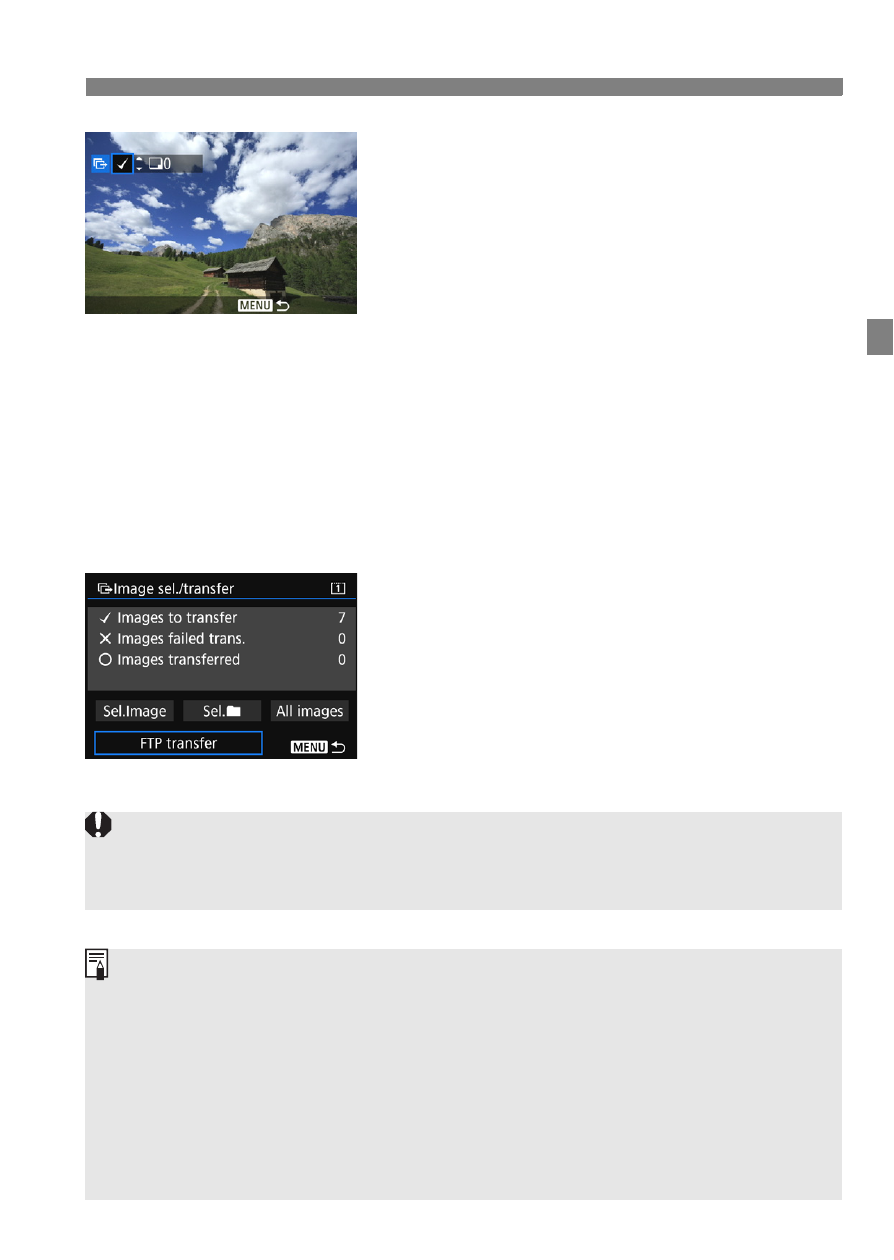
Select images to transfer.
Turn the <5> dial to select the
image to be transferred, then press
<0>.
Turn the <5> dial to display the [X]
on the screen’s upper left, then press
<0>.
If you press the button and turn
the <6> dial counterclockwise, you
can select an image from a three-
image display. To return to the single-
image display, turn the <6> dial
clockwise.
To select other images to be
transferred, repeat step 4.
5
Transfer the image.
Select [FTP transfer], then press
<0>.
Select [OK] on the confirmation
dialog to transfer the image.
Images selected with [Sel.n] and
[All images] can also be transferred
in this way.
If you set the Live View shooting/Movie shooting switch to
image transfer of captured images, the image transfer will be temporarily
cancelled. Set it to to resume the image transfer.
You can also transfer shot movies. However, when the Live View
shooting/Movie shooting switch is set to
transferred. Set it to and transfer them.
When [Sel.Image] is selected, you can check the transfer history on the
upper left of the screen: No mark: Not selected. X: Selected for transfer.
l: Transfer failed. k: Transfer succeeded.
The procedures for [RAW+JPEG transfer] (p.35) and above steps 1 to 4
can also be performed even while the camera is not connected to an
FTP server.