Install photoconductor – Epson AcuLaser CX11N User Manual
Page 11
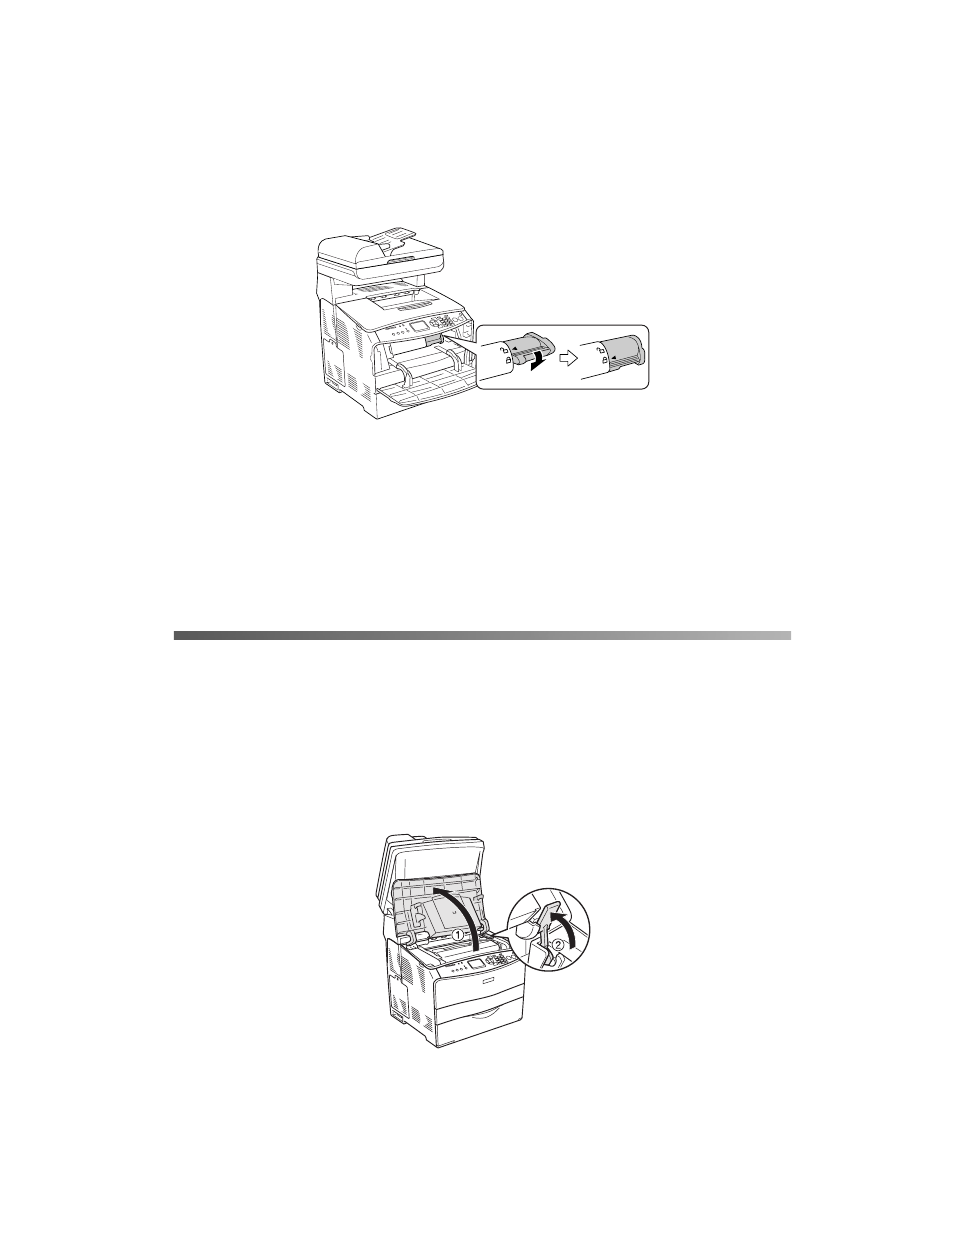
Install Photoconductor
11
6. Push down the right lever to lock the toner cartridge.
Note:
The toner cartridge is installed securely when you cannot turn the lock lever any
further.
7. Close cover A and confirm the error message in the LCD panel. If another toner
cartridge needs to be installed, a message is displayed. Repeat steps 3 to 7 for each
of the remaining toner cartridges.
Install Photoconductor
Caution:
Make sure the CX11N is turned on and you have installed all the toner cartridges, as
described in the previous section.
1.
Install Photoconductor
appears on the LCD screen. Lift up the scanner, then
lift up cover B and raise the orange lever inside, on the right side.
See also other documents in the category Epson Printers:
- Stylus Pro 7800 (11 pages)
- Stylus Pro 4000 (49 pages)
- Stylus Photo R300 (2 pages)
- Stylus Pro 7000 (147 pages)
- AcuLaser C3000 (316 pages)
- Stylus Pro 7900 (24 pages)
- Stylus Pro 4450 (21 pages)
- 1000 (272 pages)
- T034120 (4 pages)
- T580300 (4 pages)
- 300 (91 pages)
- B 510DN (218 pages)
- B 510DN (190 pages)
- Stylus NX510 (8 pages)
- Stylus Photo RX580 (95 pages)
- T549300 (4 pages)
- B 500DN (168 pages)
- AculaserCX11NF (5 pages)
- 480SXU (24 pages)
- 4500 (317 pages)
- STYLUS RX500 (99 pages)
- 2100 (13 pages)
- Stylus NX215 (2 pages)
- T098320 (4 pages)
- T041020 (4 pages)
- R210 (8 pages)
- All-In-One Stylus Photo RX600 (164 pages)
- 777I (53 pages)
- T033120 (4 pages)
- Stylus CX7000F (8 pages)
- 60 (113 pages)
- T034220 (4 pages)
- WorkForce 40 Series (36 pages)
- T054220 (4 pages)
- Stylus CX3200 (11 pages)
- Stylus CX7800 (18 pages)
- T060220 (4 pages)
- 2500 (180 pages)
- AcuLaser CX11N (4 pages)
- 2000P (16 pages)
- T606600 (4 pages)
- Stylus CX6000 (18 pages)
- FS-4000DN (2 pages)
- MSDS T544700 (4 pages)